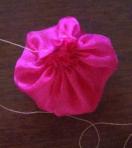
The Fabric Flowers on the Rose Top received numerous comments when I wore it out last night, so I thought I would try my first tutorial on how to make them.
All of the flowers except the coral roses are made the same way. The stiffness of the fabric and the locations of the “tacking down” stitches create the variations.
To make these, all that is needed is a circle of fabric.
There are a number of ways to cut a fabric circle. My favorite was always to use a pan lid as a template, but for the flowers I did not want a pen or ink line. Instructions for creating circles from squares (no pen or ink lines) are included at the end of this tutorial.
1. Start with a fabric circle approximately twice the diameter of the desired size of the finished fabric flower. This 6″ circle will create a 2.5″ to 3″ flower.
2. Hand stitch with a running stitch approximately 1/4″ – 1/2″ from the edge of the circle – all the way around. Fabric that frays extremely easily should be stitched 1/2″ from the edge.
The stitches do not need to be neat or even.
3. Pull the thread to gather the circle into a balloon shape.
4. Turn the balloon shape over.
5. Place the Balloon Shape on the base fabric or item to be embellished and squish down slightly with your hand. This will help “deflate” the balloon a bit and get the gathering stitches to lay flatter.
6. Tack stitch the center of the flower to the base two or three times.
7. To create petals, bring your needle up midway between the flower center and the edge. Then pass it through the very edge of the flower and back down through at the midway point. Pull the thread taut and tack a few times on the back of the base.
8. Additional petals can be created by bringing your needle up in the flower center and passing it through the top layer of the balloon and then back down through the center.
Each tack stitch will create petals and give the flower dimension.
Beautiful!
9. If desired, beads or small buttons can be stitched into the flower center.
Tomorrow: How to create the leaves!
Fabric Circles from Fabric Squares:
Basically, the squares is folded into a smaller square, then a triangle and then cut. Precision is not needed, required or even desired!
1. Start with a sort-of square of fabric.
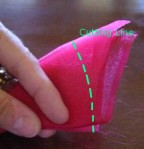
2. Finger fold (do not iron) the square along the two fold lines.
This will create a smaller square that should be folded diagonally.
3. Finger fold (do not iron) along the diagonal fold line creating a triangle.
4. Cut the fabric as shown, along a slightly curved line.
5. Open the triangle and voila! A circle! Or in this case, two circles!! They may not perfect circles, but they are perfect for making fabric flowers!


Pingback: How to Make Leaves for the Fabric Flowers | The Destashification Project
Thank you so much for sharing! I too love fabric and ribbon flowers but haven’t tried this method yet. Now I can use up all the scraps from all the formals I’ve made for daughters and granddaughters and have a memory bouquet in the process. Thanks again!
buneva@hotmail.com
A Memory Bouquet! What a great idea!
Pingback: The Purse d’Resistance – Stash Couture | The Destashification Project
I posted a link to this tutorial today.
Nancy Ward
PaperFriendly
http://www.nancywardcrafts.com
The flowers are pretty and look so easy to make. Looks like you start out my making yo-yos and go from there.
I like these flowers that are made like yo-yos. Think I’ll try to make some.
Loving your flowers, I have seen a similar version before, but not with the twists in the middle that create the petals. I’m inspired! 🙂
TEŞEKKÜRLER
I did a quick Google Translate and determined that “TEŞEKKÜRLER” is Turkish for “Thank You”, so “TEŞEKKÜRLER” for your kind comment.