

Stash Couture Secure Luggage Tag – no personal information visible!
Travel and security seem almost synonymous anymore.
Yet it was surprising to learn that all those beautiful open-faced fabric luggage tags are of concern as they show personal information.
So today’s post is a tutorial for making secure fabric luggage tags.
The tags open like a wallet and keep one’s name, address and phone number securely closed inside while hanging. However, the information can be easily accessed should the luggage ever become lost by simply “opening the wallet.”

Secure Tags Closed
Scraps of heavy interfacing, fabric, ribbon (22″), and plastic are all that is needed to make the simple version (in the orange print).
The green/white version with the fabric framed ID holder additionally requires some scraps of Really Stiff Stuff (Peltex, etc.) and bits of fusible webbing (Steam-A-Seam, Heat-N-Bond, etc.)

Secured Tag opened to show ID.
By threading the ribbon through a grommet or a buttonhole, the tag will remain closed when hanging.
Following are the instructions are for the White/Green Version. The simpler Orange version will be included in the next post.
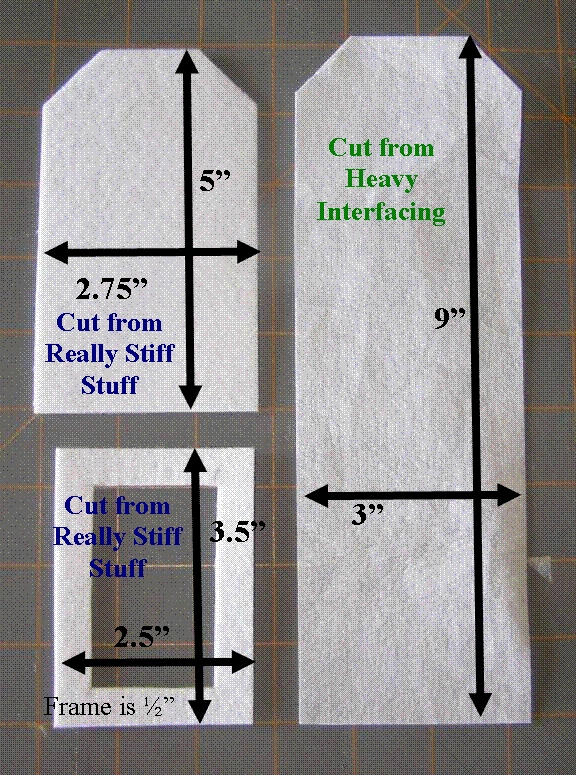
Photo 1: Interfacing Cutting
1. Cut interfacing and Really Stiff Stuff (RSS) as shown in Photo 1. Use Photo 2 to cut angles into ends.
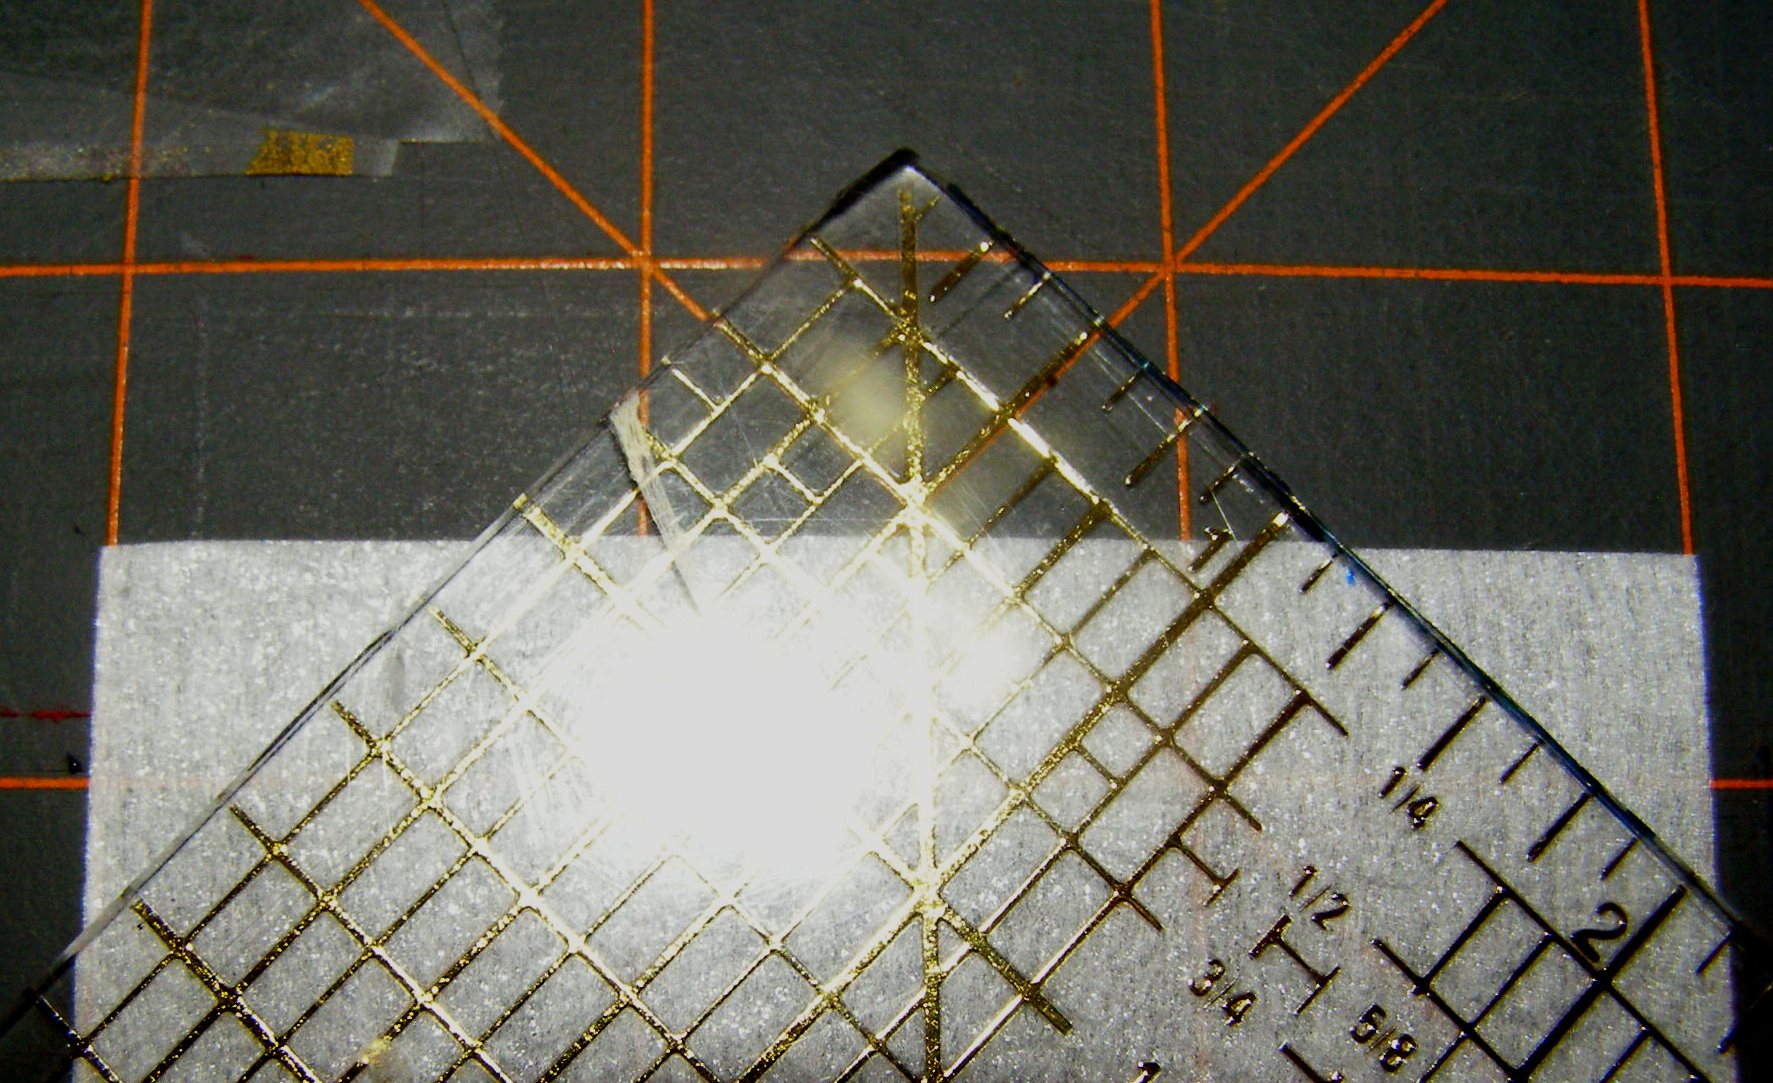
Photo 2: Cutting angles into ends of interfacings.
2. Cut fabric into a 7″ * 10″ rectangle (for tag) and a 3.5″ * 4.5″ rectangle (for ID frame).

Photo 3: Frame web-fused to smaller fabric rectangle.
3. Following manufacturer’s instructions iron the fusible webbing to one side of the RSS frame. Then center and iron it to the wrong side of smaller fabric rectangle as shown in Photo 3.

Photo 4: Trim and Clip – Carefully!
4. Using sharper scissors than I have, trim away fabric just less than 1/2″ from inner edge of frame and clip (make cuts) to frame corners as shown in Photo 4.
4. Following manufacturer’s instructions, attach fusible webbing to visible side of RSS frame. As shown in Photo 4, I use 1/2″ ribbon of fusible webbing. It is the perfect size for this project.
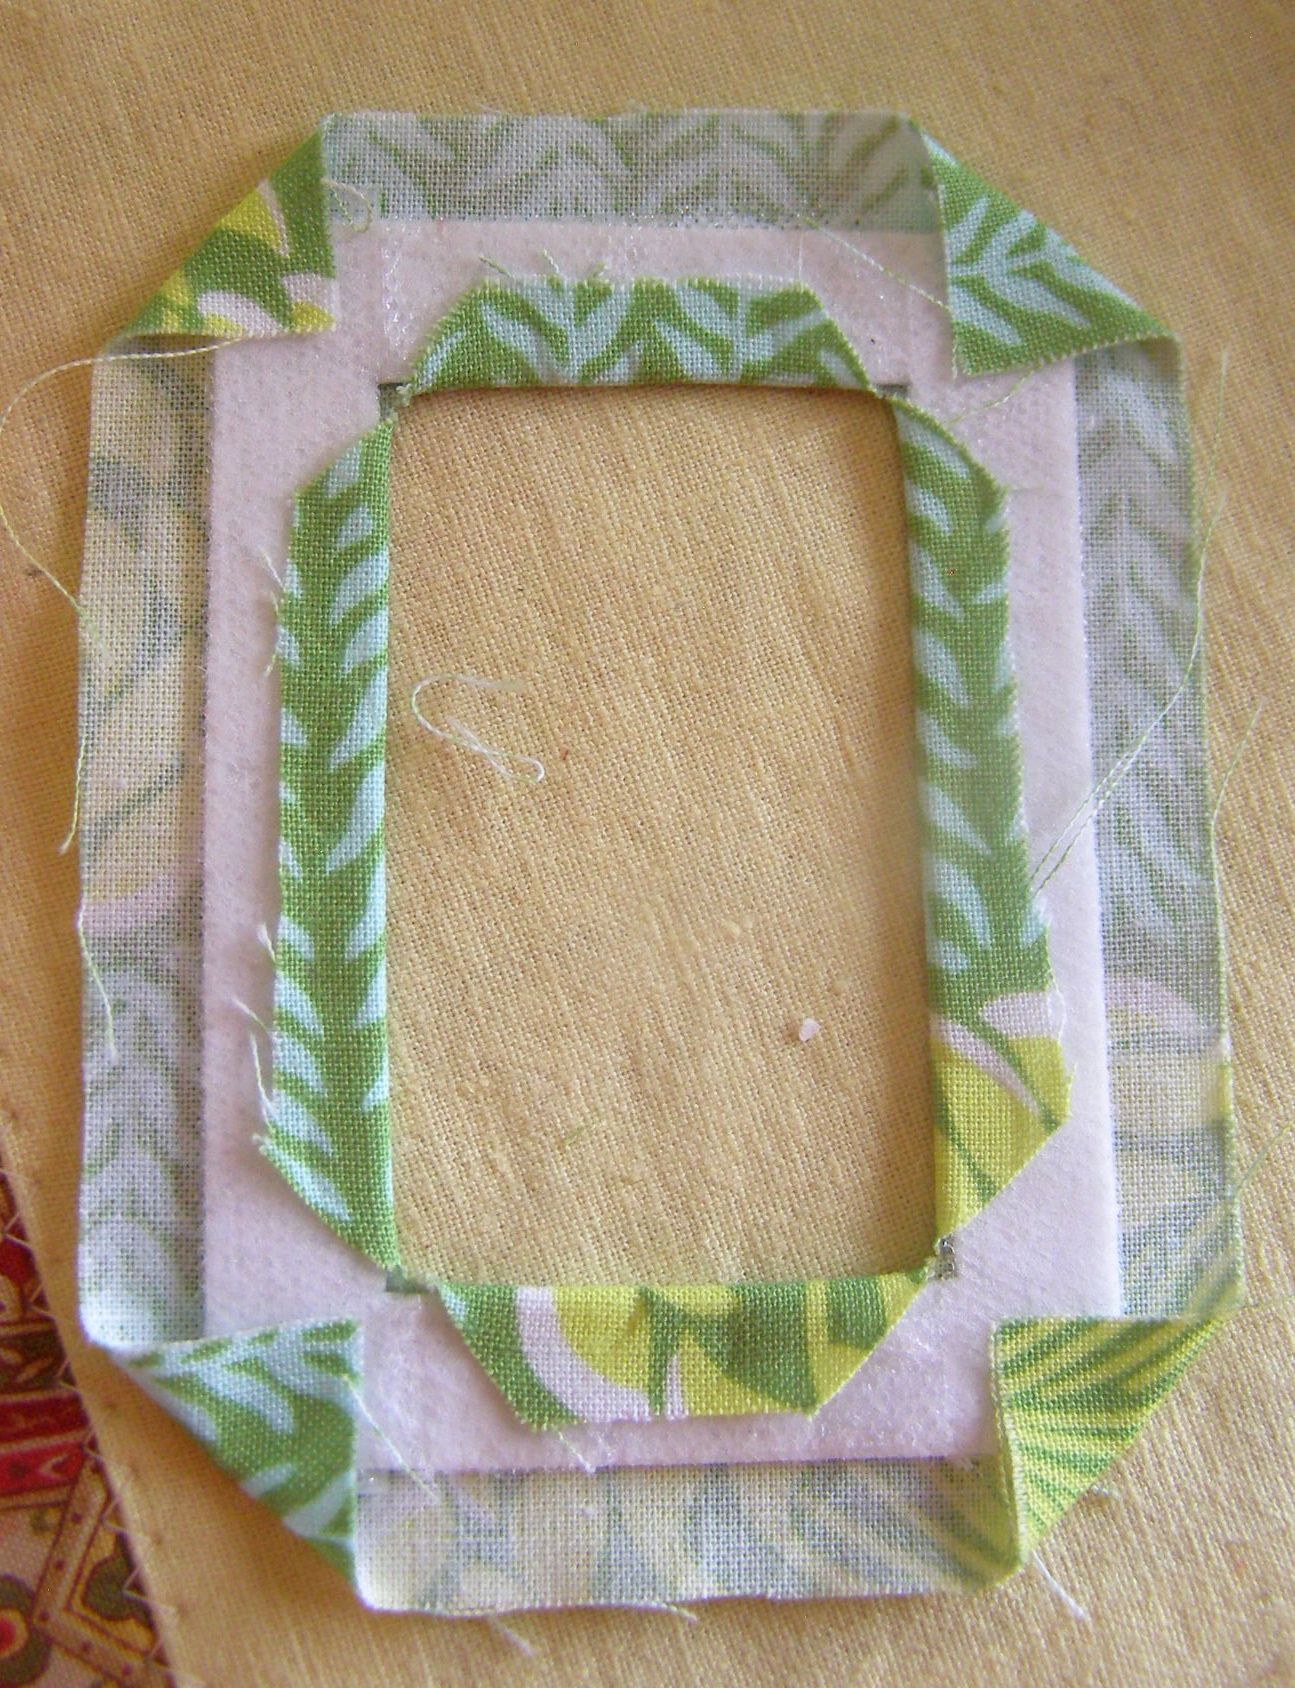
Photo 5. Fusing fabric to frame.
5. Carefully, or using an already-bearing-pieces-of-fusible-webbing-iron-from-earlier-mistakes like I do, fuse corners and inner fabric to RSS frame as shown in Photo 5. Then fuse outer edges.
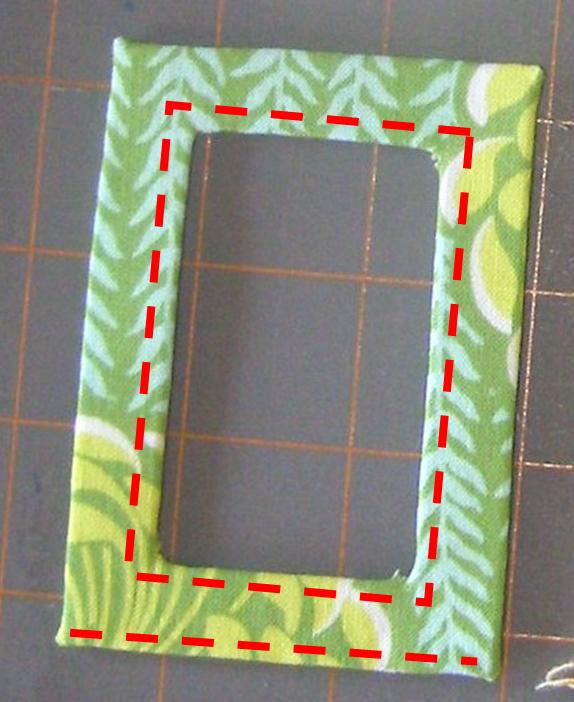
Photo 7: Stitching Lines for attaching plastic to frame.
6. Using scrap plastic (I use the plastic that sheets, blankets and pillowcases are sold in – it is surprisingly pliable) cut a rectangle the same size as the frame – maybe just a bit bigger. Place against back side of frame and top stitch close to inner edge of frame. Trim the plastic so it does not show around the frame’s outer edge. Then top stitch along one shorter outer edge of frame. Stitching lines are shown in Photo 7.
Photo 8: Fold lines and interfacing placement.
7. Iron larger rectangle of fabric flat, then fold in half lengthwise and press (this will be referred to as the “Center Line”). Then open and fold along line 5.5″ from one of the narrower ends. Press again (this will be referred to as the “5.5” Line”). Open and fold up 1/2″ from other narrow end. Press again. Place larger interfacing piece, fusible side down, against center fold line and 1/2″ bottom fold line. Fold lines and interfacing placement are shown in Photo 8.
8. Fuse interfacing to fabric following manufacturer’s instructions.
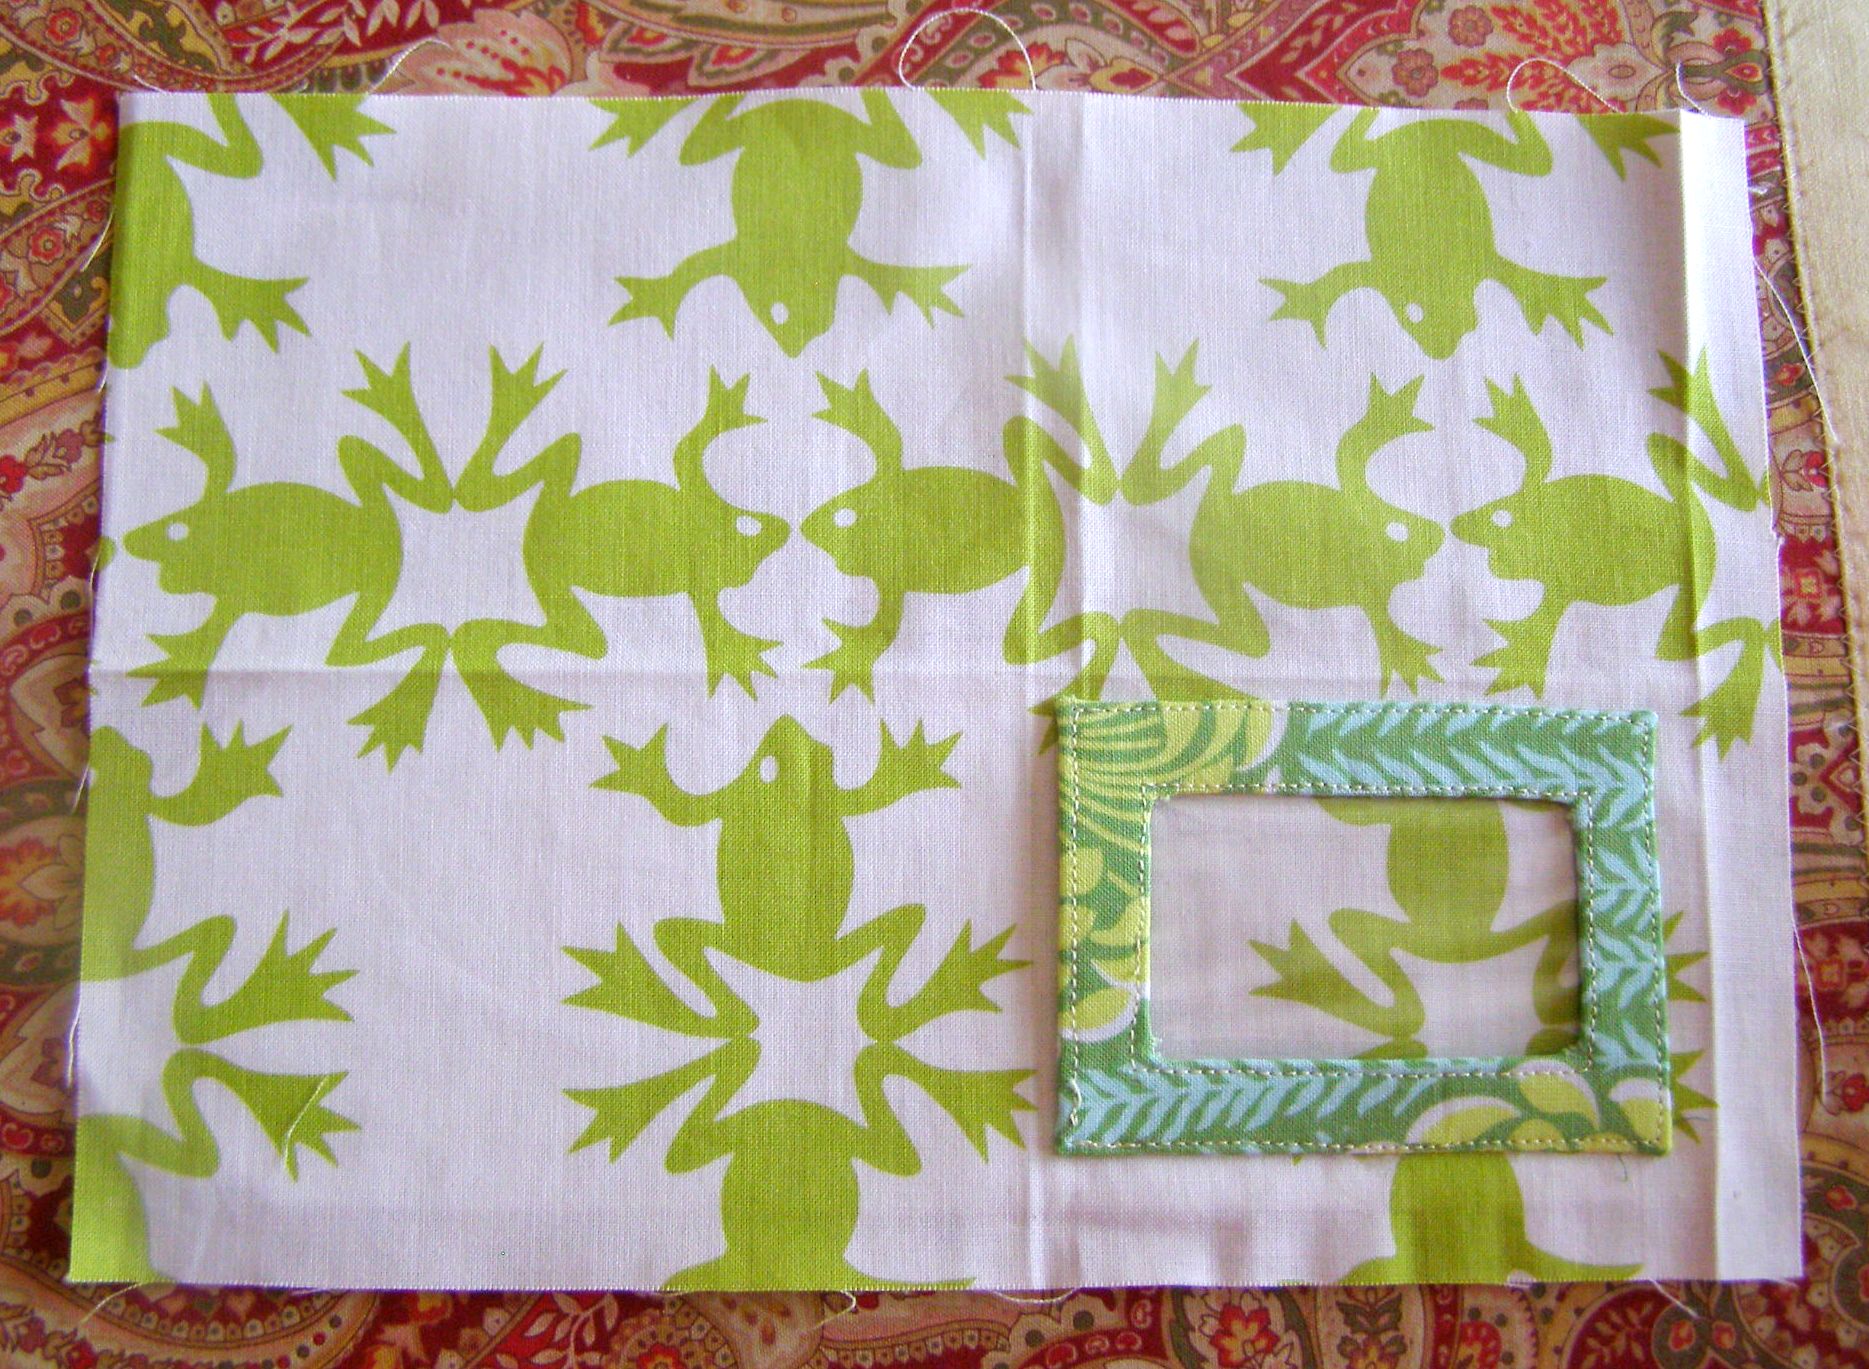
Photo 9: Place frame on right side of fabric.
9. Place frame on right side of fabric. Locate it 1/4″ from Center Line and 5.5″ Line) as shown in Photo 9. The outer edge of the frame that was topstitched as the last seam in Step 6 should be placed toward 5.5″ line. Topstitch around three untopstitched outer edges of frame (only 3 sides – if all 4 edges are stitched, there is no way to slide the ID information into the frame!)

Photo 10: Sew long and angled edges. Trim. Turn up 1/2″ folded edge.
10. Fold right sides of large rectangle together along center fold line. Stitch up long side and angled edge as close to edge of interfacing as possible. Do not stitch 1/2″ folded edge. Trim angled corners. Fold up 1/2″ folded edge as shown in Photo 10.
11. Turn tag right side out. Press from fabric only side (pressing the plastic is not a good idea).
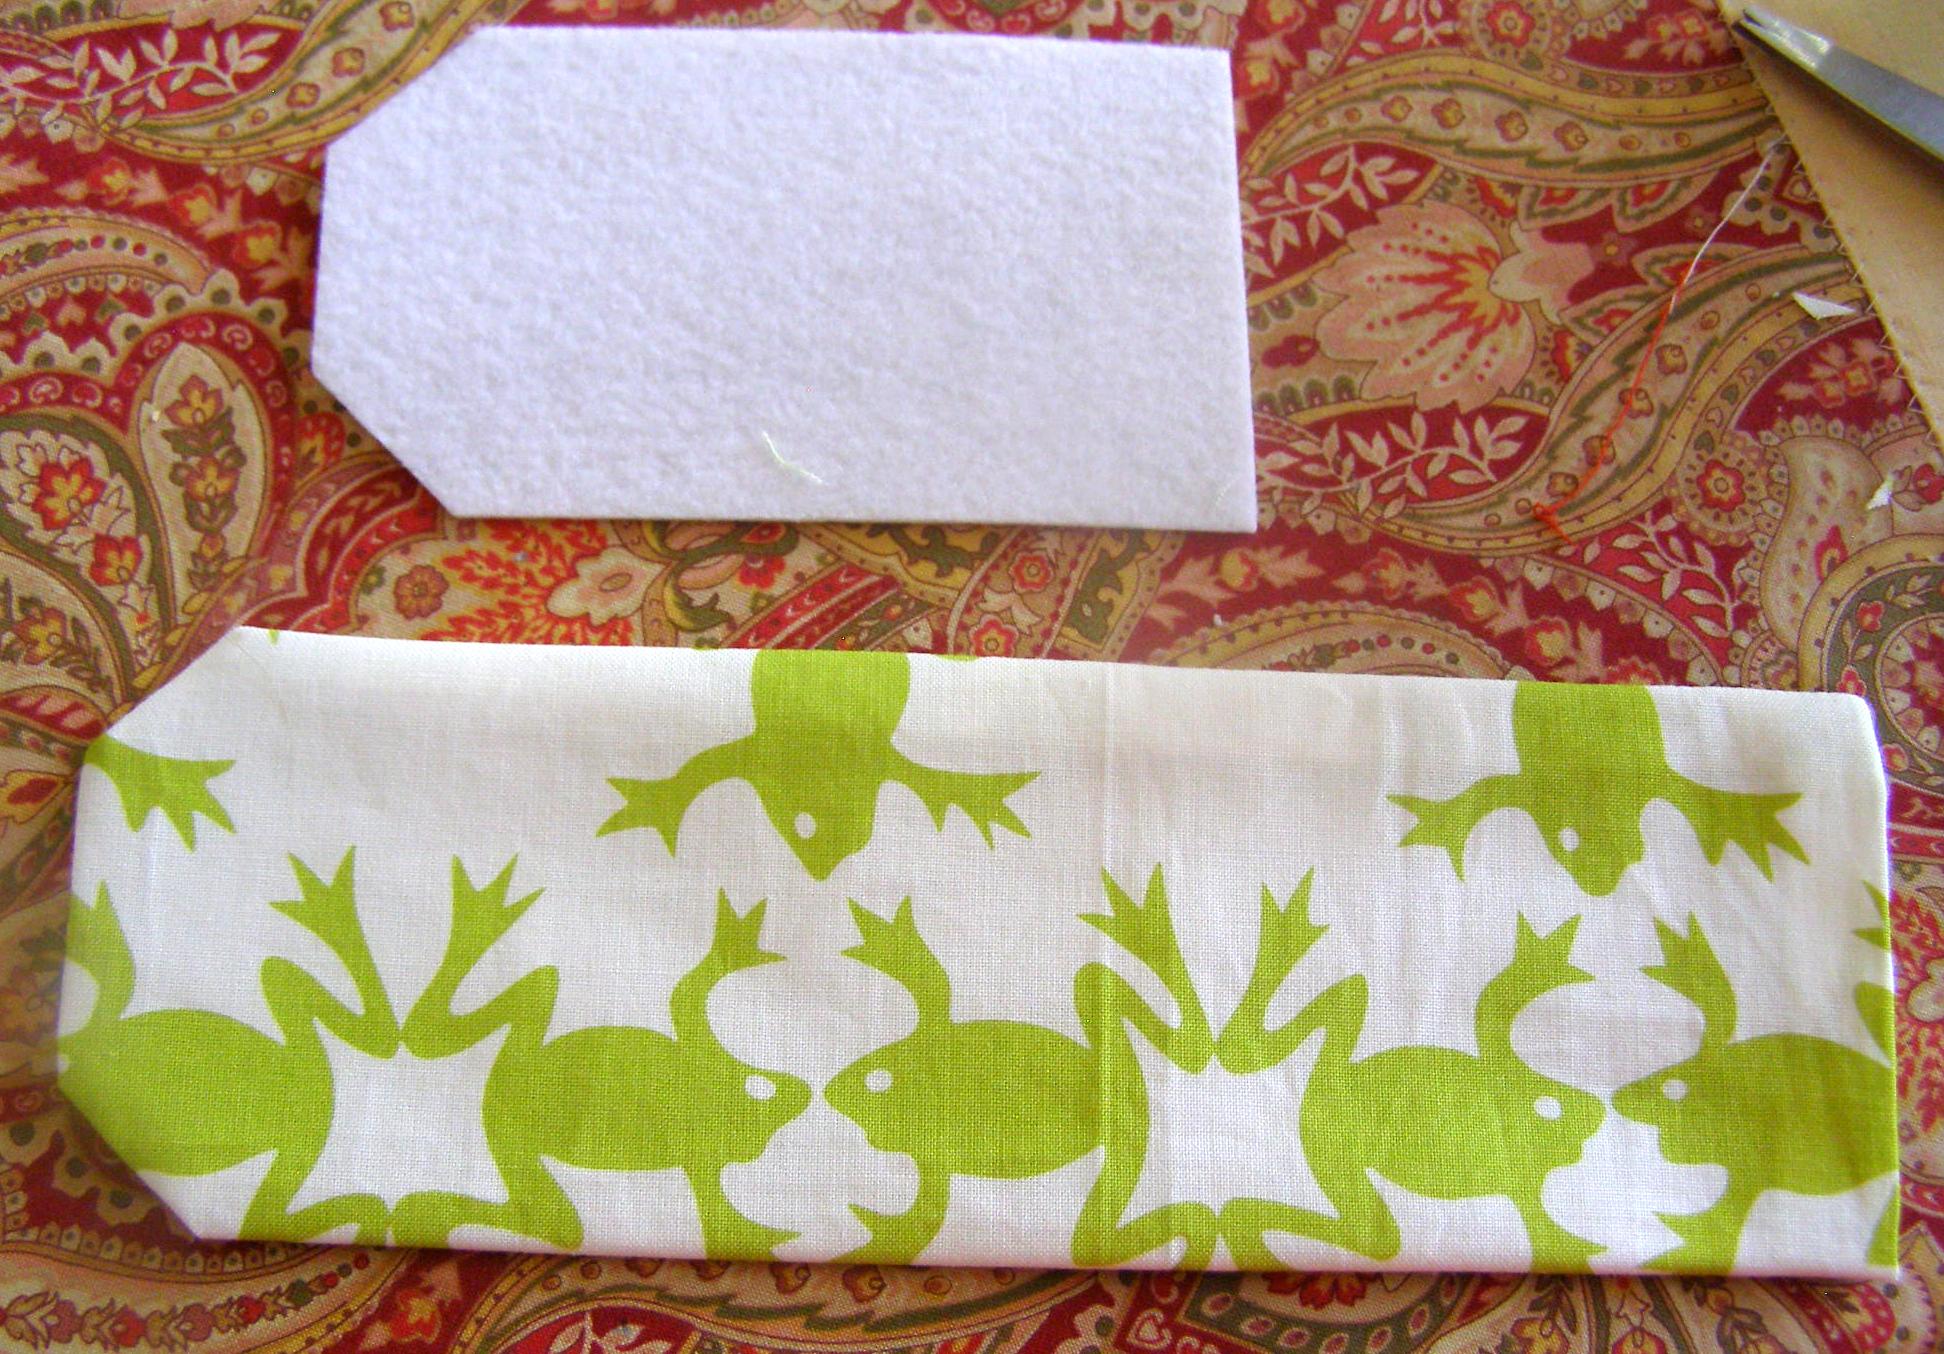
Photo 11: Turn right side out. Push RSS angled piece into tag.
12. Push remaining RSS (Really Stiff Stuff) angled piece into tag until it reaches the end. Trim long sides – just a smidge – if the RSS piece does not fit.
13. Fold 22″ piece of ribbon in half. Place 1/2″ into opened end of tag as shown in Photo 12. Topstitch close to out edge all the way around tag.
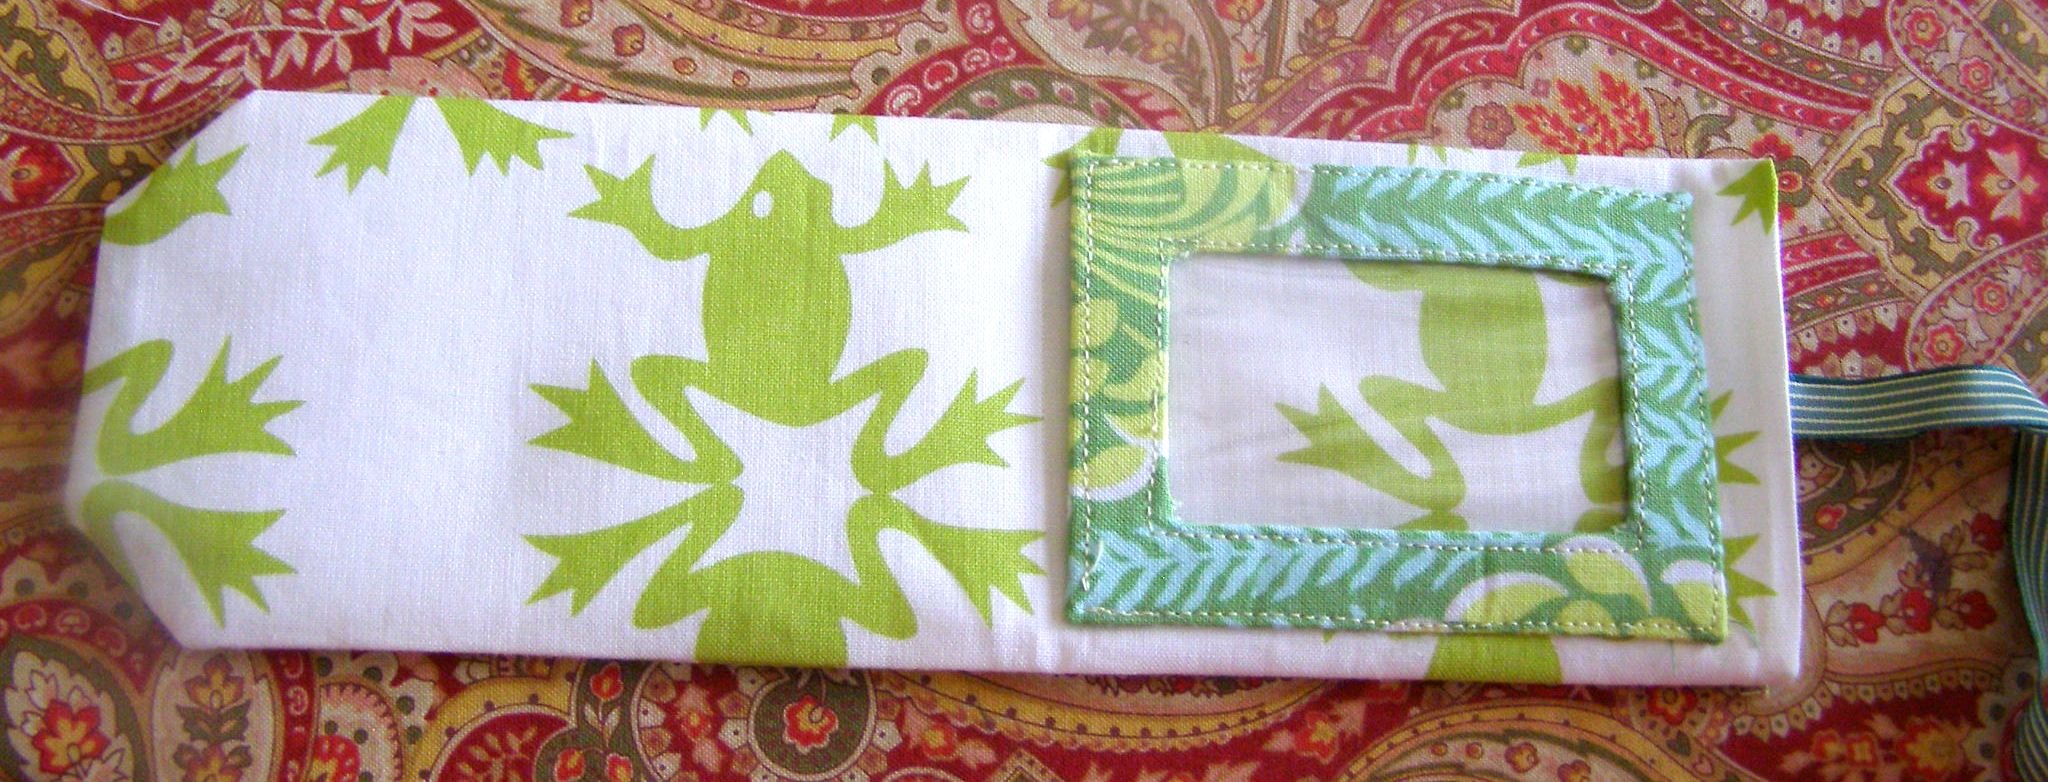
Photo 12: Insert ribbon and topstitch edge.
14. Make a button hole or place a small grommet into angled end of tag. Thread ribbon through button hole or grommet.
Photo 12: Secured Tags
15. Stash Couture and Secure Tag is completed – ready for that next trip!
The added bonus is that you will never mistake your luggage for someone else’s again!

That is brilliant and beautiful. I love your sense of humor. Sharper scissors than I have! Hilarious!
Alas, I do have a very sharp pair of scissors.
Unfortunately, prior to travel in June I put them away – and haven’t found them since! So I am sewing with some rather dull replacements!
Pingback: Blue Bird Bag – Appliqued Overnight Bag | The Destashification Project
Pingback: A Manly, but still Secure, Luggage Tag | The Destashification Project