

Scrap Bag Bag
The Scrap Bag Bag is a perfect overnight bag – fun, roomy, zippered closures, lightweight – and sews up quickly using Stash Fabrics.
Today’s post is the tutorial for sewing these fun and functional Destashification bags.
Materials:
- Fabrics – A yard or so for the bag. Another yard for the lining. Some coordinating remnants for the pockets. Or…Destash and use different fabrics!
- Webbing, which may be referred to as belting – 3 yards
- Piping – 3 yards
- Fusible Batting – a yard or so. I used Thermolam.
- Really Stiff Stuff – enough to cut a 18.5″ by 8″ rectangle. I think I used something called Peltex. Non-fusible or fusible on one side.
- Zipper: 22″ – 24″ Heavy Weight
- Fusible webbing on a roll – 1/2 inch wide. (Optional, but great stuff!)

Tutorial Bag
Fabric Choice:
The original Scrap Bag Bag is sewn from quilting weight cottons. The Tutorial Bag is sewn from Home Dec fabric. Although both types of fabric work well, I would recommend using the quilting weight cottons if not an experienced sewer.
I would also recommend darker colored fabric for the base. Overnight bags are often placed on surfaces that would not pass a white glove test.
 The Pattern Pieces:
All Seam allowances are 1/2″ and are included in patterns and rectangle measurements.
There are 5 Main Pattern Pieces for the Bag – Side, Base, End, Top and Pocket. The Side Piece is the only piece that requires printing. The other pattern pieces are simply rectangles. Specific directions for each is discussed individually below.
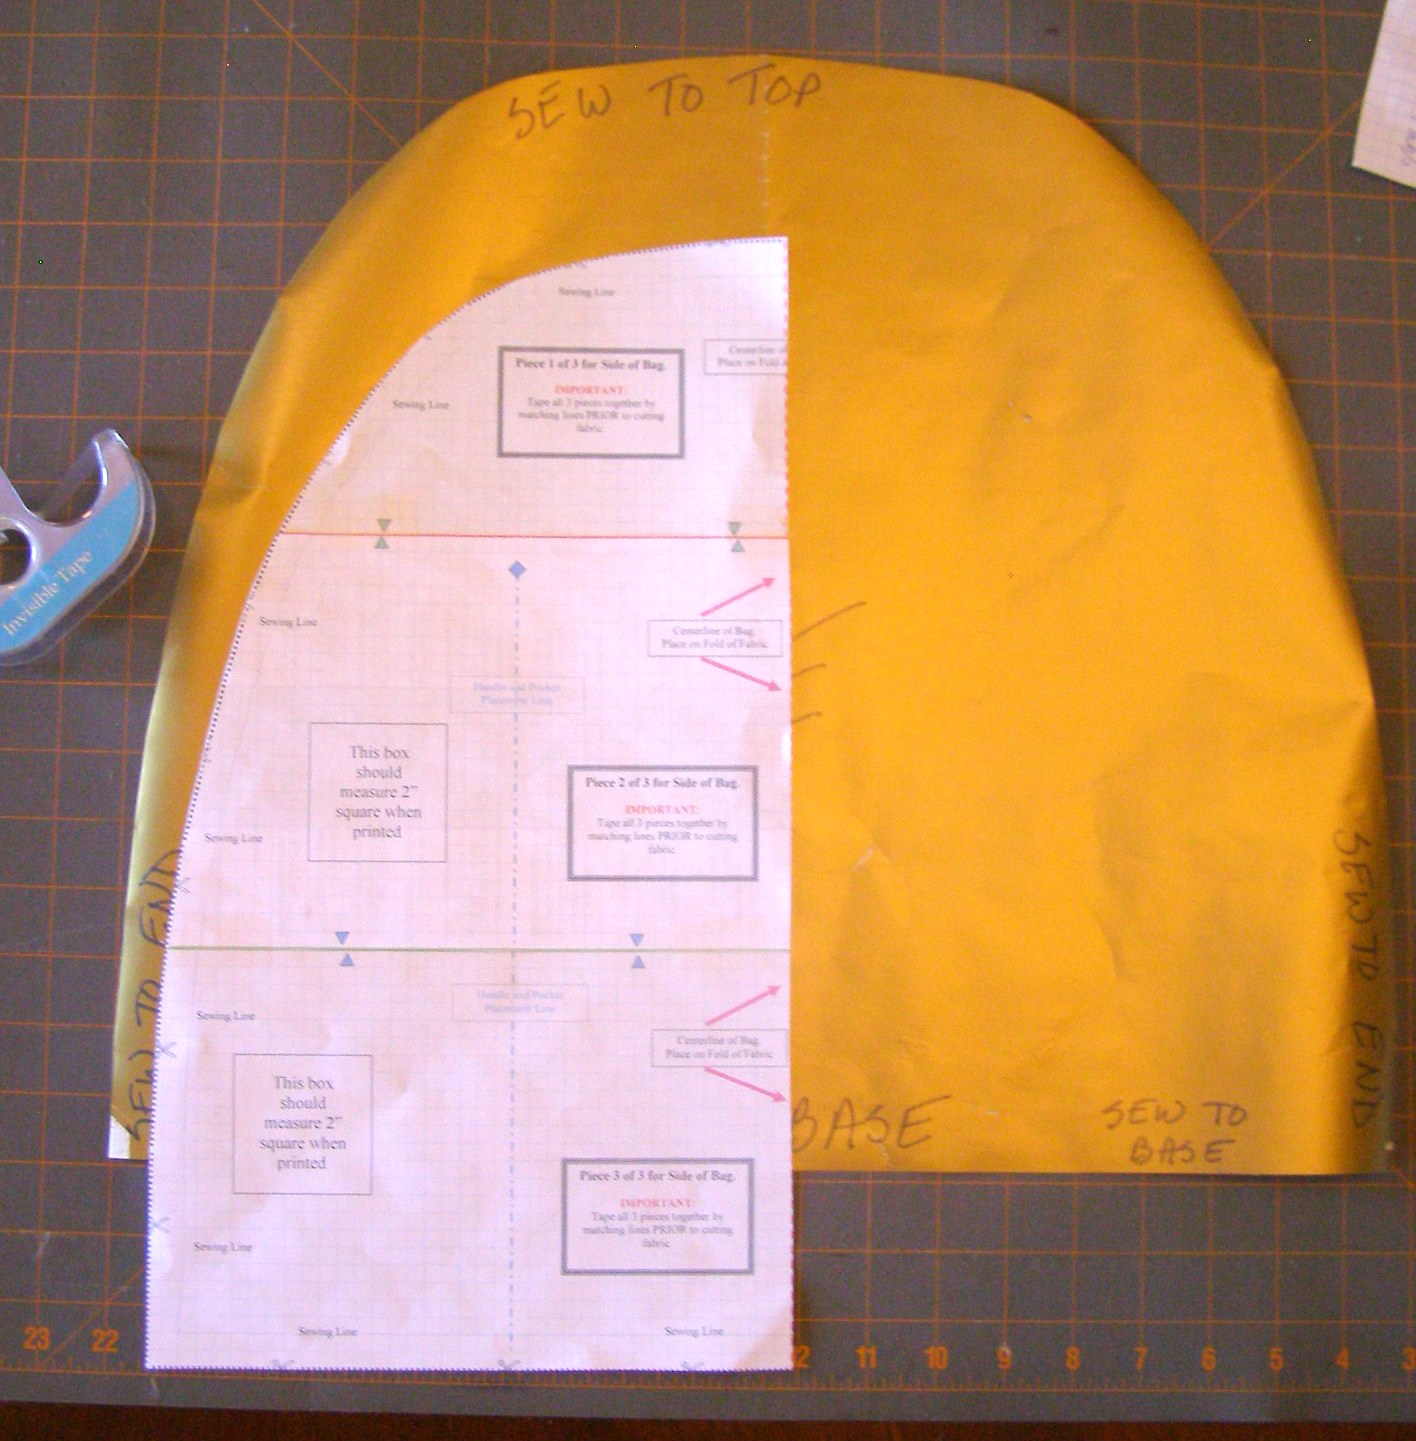
Bag Side Pattern Piece from 3 printed pieces – traced onto wrapping paper,
Bag Side:
Print the three pattern pieces used to create the curved Bag Side and tape them together matching colored triangles. They are designed to print on letter-sized paper (click “Read Only” when prompted)
This will create one half of the Bag Side.
Fold wrapping paper, place longer straight edge of pattern on fold and trace pattern to create full sized Bag Side pattern.
Cut the following using the full-sized Bag Side pattern:
- Fabric – Cut 2
- Lining – Cut 2
- Batting – Cut 2
The remaining pattern pieces for the Bag are, with one exception, rectangles. I measured/drew the rectangles onto the back side of inexpensive wrapping paper (from that After Christmas Clearance Sale Wrapping Paper Stash) and cut them out.
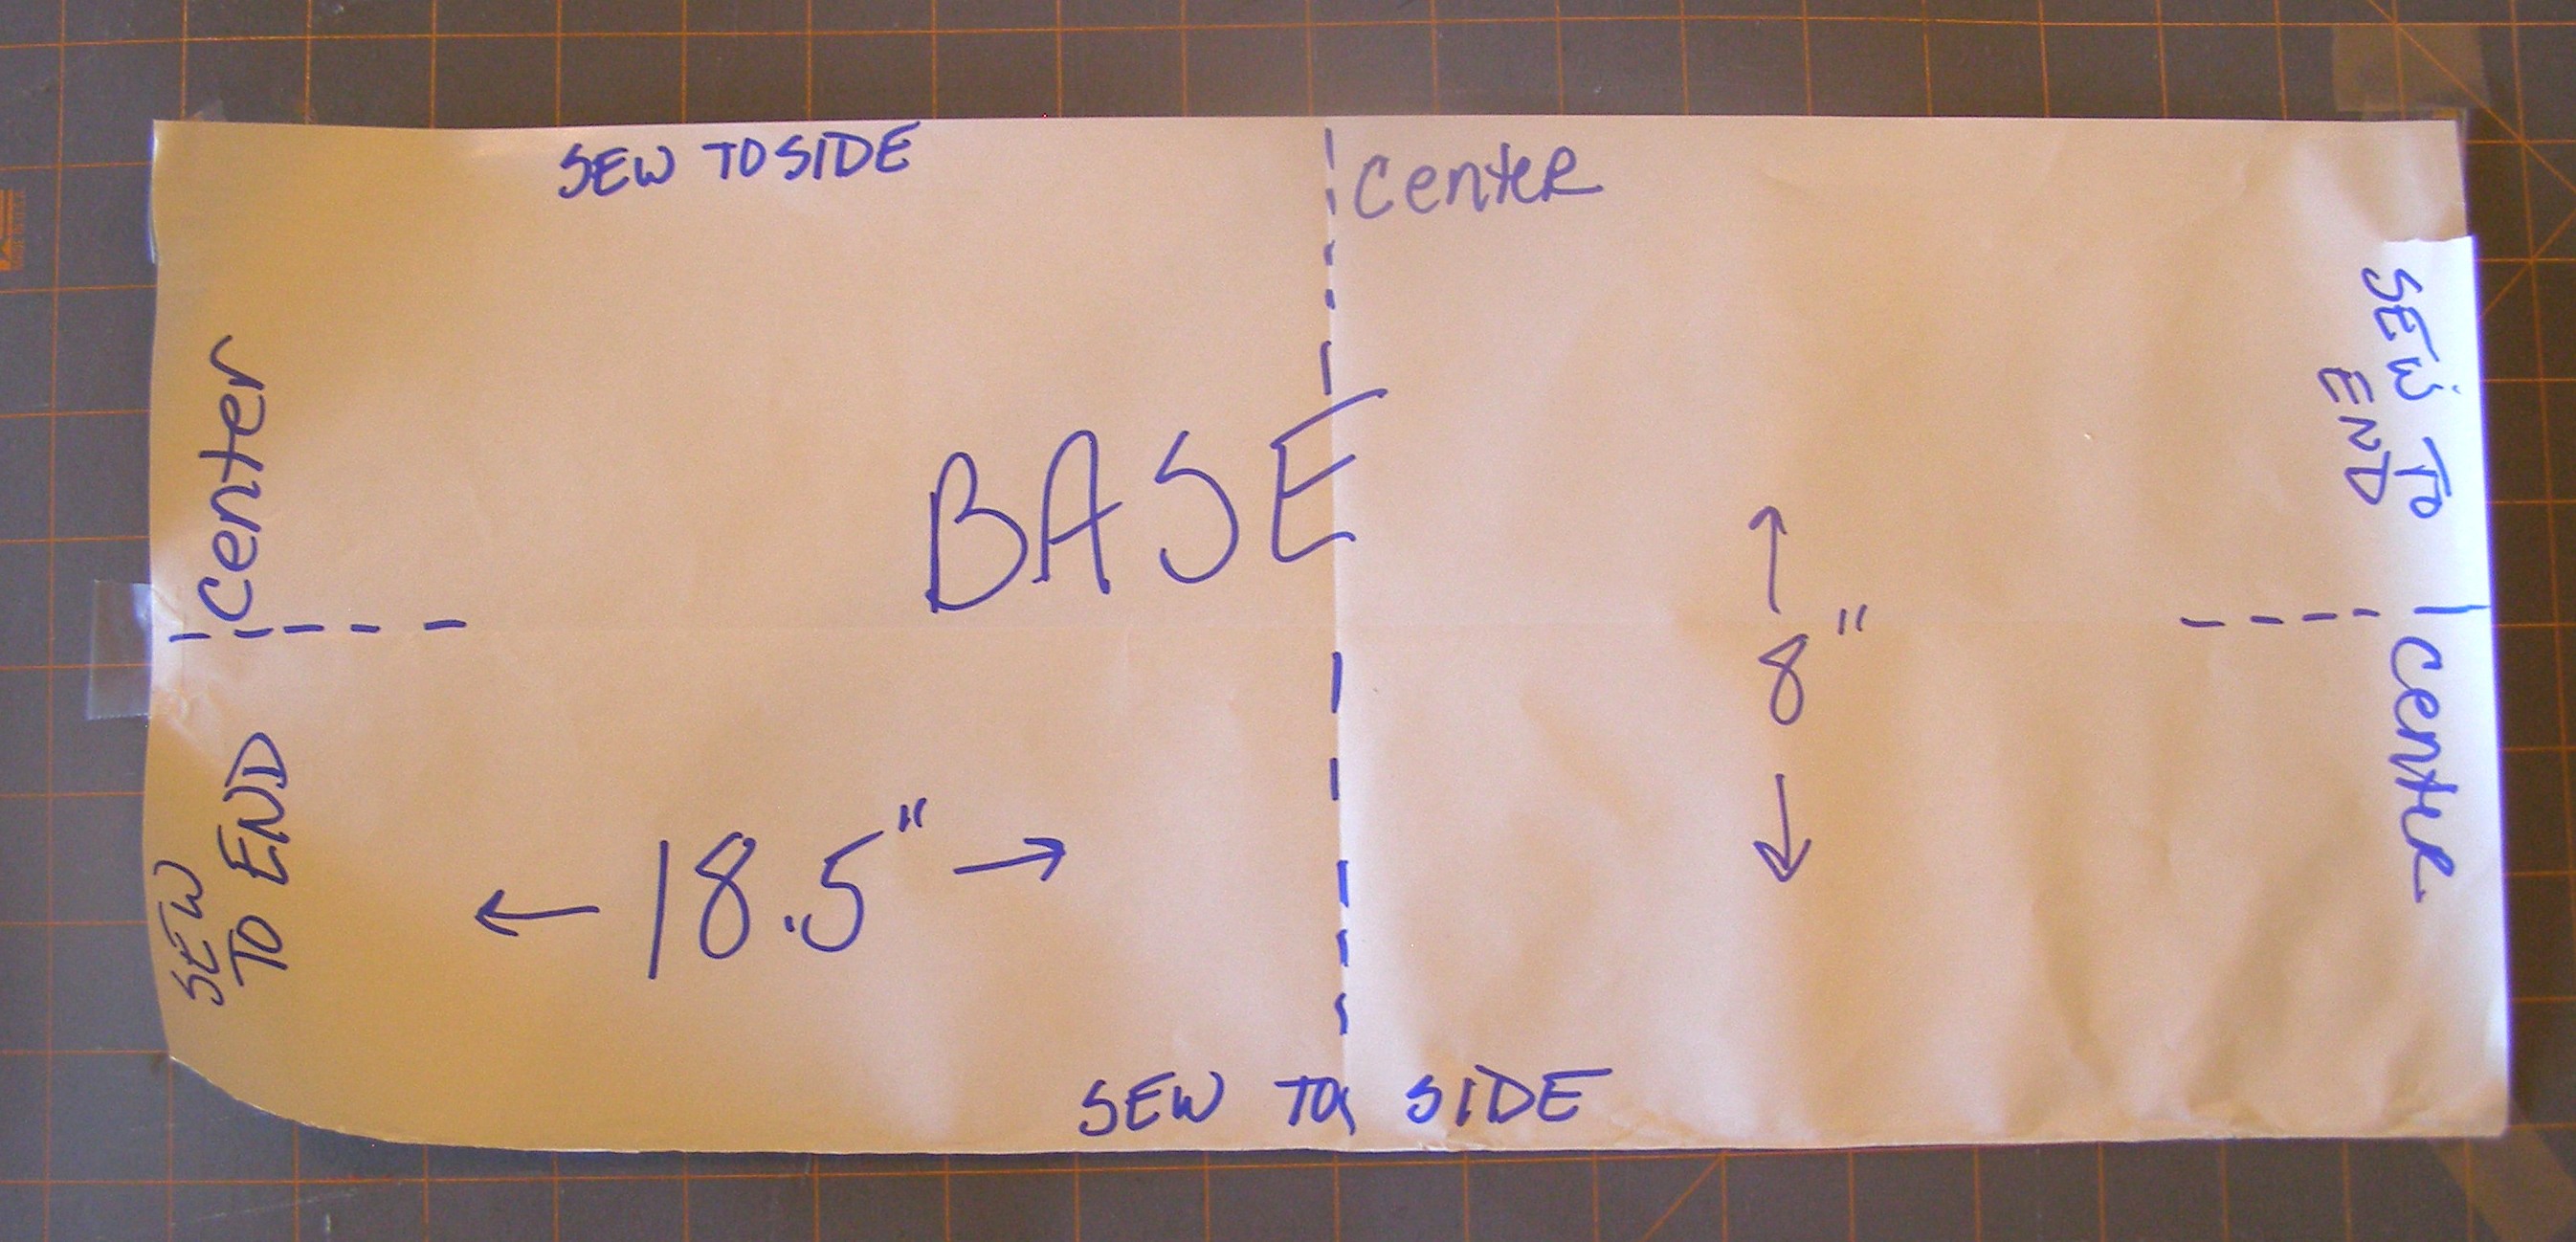
Base Rectangle
Bag Base: Rectangle is 18.5″ by 8″.
- Fabric – Cut 1
- Lining – Cut 1
- Really Stiff Stuff – Cut 1
Fold to find centerpoints as marked on pattern in photo.

End Rectangle
Bag End: Rectangle is 9″ tall by 8″ wide.
- Fabric – Cut 2
- Lining – Cut 2
- Batting – Cut 2
Fold to find vertical centerpoint as noted on pattern in photo.
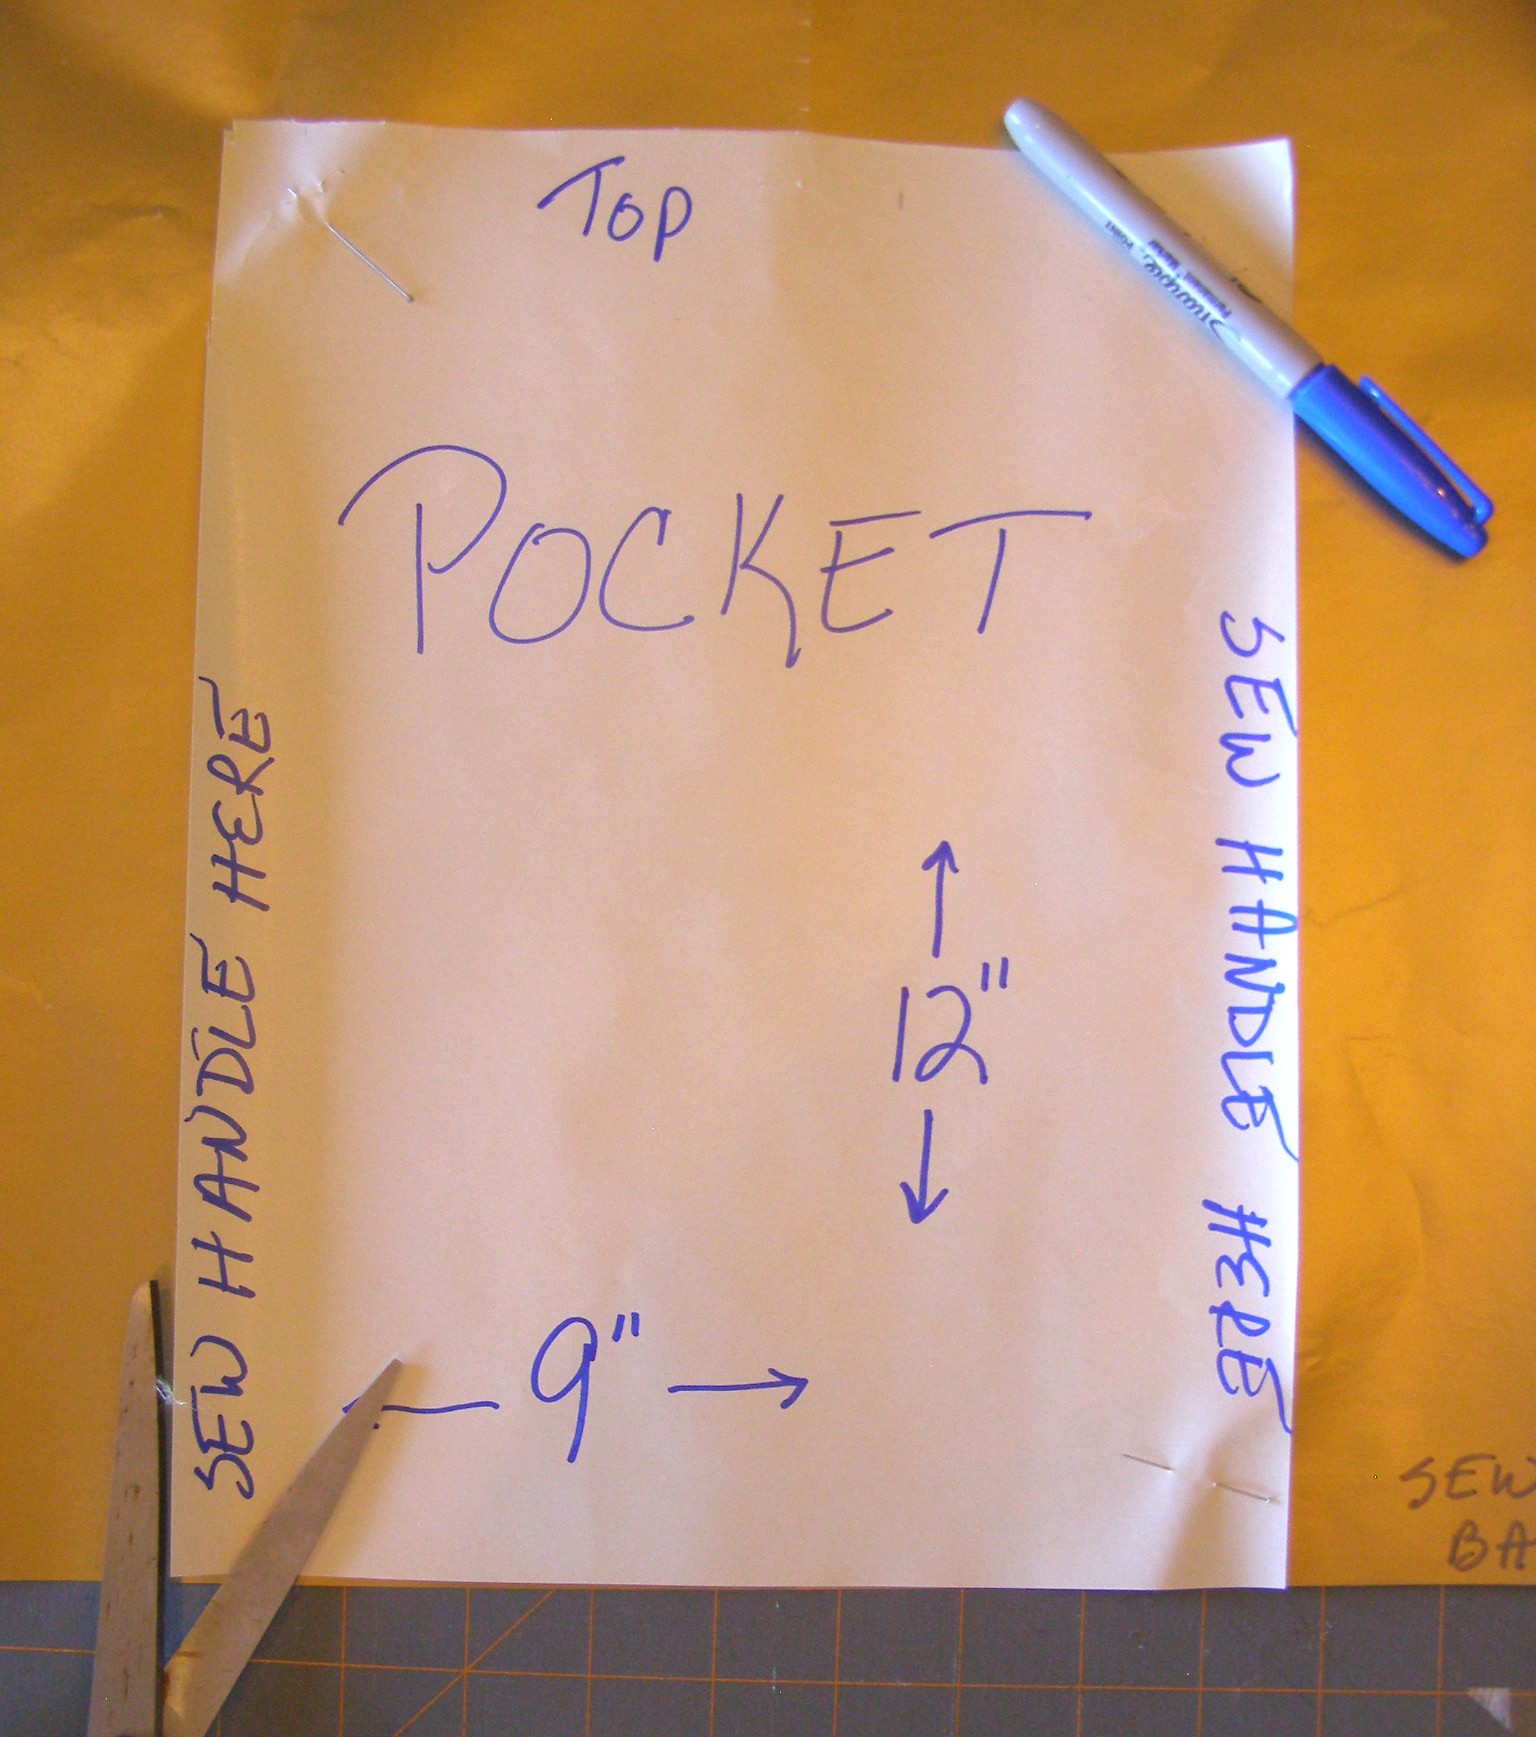
Pocket Rectangle
Bag Side Pocket: Rectangle is 12″ tall by 9″ wide.
- Fabric – Cut 2
- Lining – Cut 2
- Will also need 2 darker colored rectangles that are 5″ by 9″. These will form trim at top of pocket.
Bag Top: This pattern piece starts out as a folded 4.5″ by 14.5″ rectangle, but is gently curved to shape the bag.
- Fabric – Cut 2
- Lining – Cut 2
- Batting – Cut 2
Cutting the pattern piece is gives one a sense of accomplishment – although it is just a rectangle with a small piece removed – I think it appeals to our inner draftsperson!
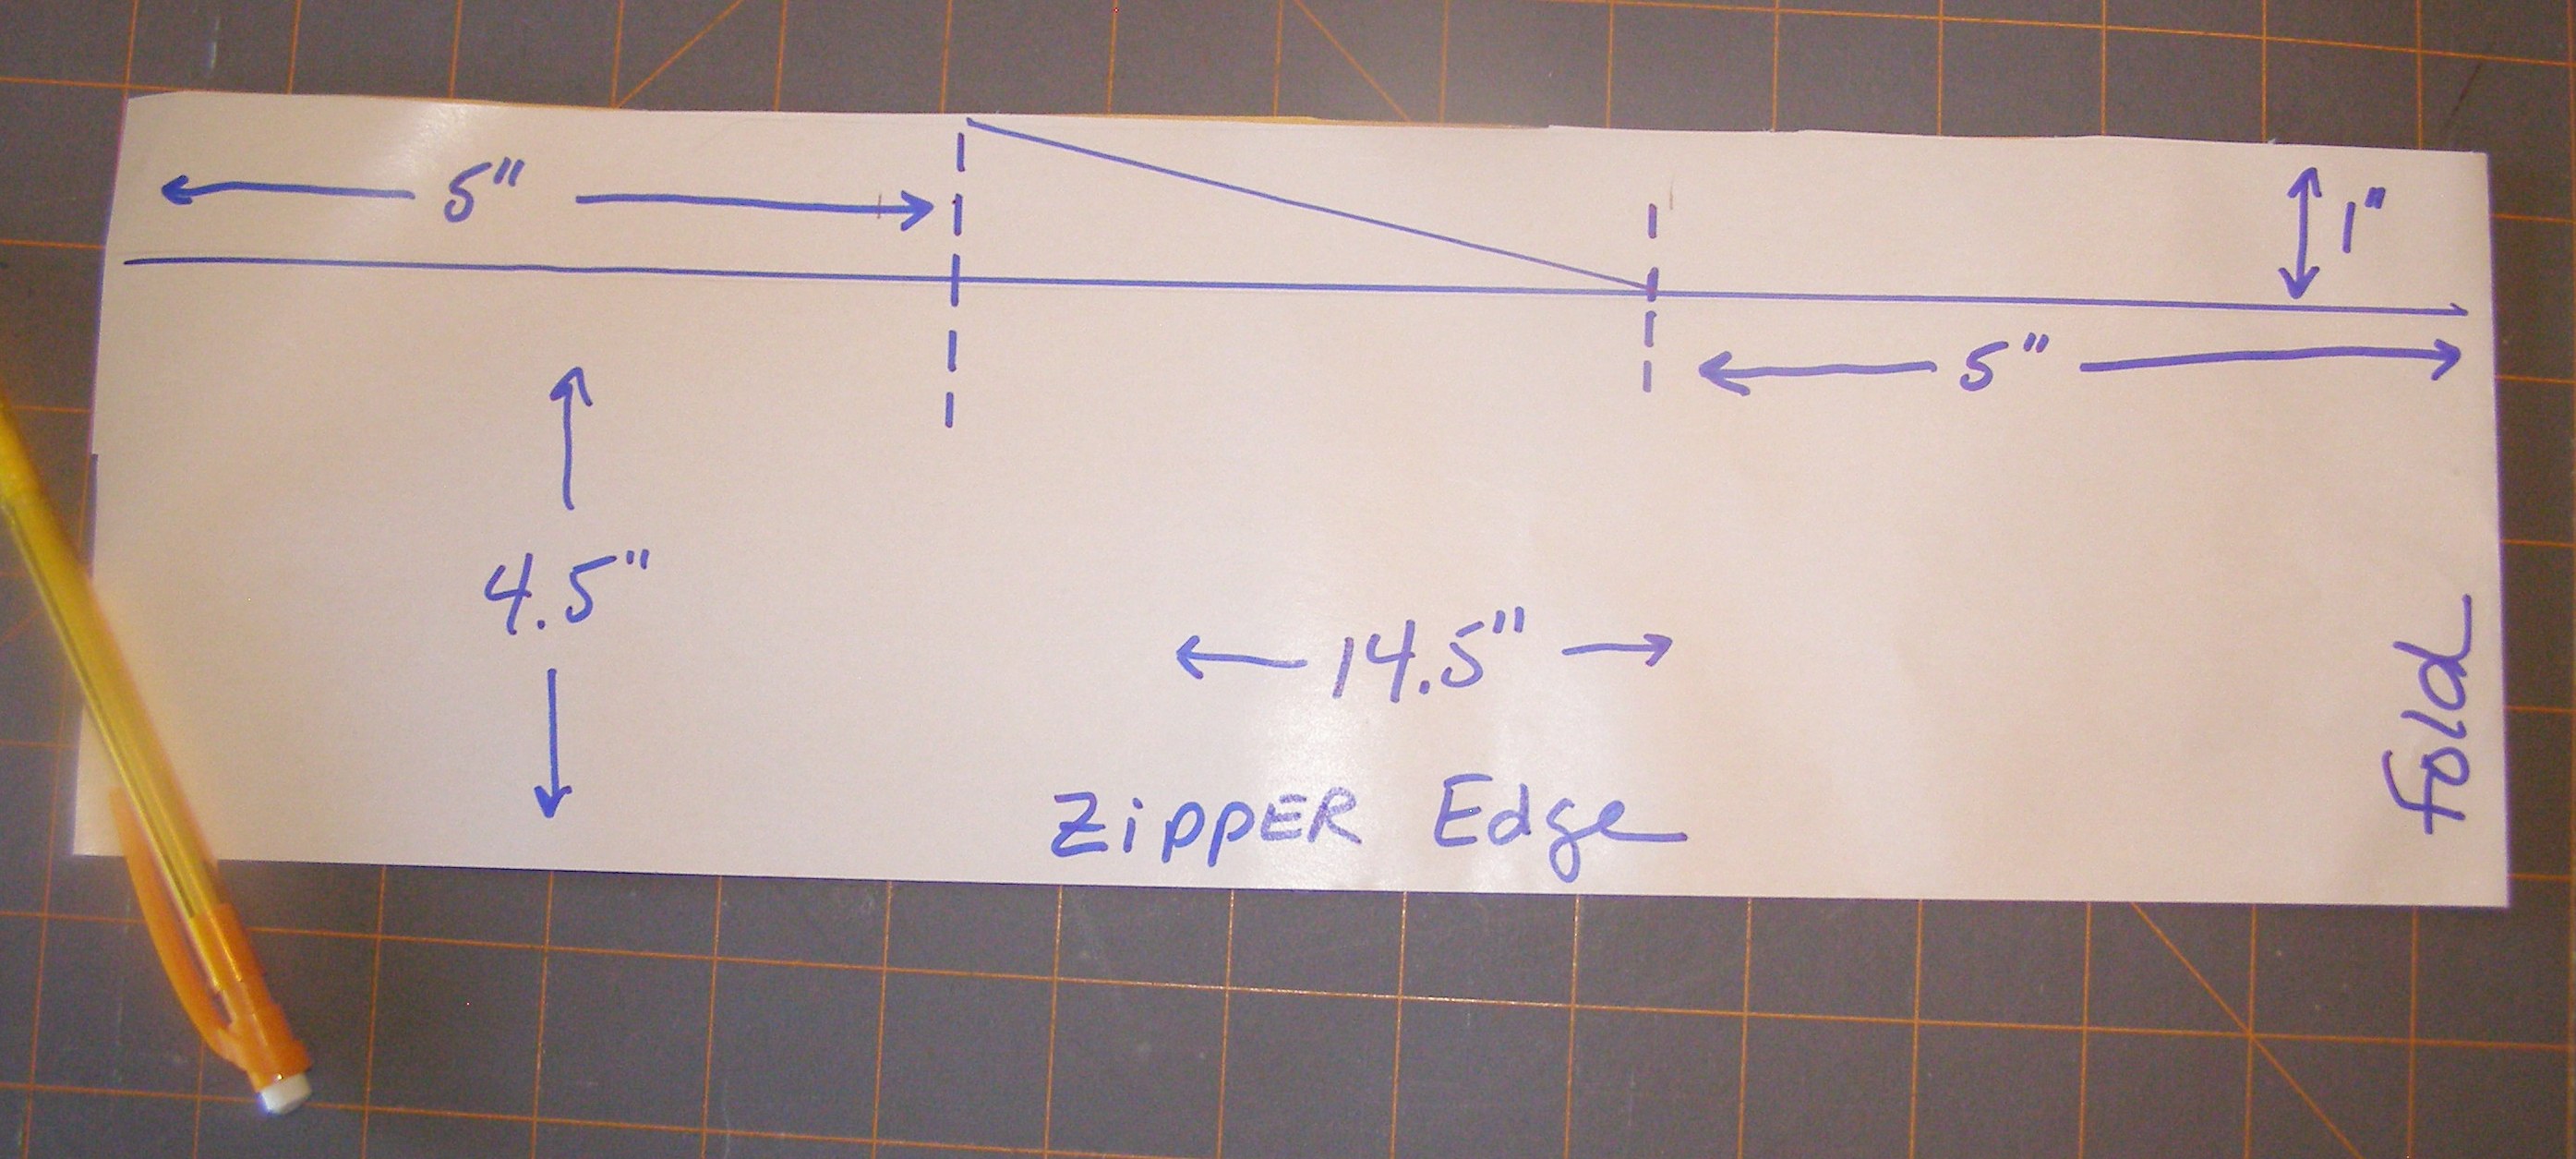
Bag Top Rectangle – cut out pattern with fold on right side as noted.
Using a folded piece of wrapping paper, cut a rectangle that is 4.5″ by 14.5″ . The folded side is noted in the above photo. When unfolded, the rectangle will be 4.5″ by 29″.
Mark the rectangle as shown in the photo, by drawing (drafting) a line 1″ from the top edge of the rectangle. Draw two lines 5″ from either end of the rectangle. These are the dotted lines in the photo. Connect the upper edge of the left dotted line to the point the right dotted line crosses the 1″ line. Doing so will form the angled line shown on the photo.

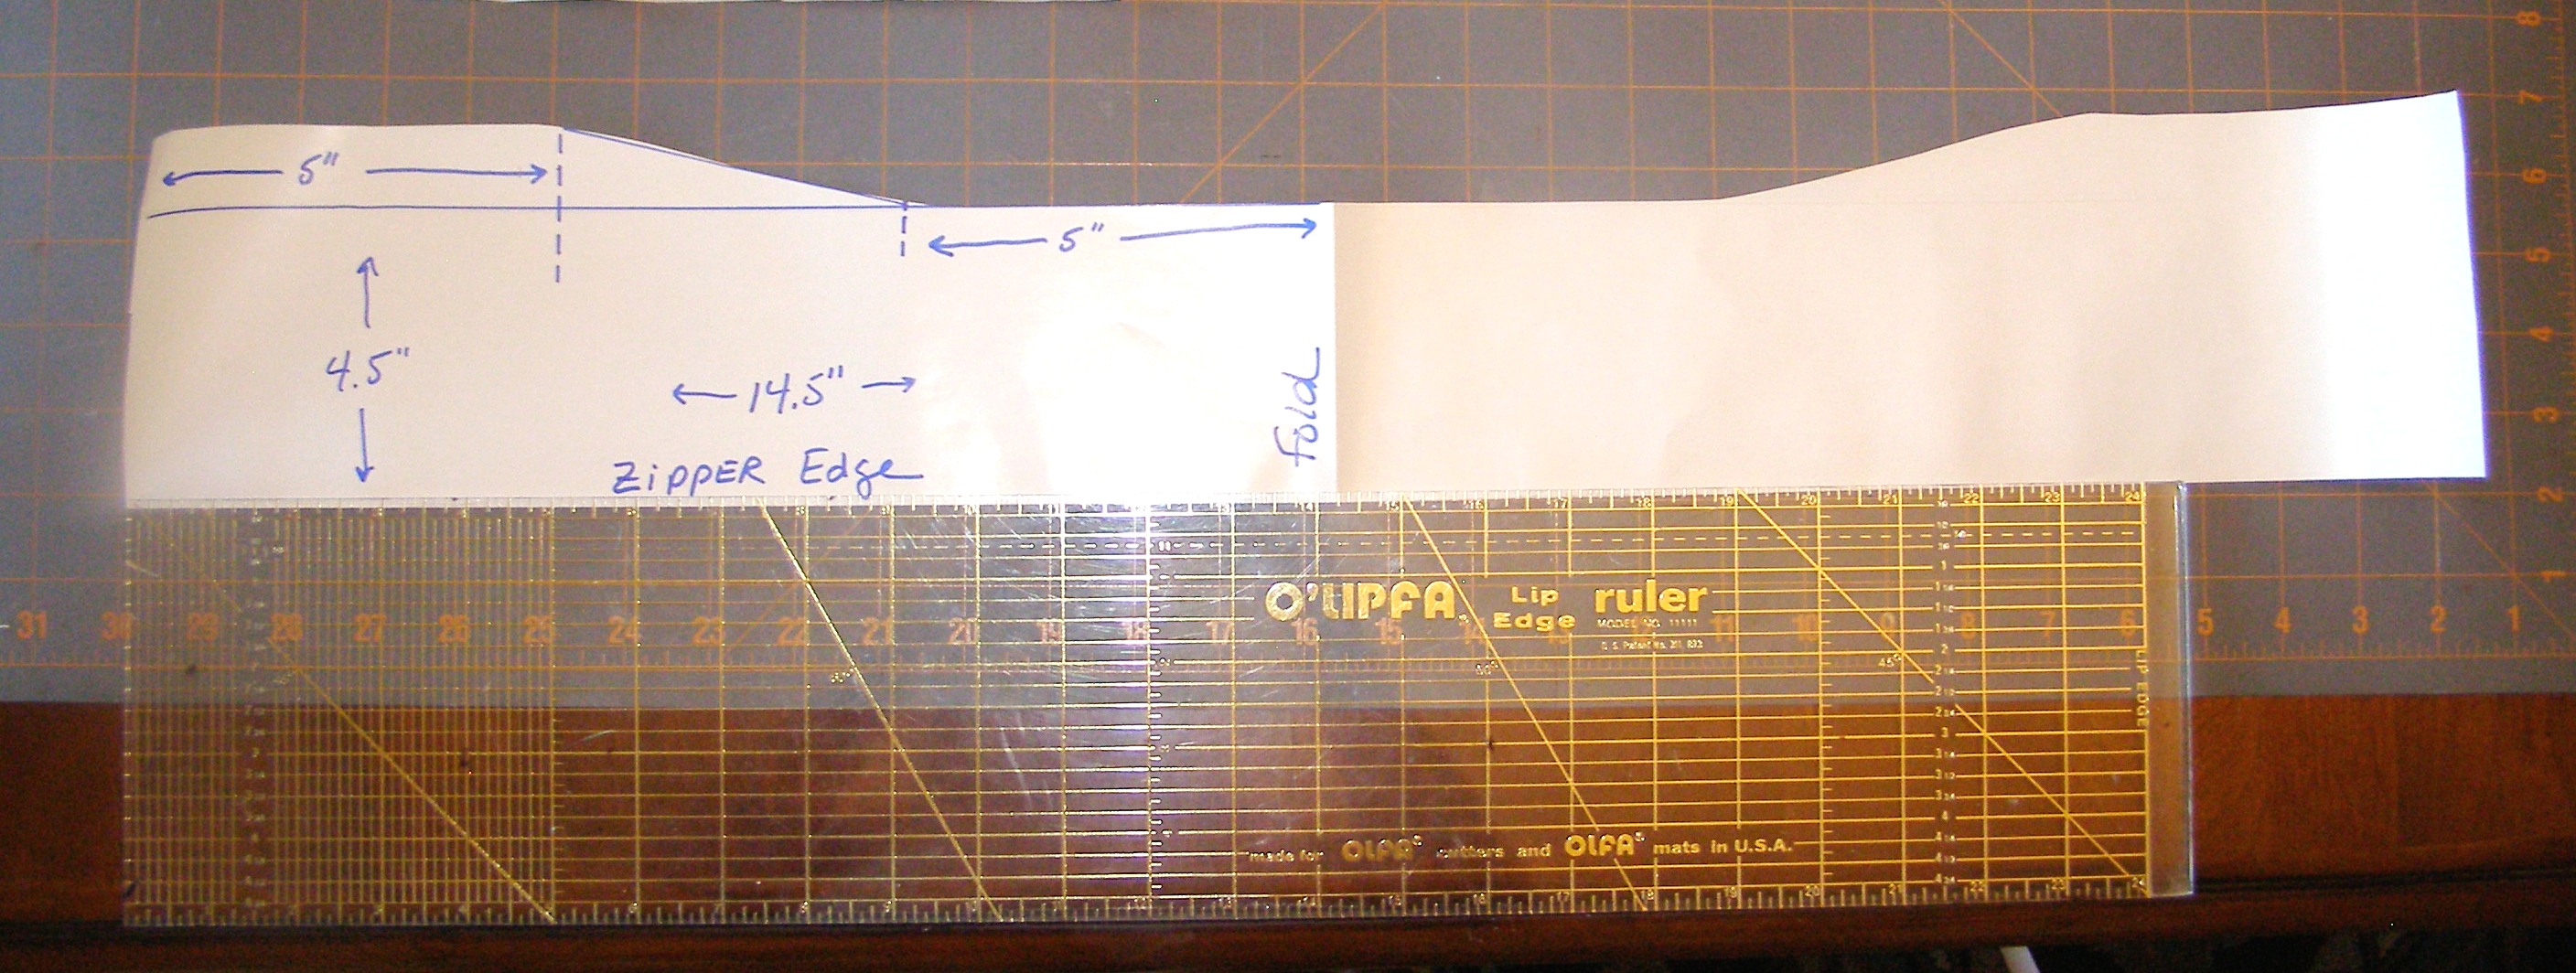
Bag Top Pattern: Cut away slashed area.
The slashed area in the above photo shows is the area to be cut away to form the curve of the bag top.
Bag Top Pattern: Completed.
Unfold the Top pattern piece and it should now look like that in the photo above.
Just to avoid any unnecessary use of the seam ripper later on, note that the zipper is sewn to the long straight, non-angled edge of the Bag Top.
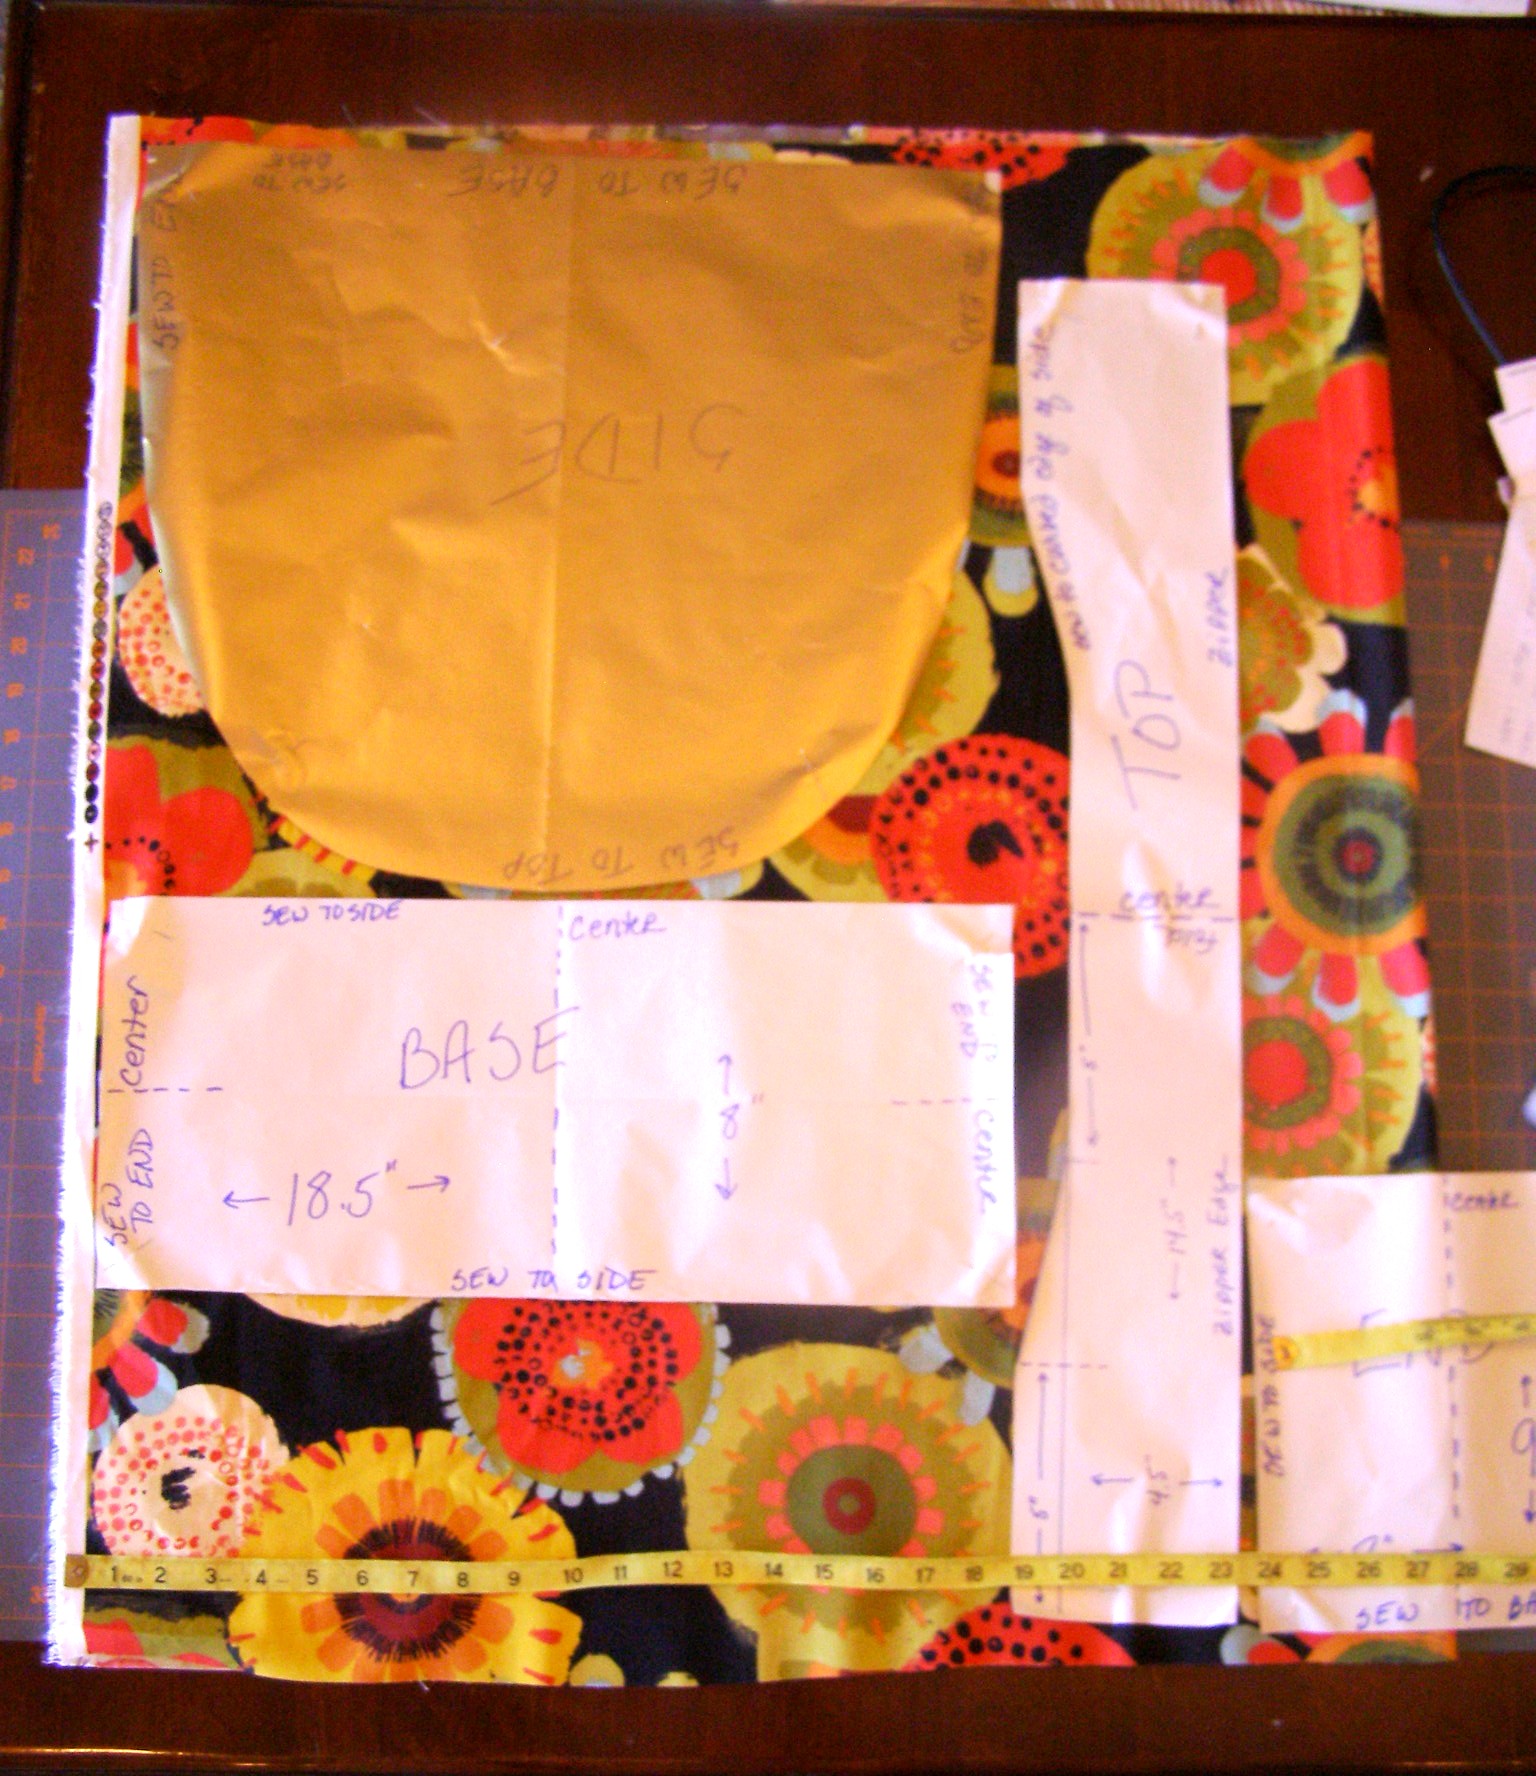
Bag Cutting Layout
To the left is the cutting layout I used for the Bag fabric. Two Bag Bases were cut – allowing one of them to be used as the lining.
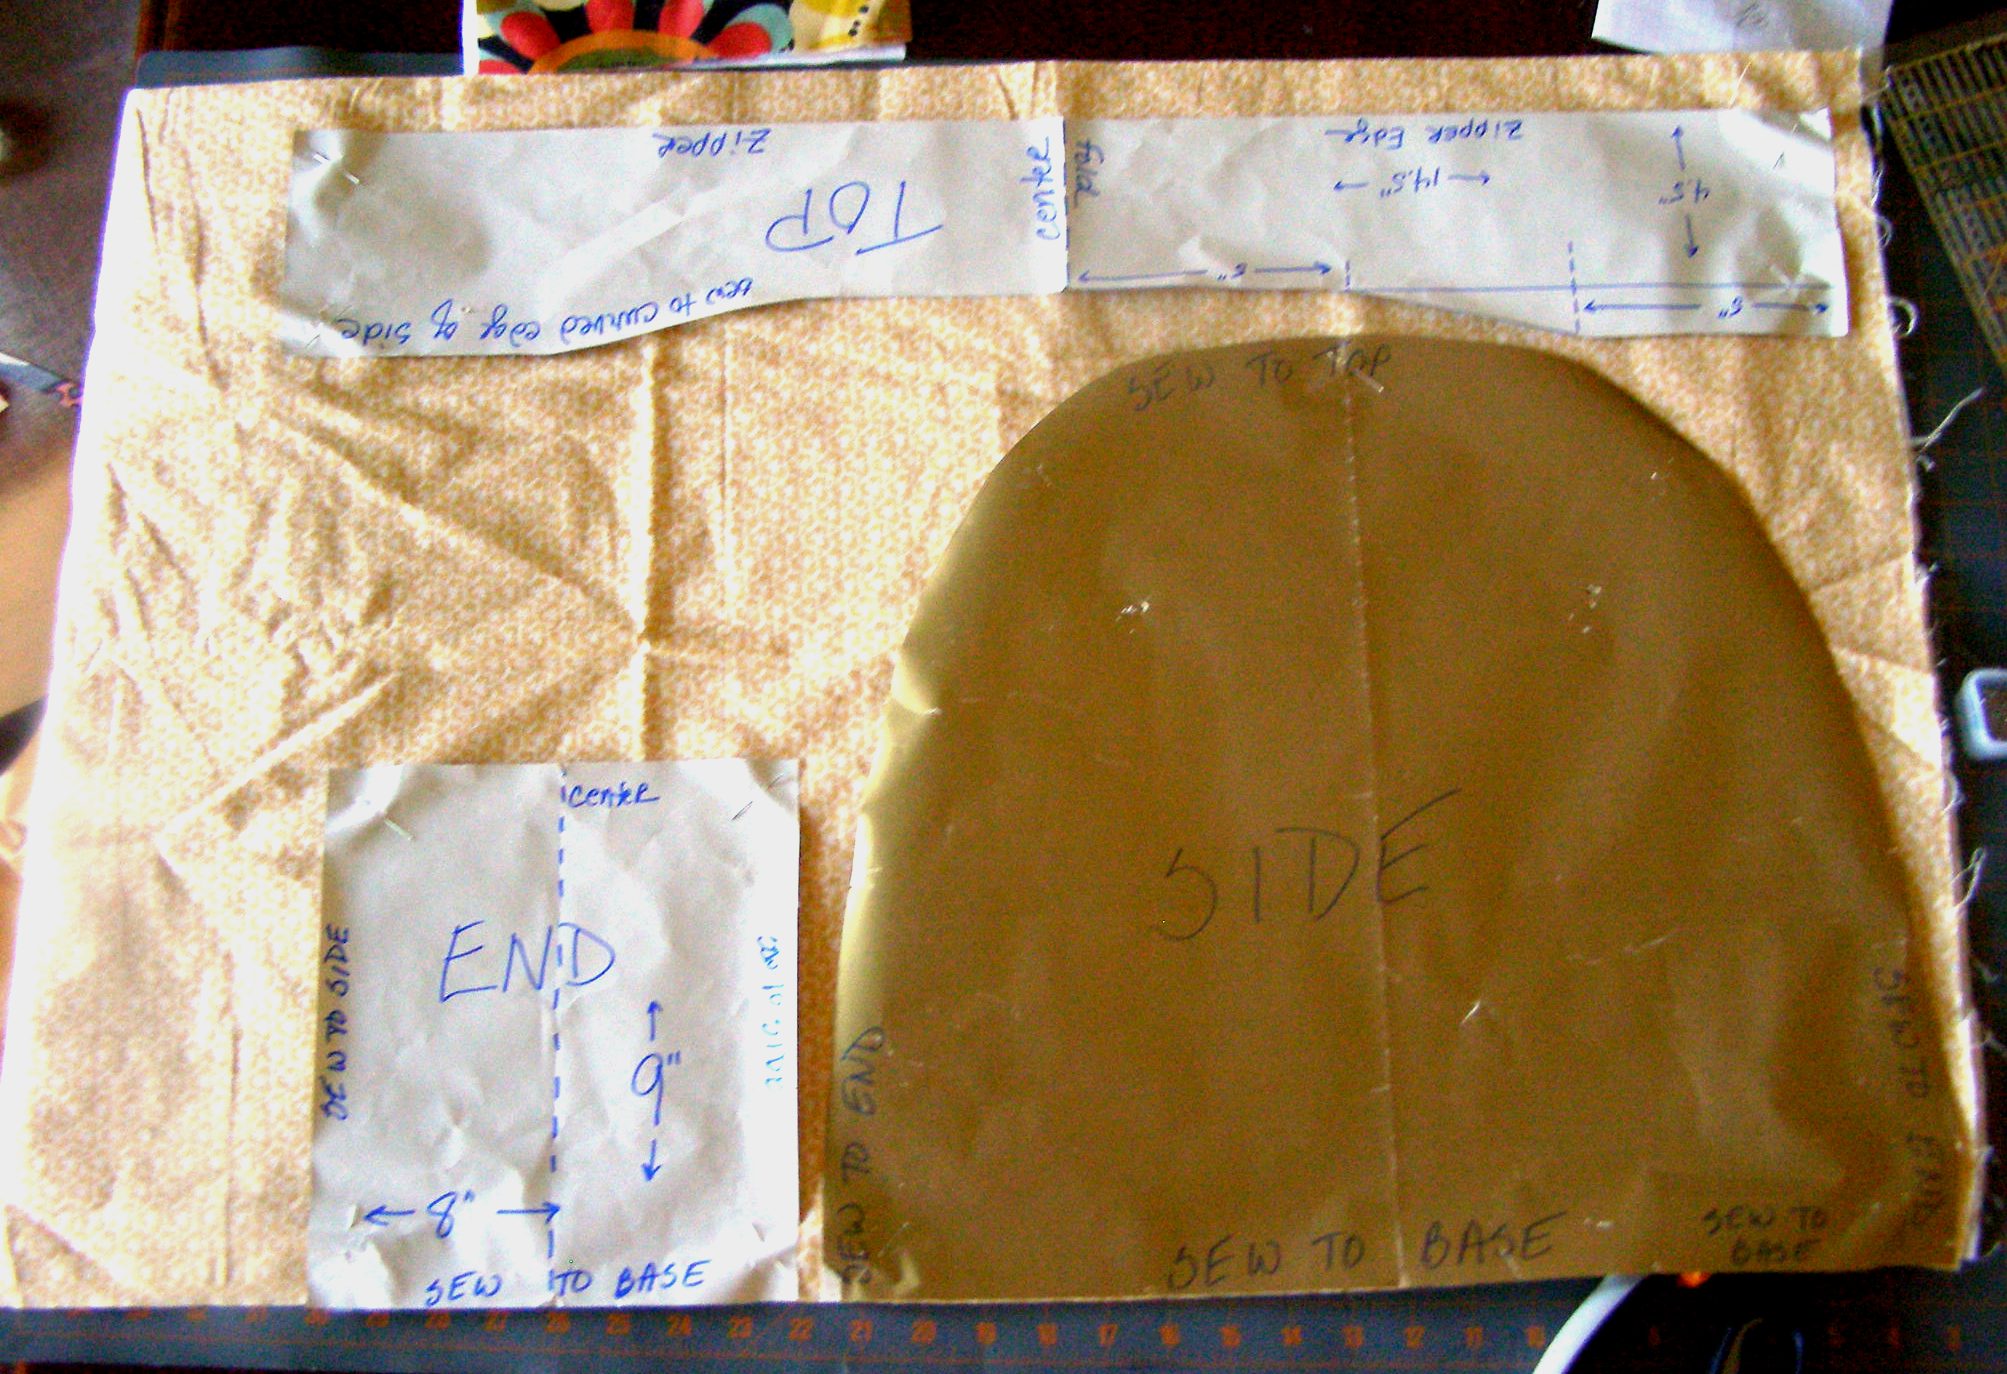
Lining Layout
The layout used for the bag lining is shown in the photo to the right. The pockets and the pocket linings were cut from other Stash Fabrics.
Of course, if a Scrap Bag Bag is desired, layouts don’t count. Use want ever fabrics you desire.
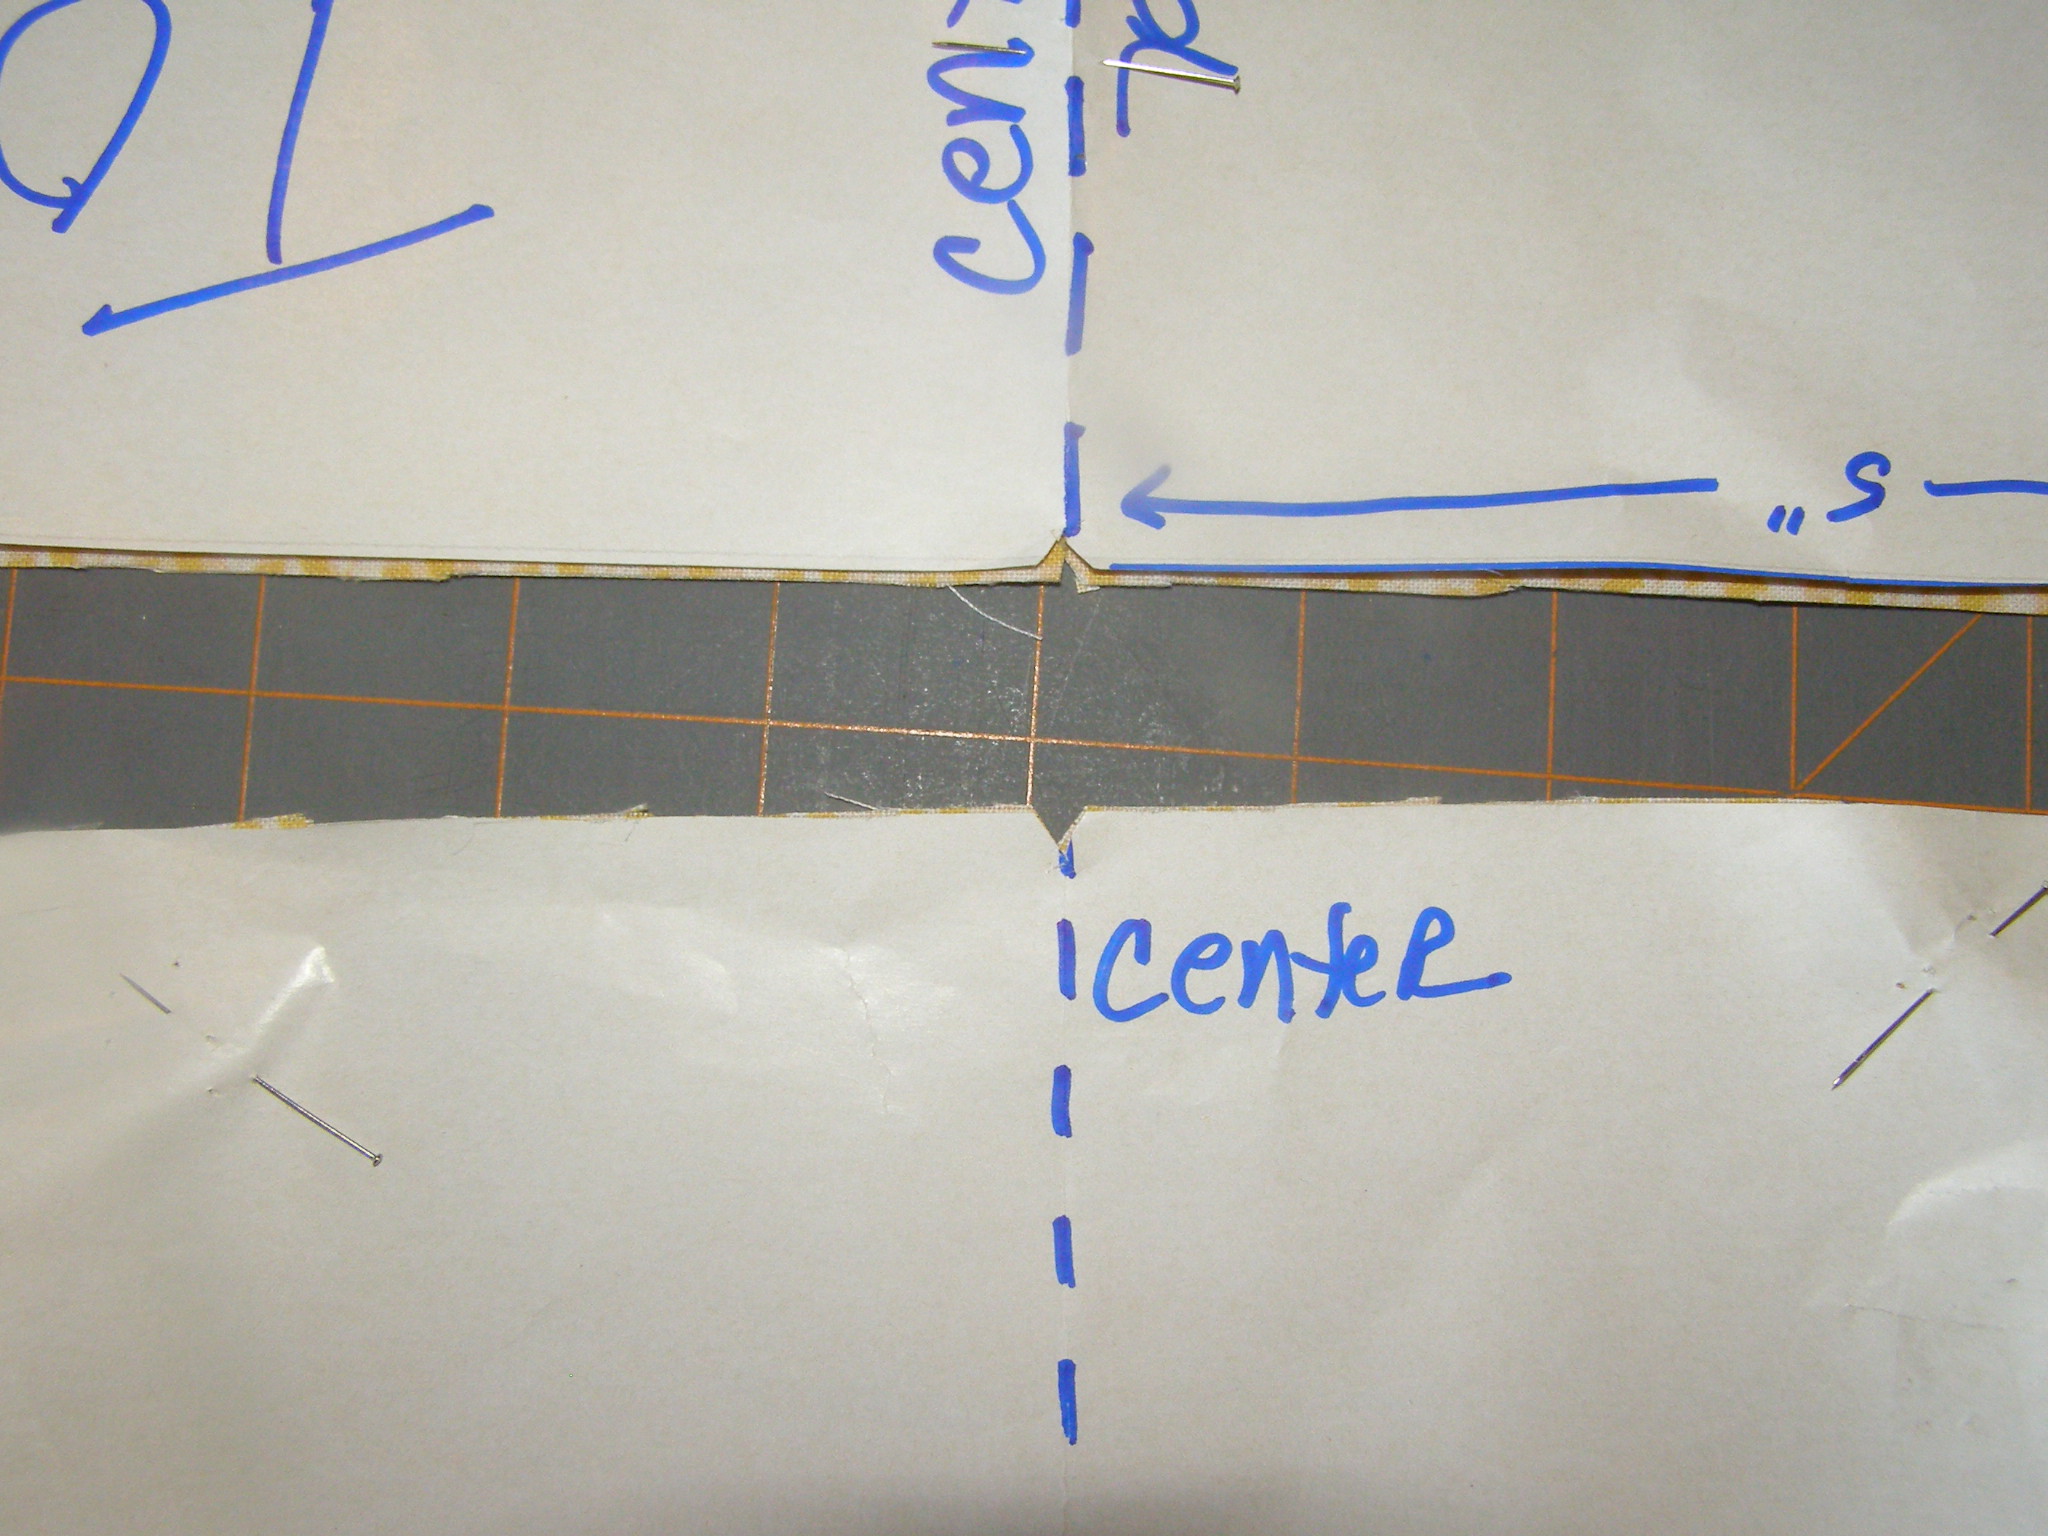
Notch centerlines of pattern pieces – it is how they fit together.
Important: Notch the centerlines of all pattern pieces.
Sewing the Bag:
The first step is to complete the pockets. The pockets are the “jewelry” of the bag.
Look for a future “Pocket Post” which will provide details on several different pockets and pocket finishes (zippers, buttons, ribbons, etc.) that can be used to personalize the bags.
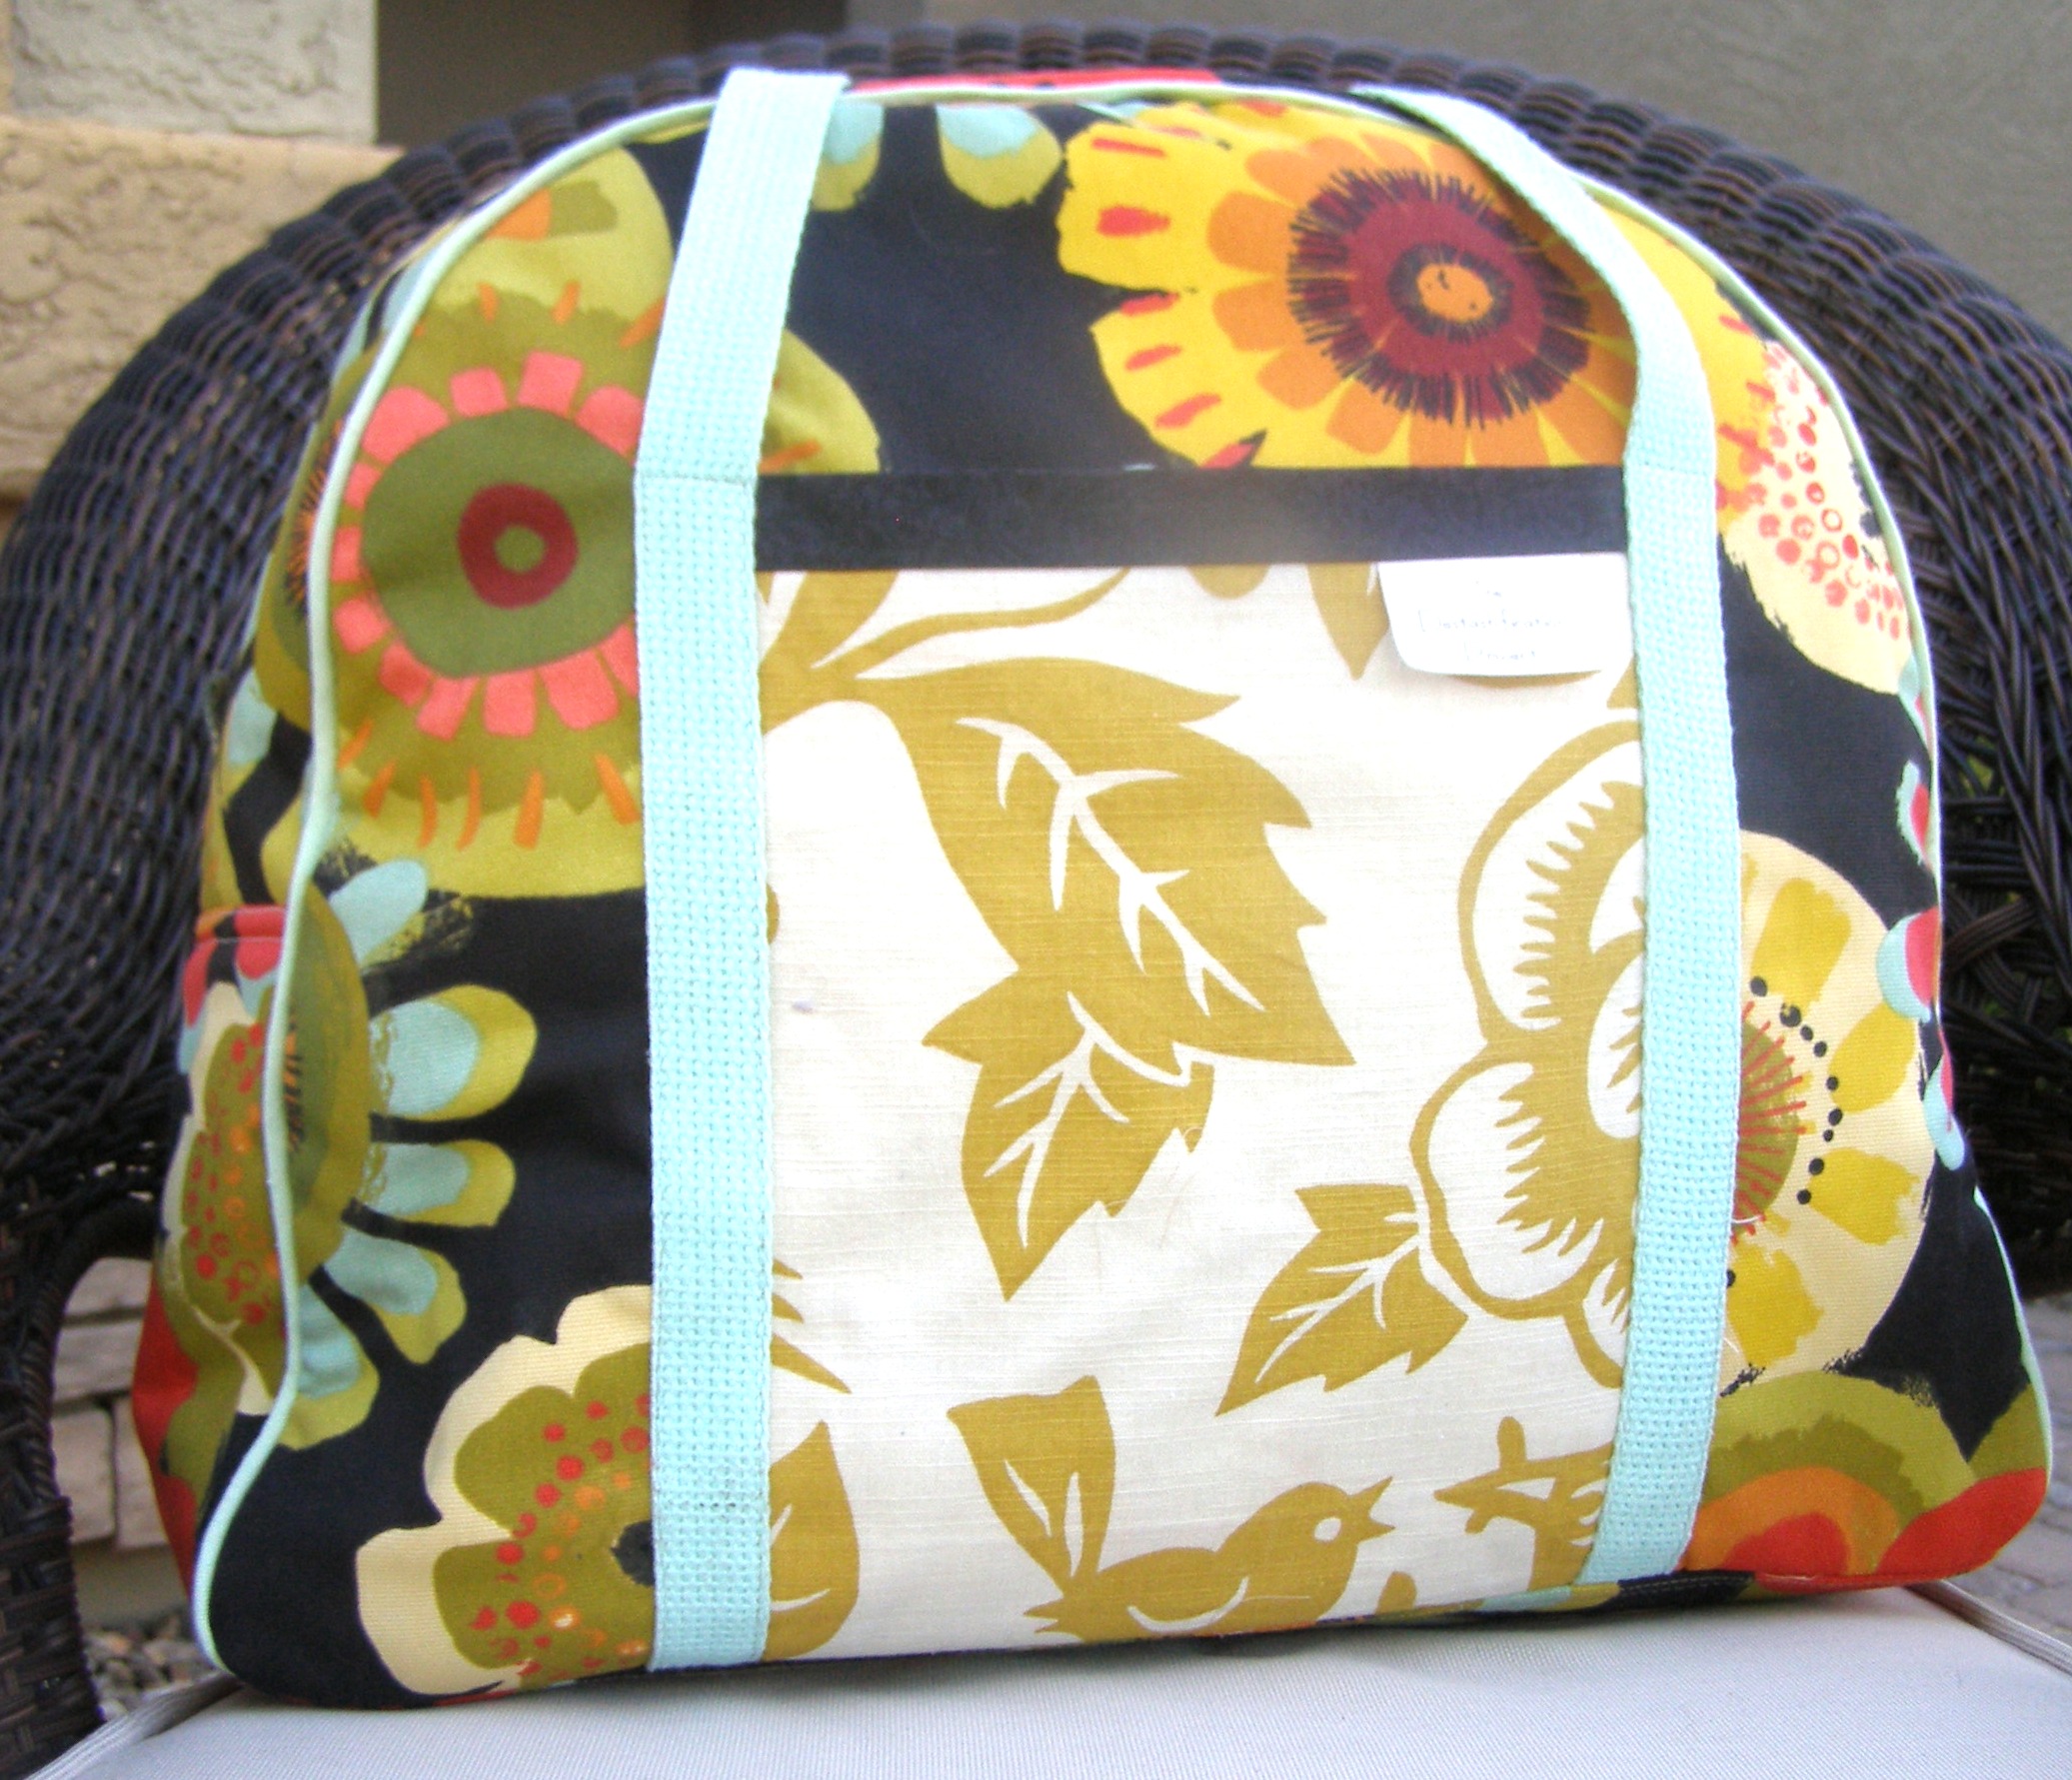
Complete Bag: Pocket with Border
Today’s pockets are lined and feature a single coordinating fabric border – and are perfect for quick access to boarding passes!
Using the Pocket rectangle pattern, cut 2 pockets of selected fabric and 2 of lining fabric. Cut two rectangles of darker fabric 5″ by 9″.
Press 1/2″ of one long edges of the dark rectangle. Then press the rectangle in half lengthwise.
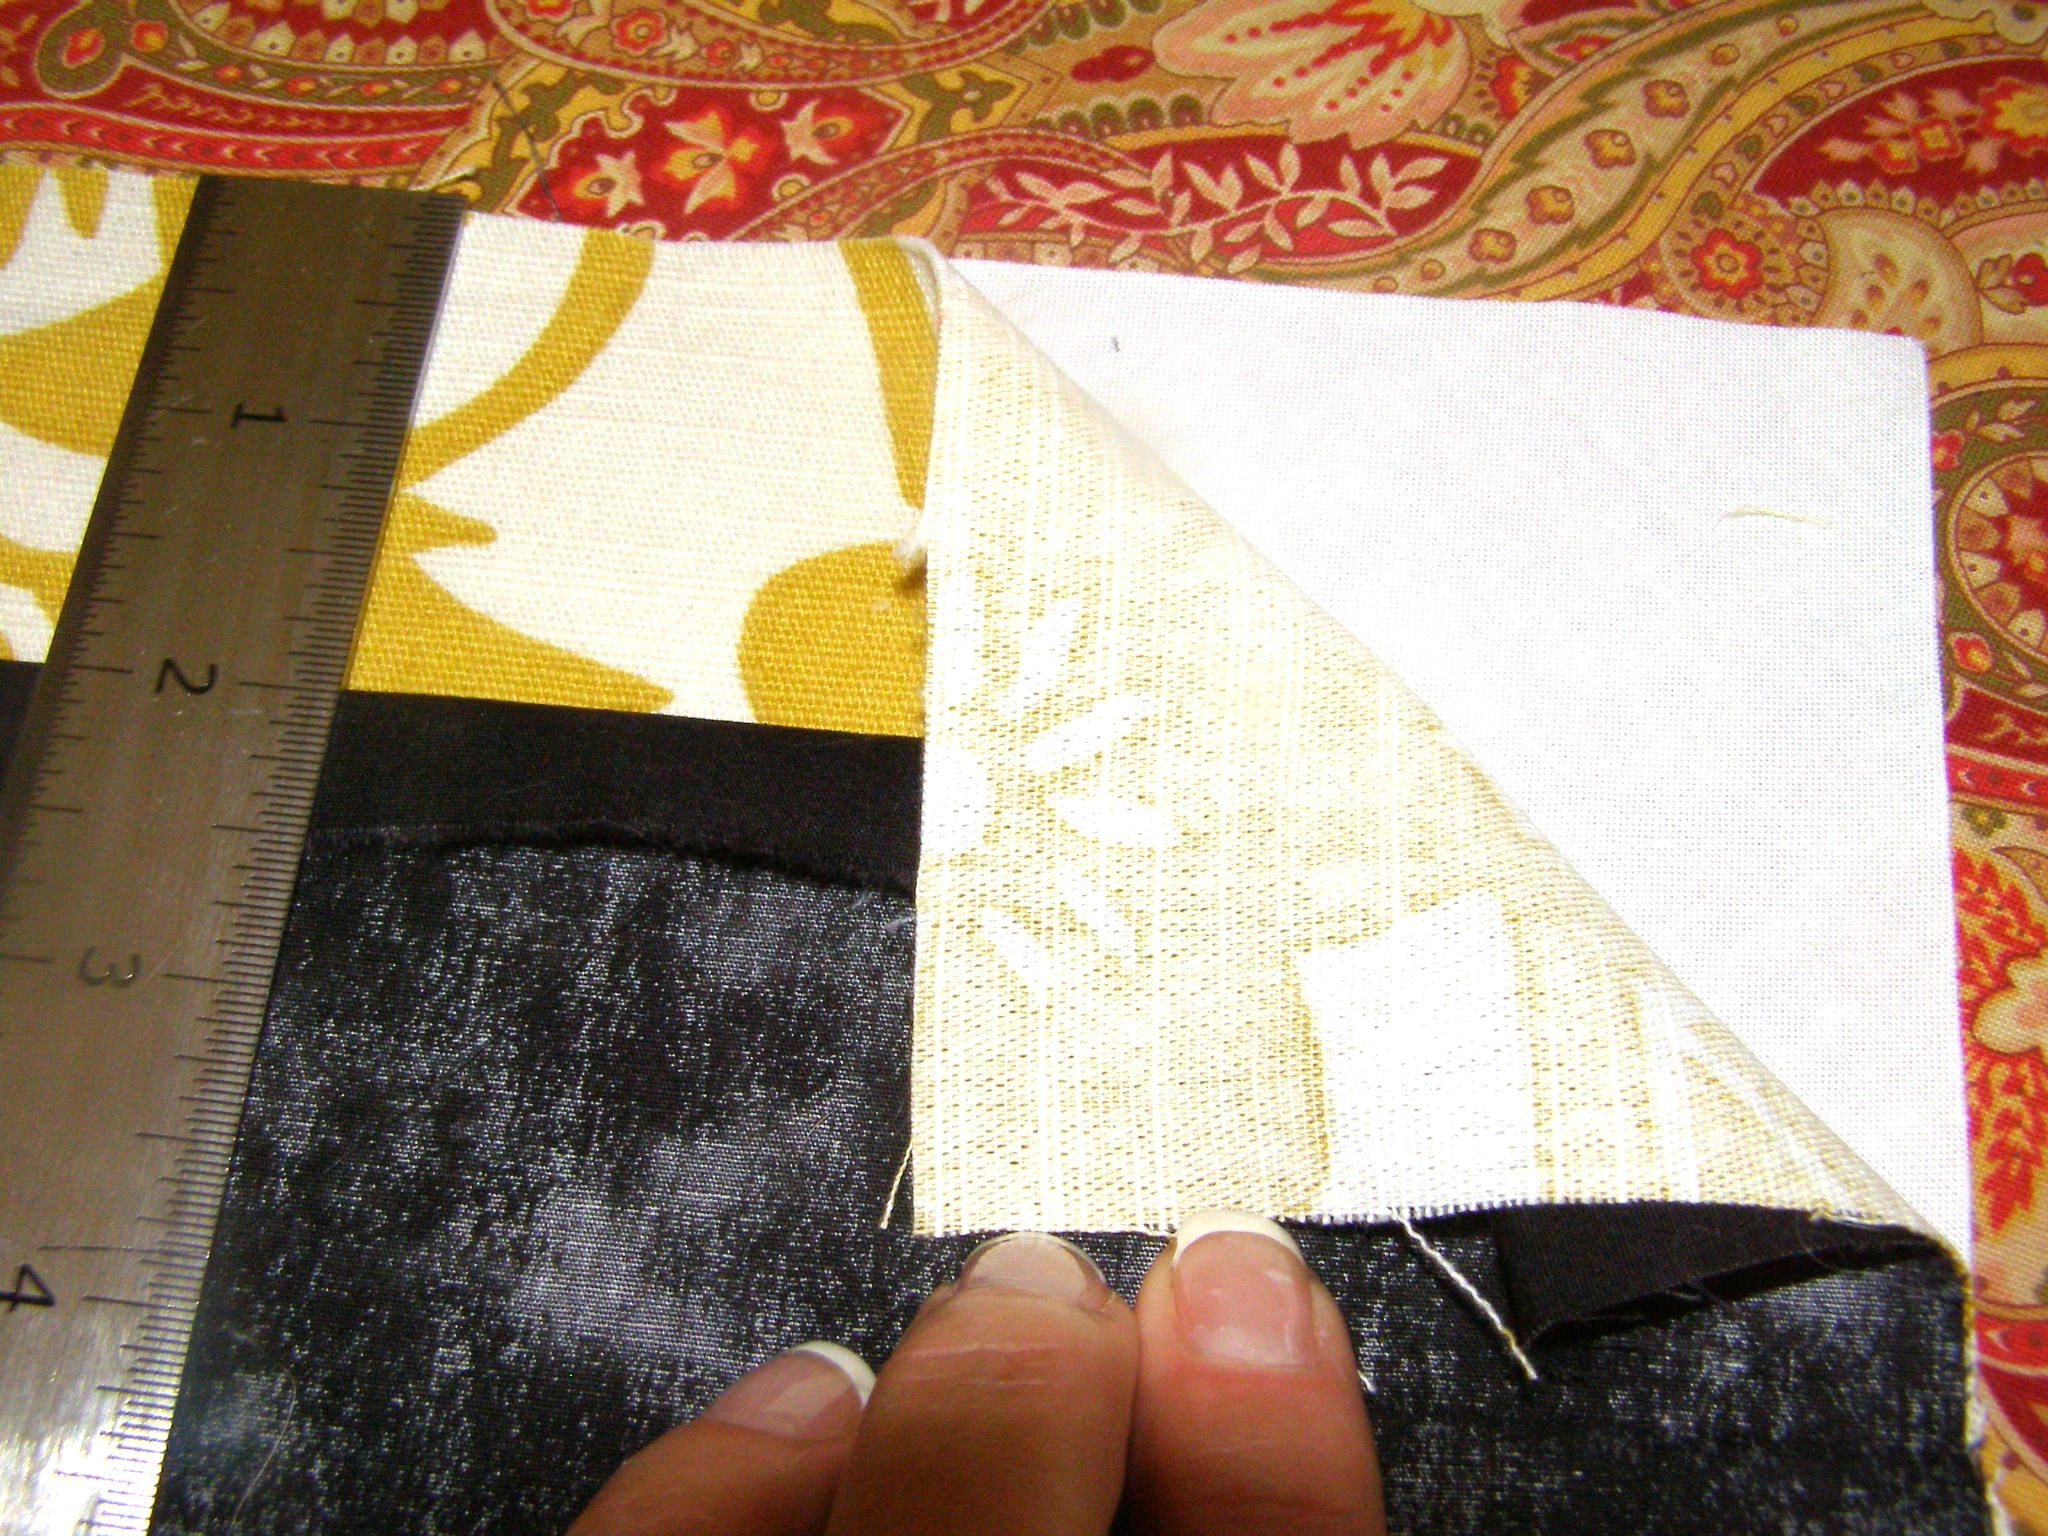
Creating pockets
Place the fabric on top of the lining – wrong sides together as shown in the upper right portion of the photo.
Place folded edge of darker rectangle 2″ from upper edge of pocket and lining – also shown in the lower portion of the photo. Pin to secure.
Unfold 1/2″ fold and sew along pressed line.
Seam of pocket sewn in 1/2′ pressed line.
Press under 1/2″ on other long edge of darker rectangle.
Wrap darker fabric over upper edge of pocket and lining. Pin to lining.
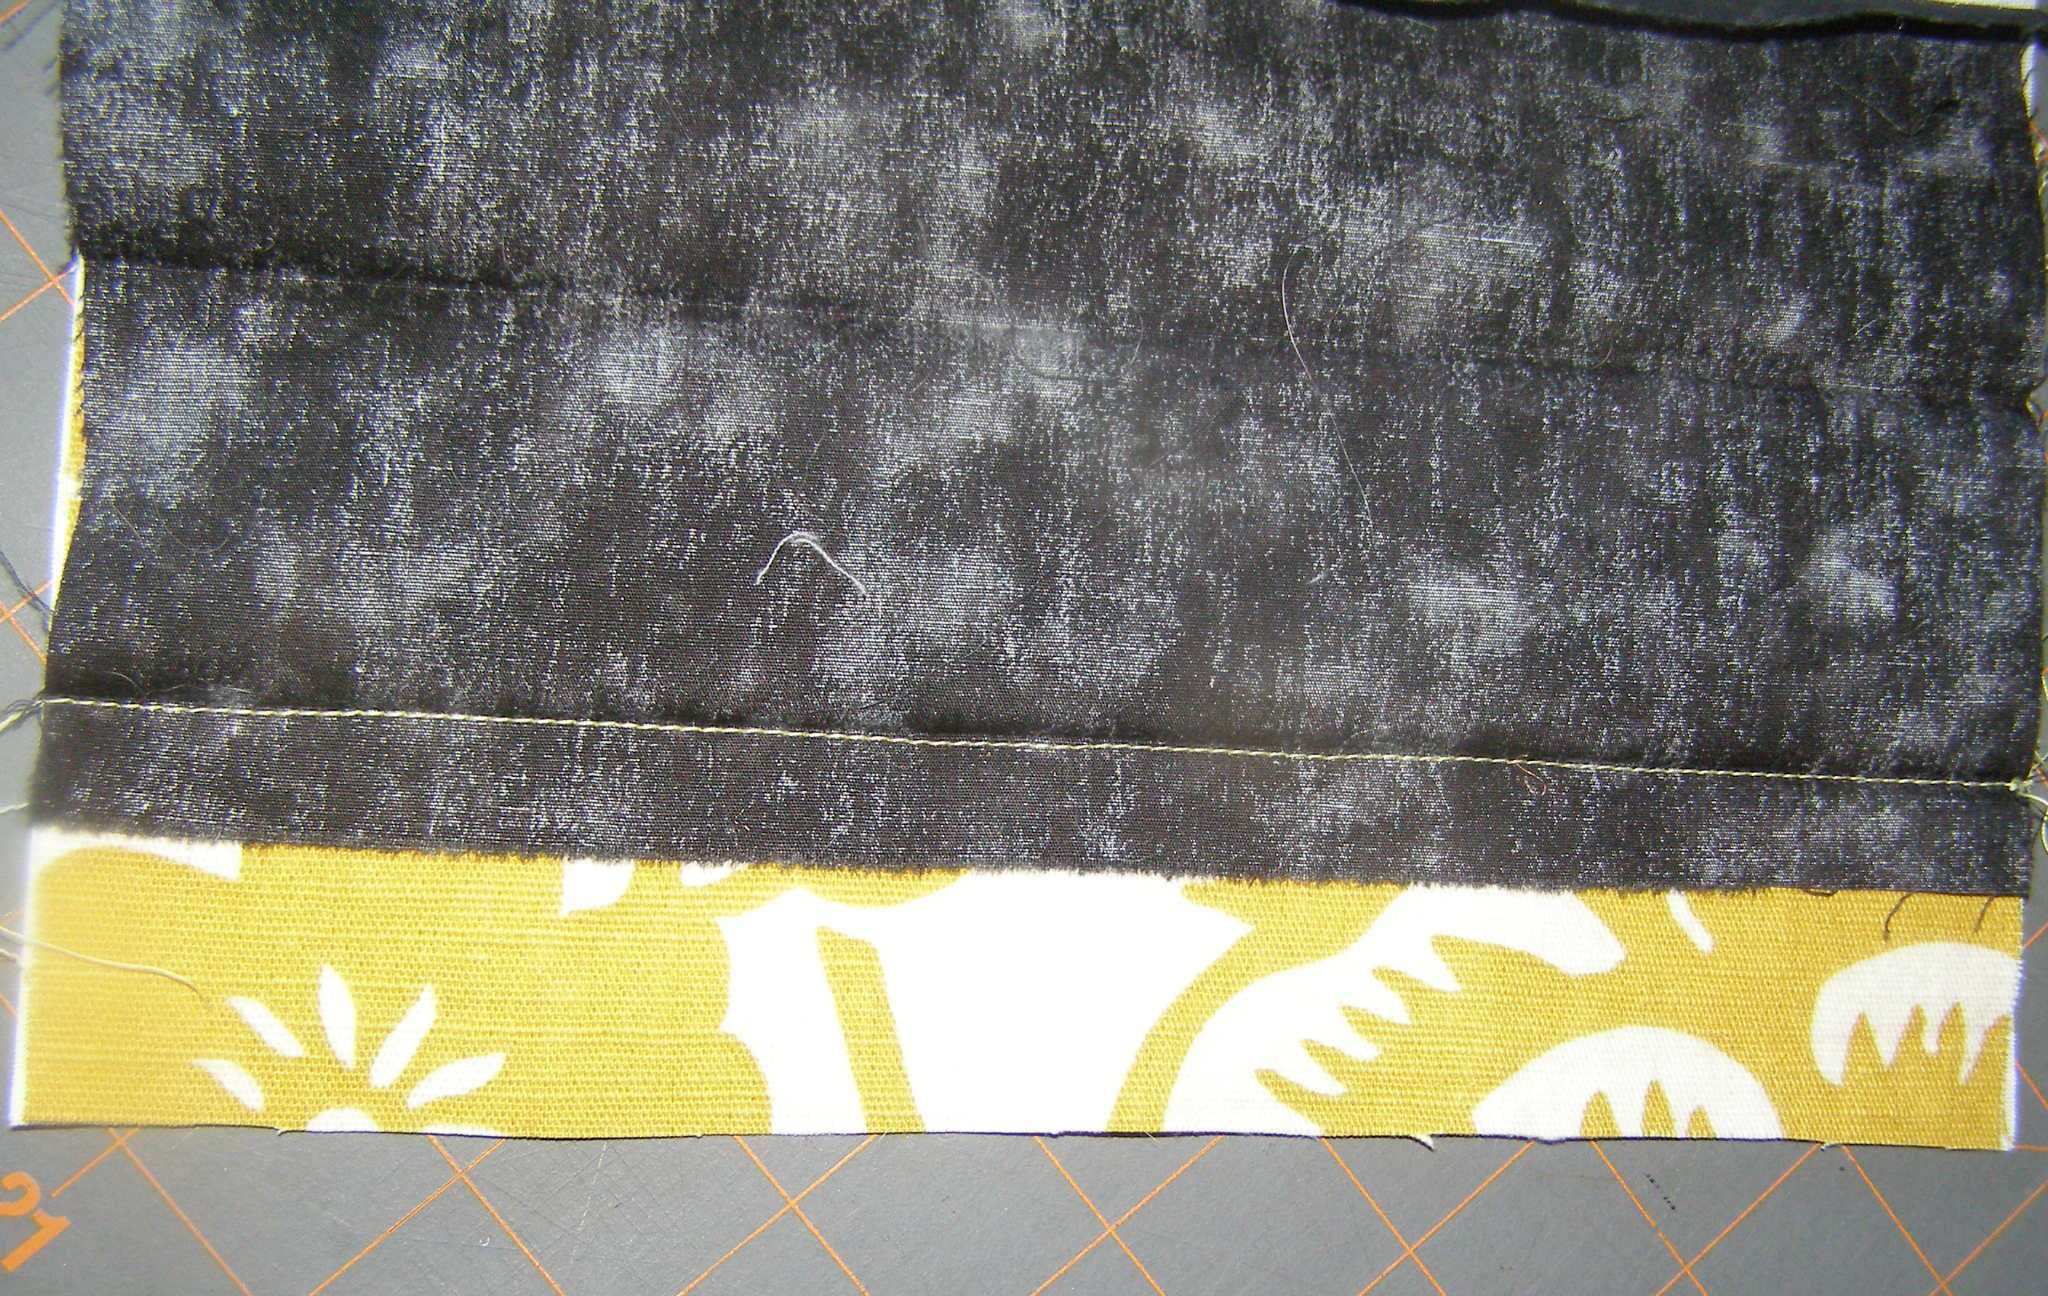
Topstitch upper and lower edges of darker fabric. Topstitch again 1/4′ from first topstiched lines.
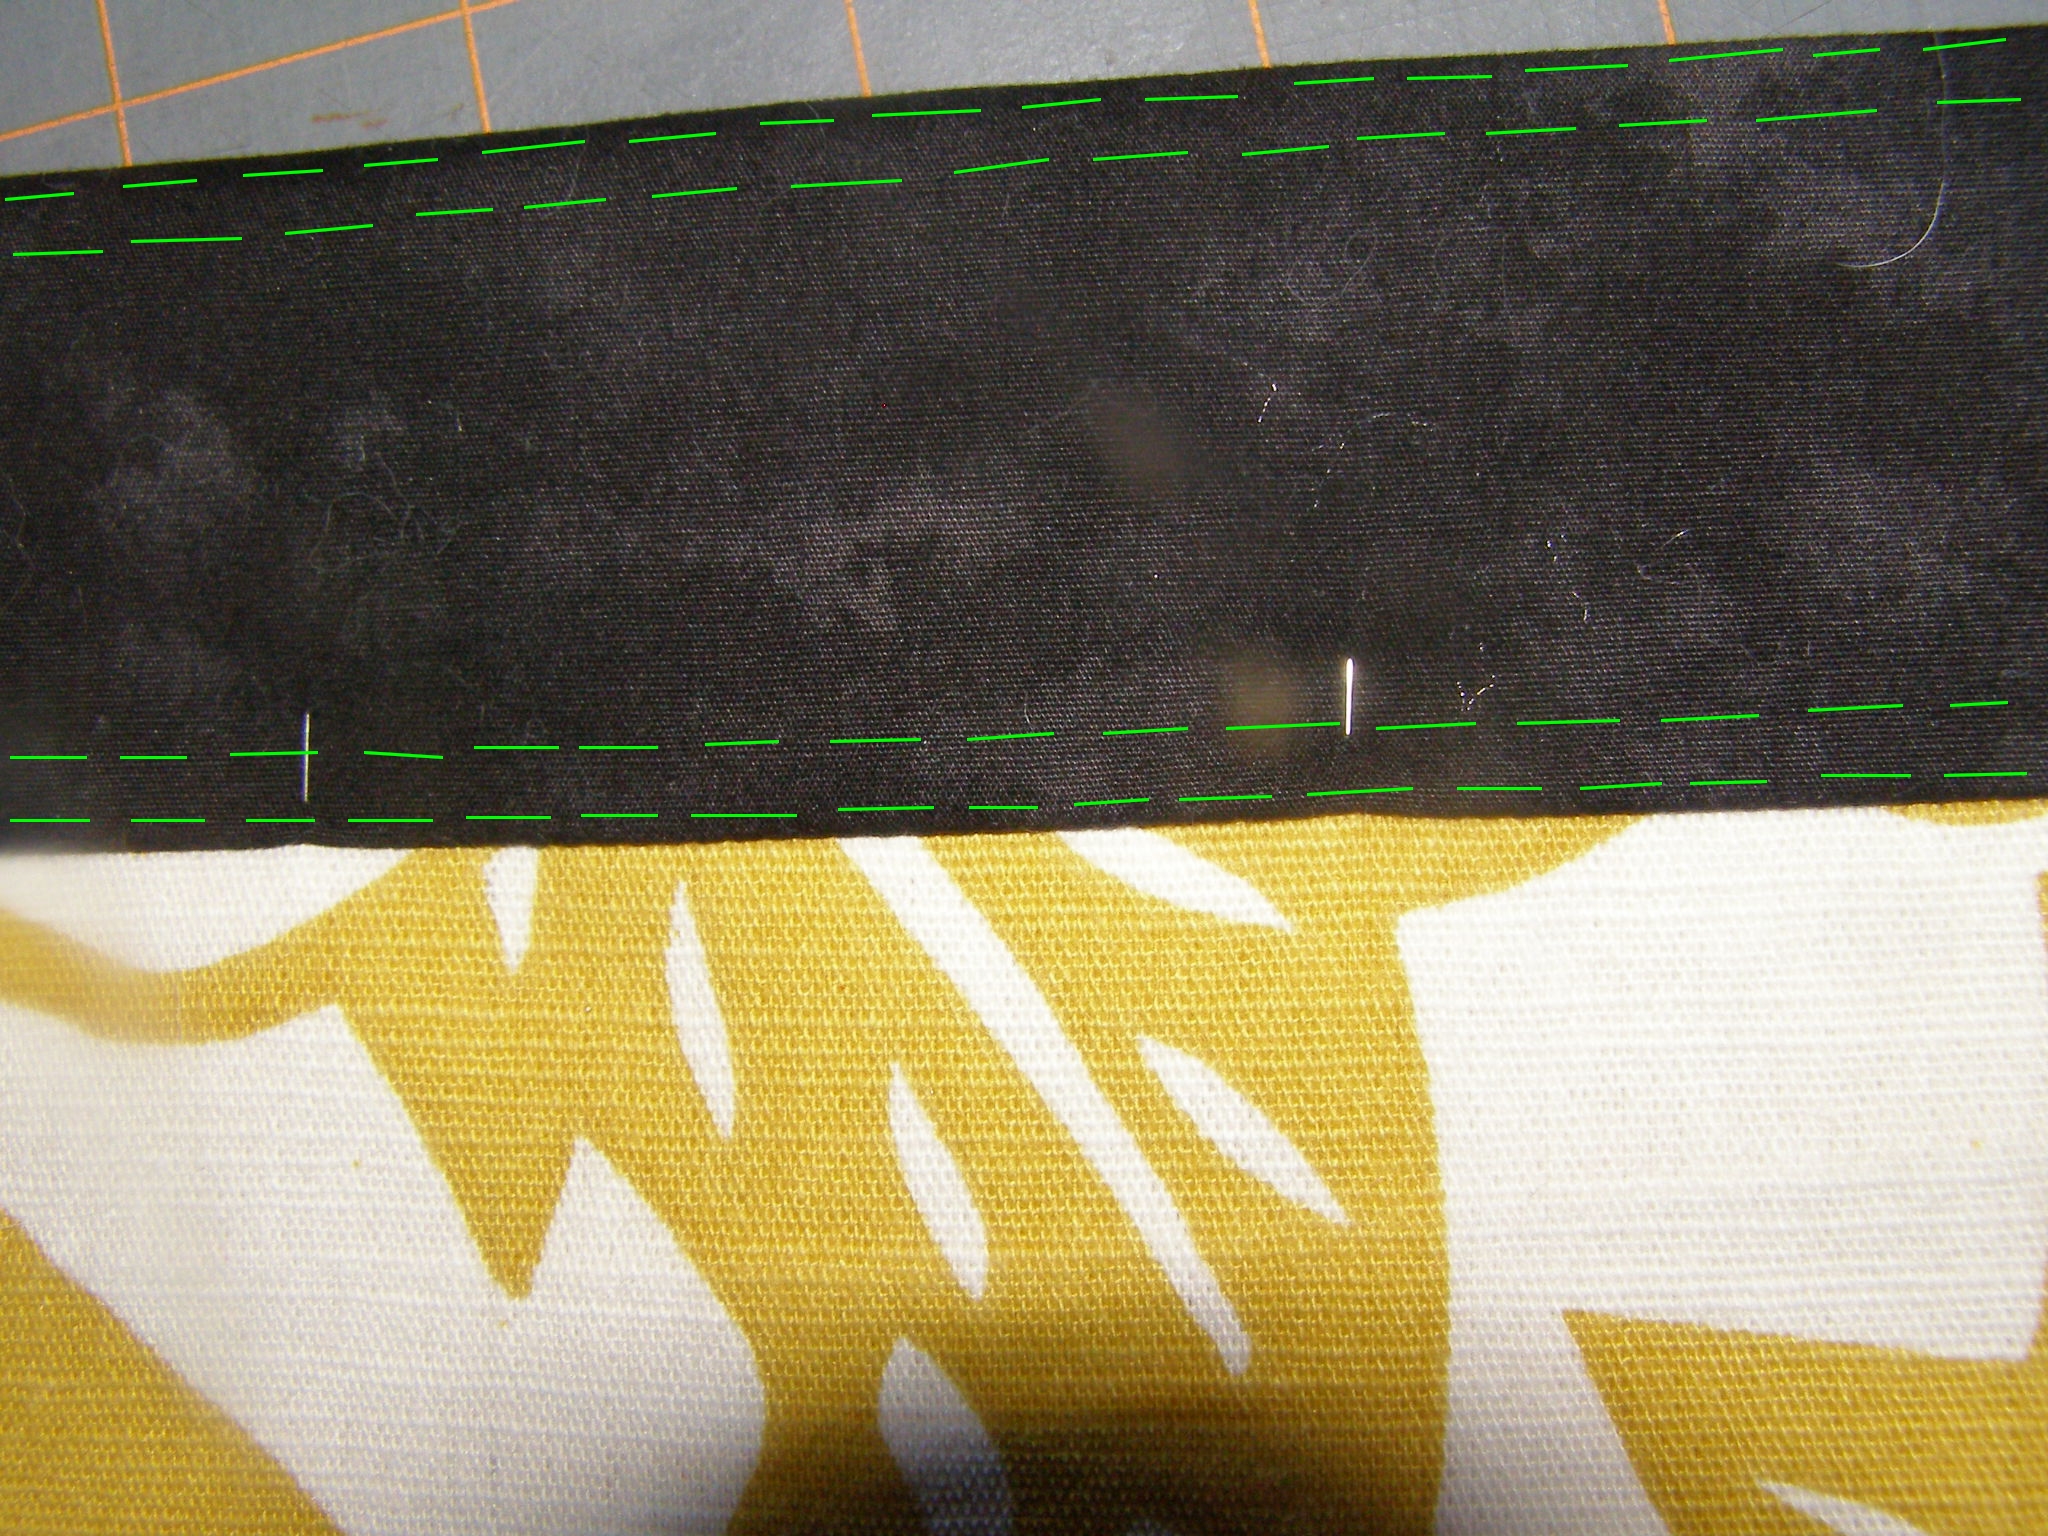
Topstitching lines
Topstitching lines locations are shown as the green dotted lines in photo to the left.
Make another pocket the same way.
Pockets are done! YAY!
Next Post: Sewing the Bag Together.

Thank you for this tutorial! You did a great job — it’s very clear. I am adding this project to my (long) list of bags I MUST make.
Pingback: Blue Bird Bag – Appliqued Overnight Bag | The Destashification Project
Pingback: Giraffe Overnight Bag | The Destashification Project
Thank you so much for this beautiful bag pattern. As soon as I get through some quilts I have committed to do, I am going to make one of these. So awesome.. Thanks again.
Pingback: Black and White and Carried All Over… | The Destashification Project