I envy those quilters that can turn a perfect “scant” 1/4 inch seam.
The engineer in me cannot compute the term “scant.” Engineers use calipers. Engineers measure 3/16″ or 7/32″ or 5.55625 millimeters, but “scant” is not in our vocabulary.
I was asked for a quilt by one of my children. Even if it weren’t Mother’s Day the answer would still have been “Of course – what colors?”
The timeline is a bit restrictive, so intricacy and curved piecing were out. Something about the simplicity and angles of the Ohio Star Block has always spoken to me.
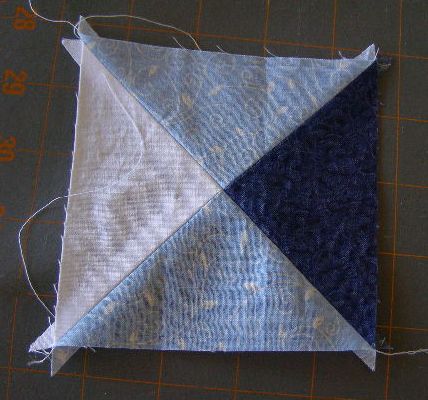
One set of “Points” – each block requires 4 of these.
Part 1 of this tutorial describes the steps to make the “points” of the star using a Math-Free Half Square Triangle method. Part 2 will describe putting the block together (also Math-Free)
Only four seams are required to make the 4 sets of points required for each block!
And all seams a done following a straight line drawn on the fabric!
Sew Simple!
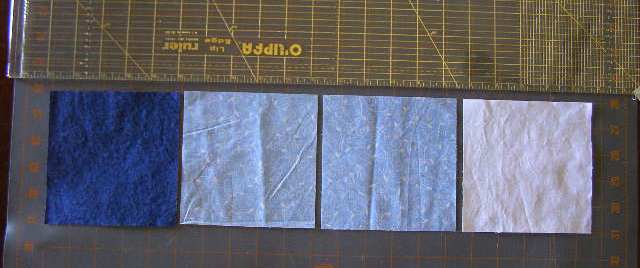
Start with four 5″ squares
Required for each set of points for a finished 9″ block:
- One 5″ square of white fabric
- Two 5″ squares of light blue fabric
- One 5″ square of dark blue fabric
Why 5″? Well, we could do the math. It involves square roots, fractions, and angles…but this is Math-free quilting. And besides, my ruler was 5″ wide.
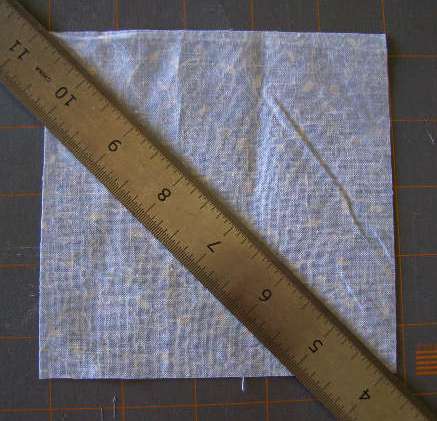
Use a straight edge to draw a diagonal line one THE BACK of each light blue square.
1. Take the two light blue squares and turn them BACK SIDE UP.
Diagonal line drawn on BACK SIDE of light blue square.
2. Using a straight edge, ON THE BACK, draw a diagonal line across each one. (I used a ruler, any straight edge will do – there is no measuring.)
A ball point pen or a pencil (engineers prefer mechanical pencils) will do. I do not recommend gel pens, crayons, glitter pens or permanent markers.
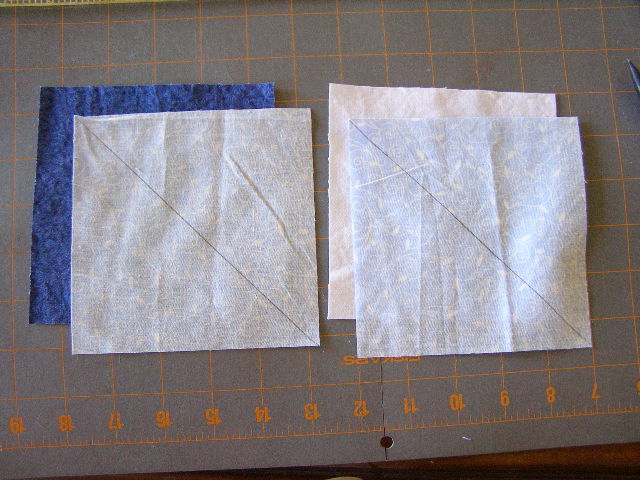
Place light blue squares on top of other squares – right sides together.
3. Place one light blue square on top of the white square and the other on top of the dark blue square.
In the photo the underlying fabric is showing so the colors of the fabric can be seen. Place the light blue squares directly on top of the underlying fabric aligning edges.
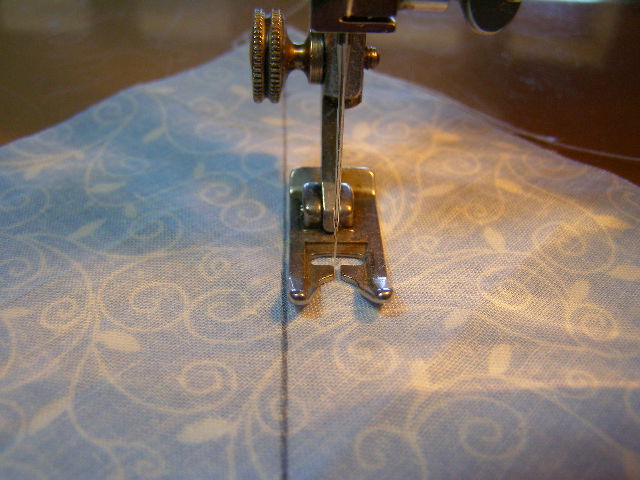
Sew approximately 1/4″ from line – on each side of line.
4. Take a square set to the sewing machine and sew approximately 1/4″ (I use the width of my pressure foot – it is close enough!) from the drawn line. Then turn square around and sew 1/4″ from the line – on the other side of the line!
Seams 1/4″ on both sides of the drawn line.
Love a pressure foot that is approximately 1/4″ !
5. Repeat for second set of squares.
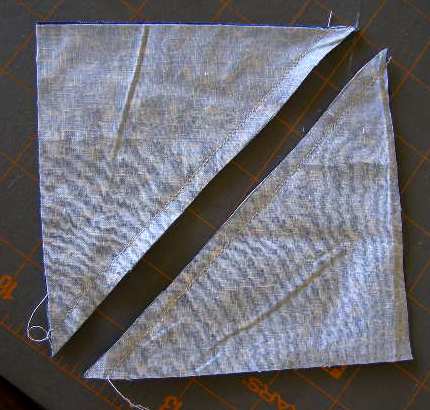
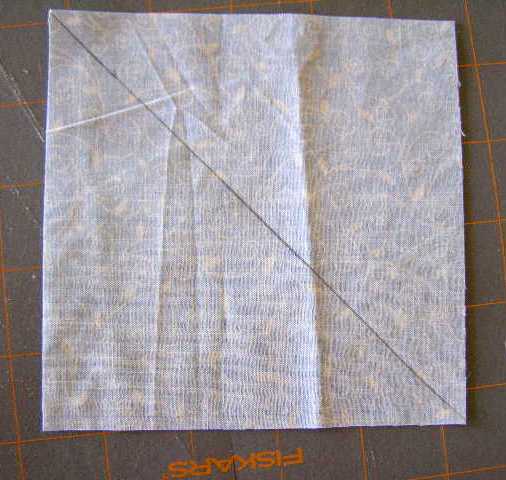
Cut along drawn line!
6. This is the exciting part: Cut along the drawn line!
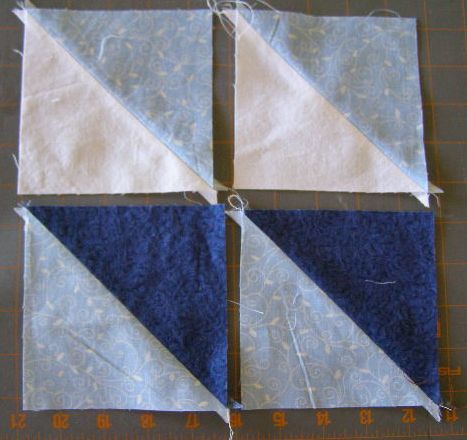
Viola! Four triangle squares!
7. Open both to reveal four squares of triangles! Press seams open.
Congratulate yourself! You are half done!

Draw diagonal lines across the BACK of the white/light blue squares.
8. Take the two white/light blue squares and drawn diagonal lines across THE BACK, using a straight edge.
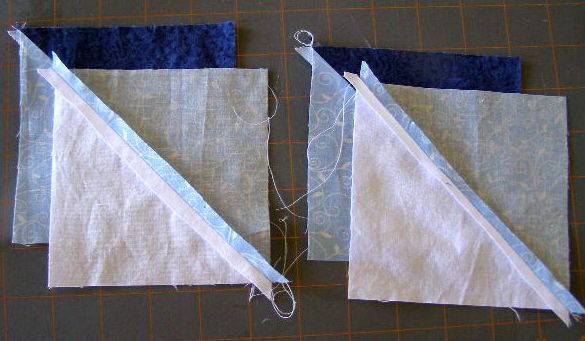
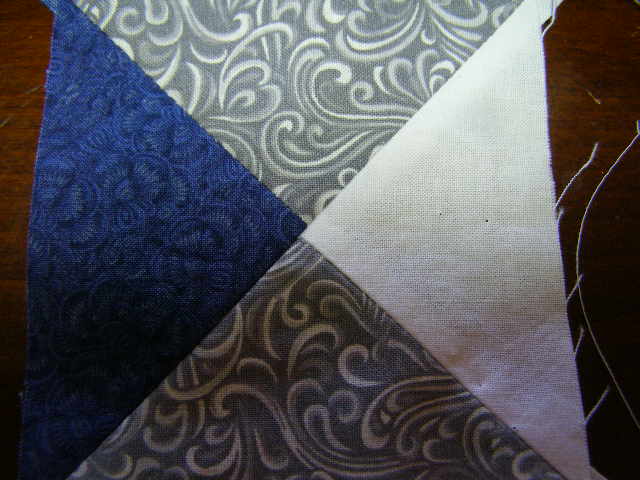
Layering squares. Light blue triangles should not touch.
9. Place each white/light blue on top of one of the dark blue/light blue squares. The light blue fabrics should NOT be on top of each other.
Again, in the photo the underlying fabrics are shown to show color placement – the edges of the squares should align prior to sewing.

Poke a pin straight through
10. Poke and Pin: Poke a pin straight up and down through the point the drawn line crosses the seam of the white/light blue square. Then make sure it pokes straight through the seam line of the dark blue/light blue square – in approximately the middle of the square.
This ensures the two seams align – resulting in those perfect points!
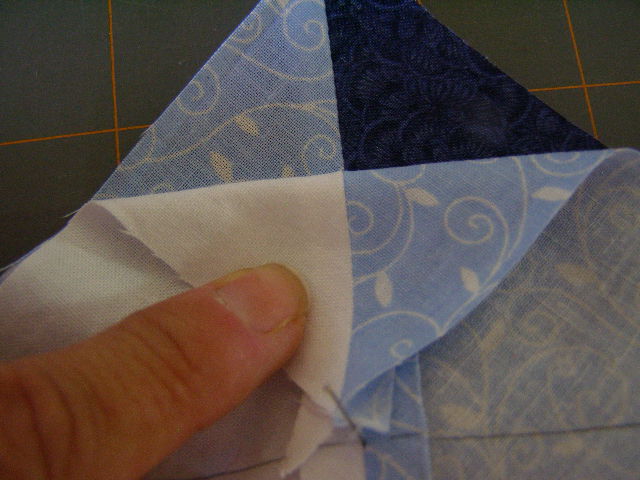
Lift top square edge to verify seams align.
11. Without moving the Poked Pin – lift the edges of the squares to verify seams align (and also to verify that the light blue fabrics are on opposite sides.)
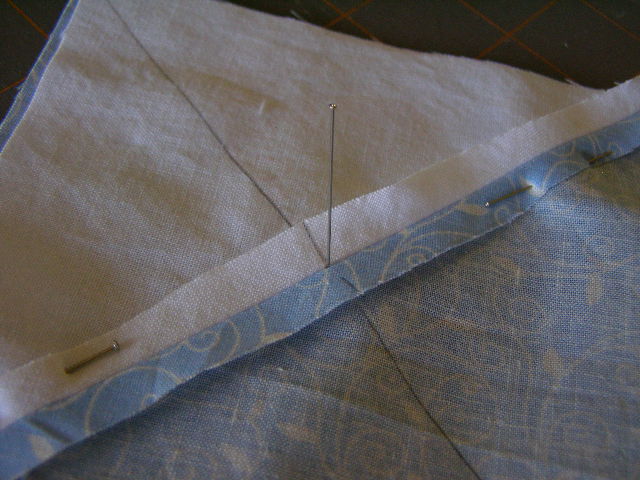
Poked and Pinned.
12. Without moving the Poked Pin – pin the square together – but no closer than 1″ from Poked Pin.
Why no closer than 1″ from the Poked Pin? It took me a while to figure this out, but the act of pinning actually slides the top fabric. The Poked Pin is marking the “points” which are to match. Pinning too close to it will pull the top fabric away causing the “points” to no longer align. (See Trouble Shooting at end of this post)
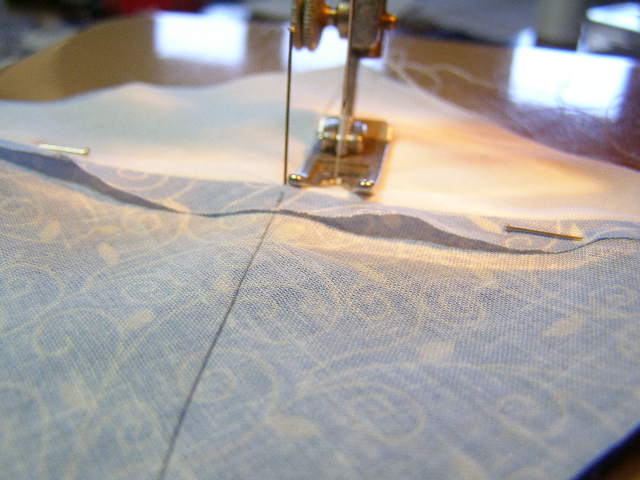
Leaving Poke Pin in until pressure foot is very close.
13. Return to sewing machine and sew 1/4″ (or pressure foot width) from the drawn line.
I leave the Poked Pin in and vertical until it approaches the pressure foot. Pulling it out too early may allow the top fabric to slide.
14. Turn square around and sew 1/4″ from drawn line on other side of line.
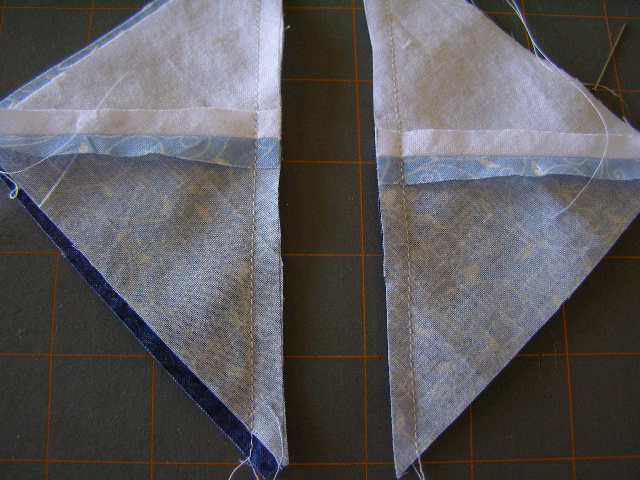
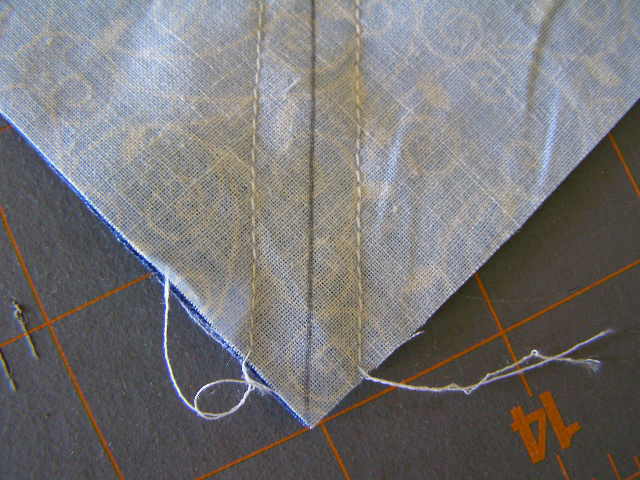
Cut along drawn line.
15. Open to double check that points align – then cut along drawn line. (Scroll down to Trouble Shooting if they do not align)
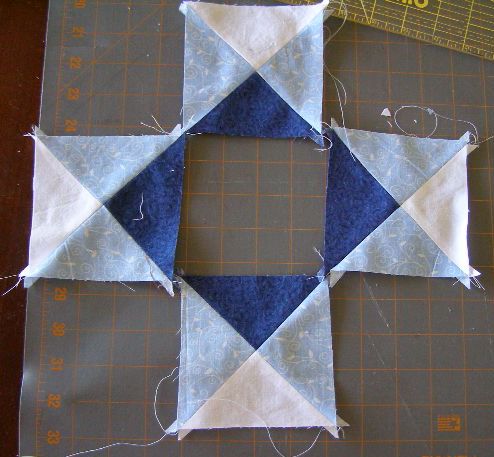
Four Perfect Points all set for Part 2: Math Free Ohio Star Finishing.
16. Press seam allowances open.
17. Celebrate!
Four Seams = Four Points!
When Points do not align
Trouble Shooting:
If the points do not align, remove the seams prior to cutting triangles apart.
Press with iron.
Reposition the Poked Pin carefully ensuring it passes through the seams of both squares and restitch.
If the points do not align and the triangles were already cut apart – remove seam and loose threads carefully. Press with iron. Place scotch tape over the stitching line (it will prevent the bias edges of the triangles from distorting). Carefully Poke a Pin through the seams of both squares. Pin and restitch. Remove scotch tape prior to pressing (or you will need a new iron for Mother’s Day!)