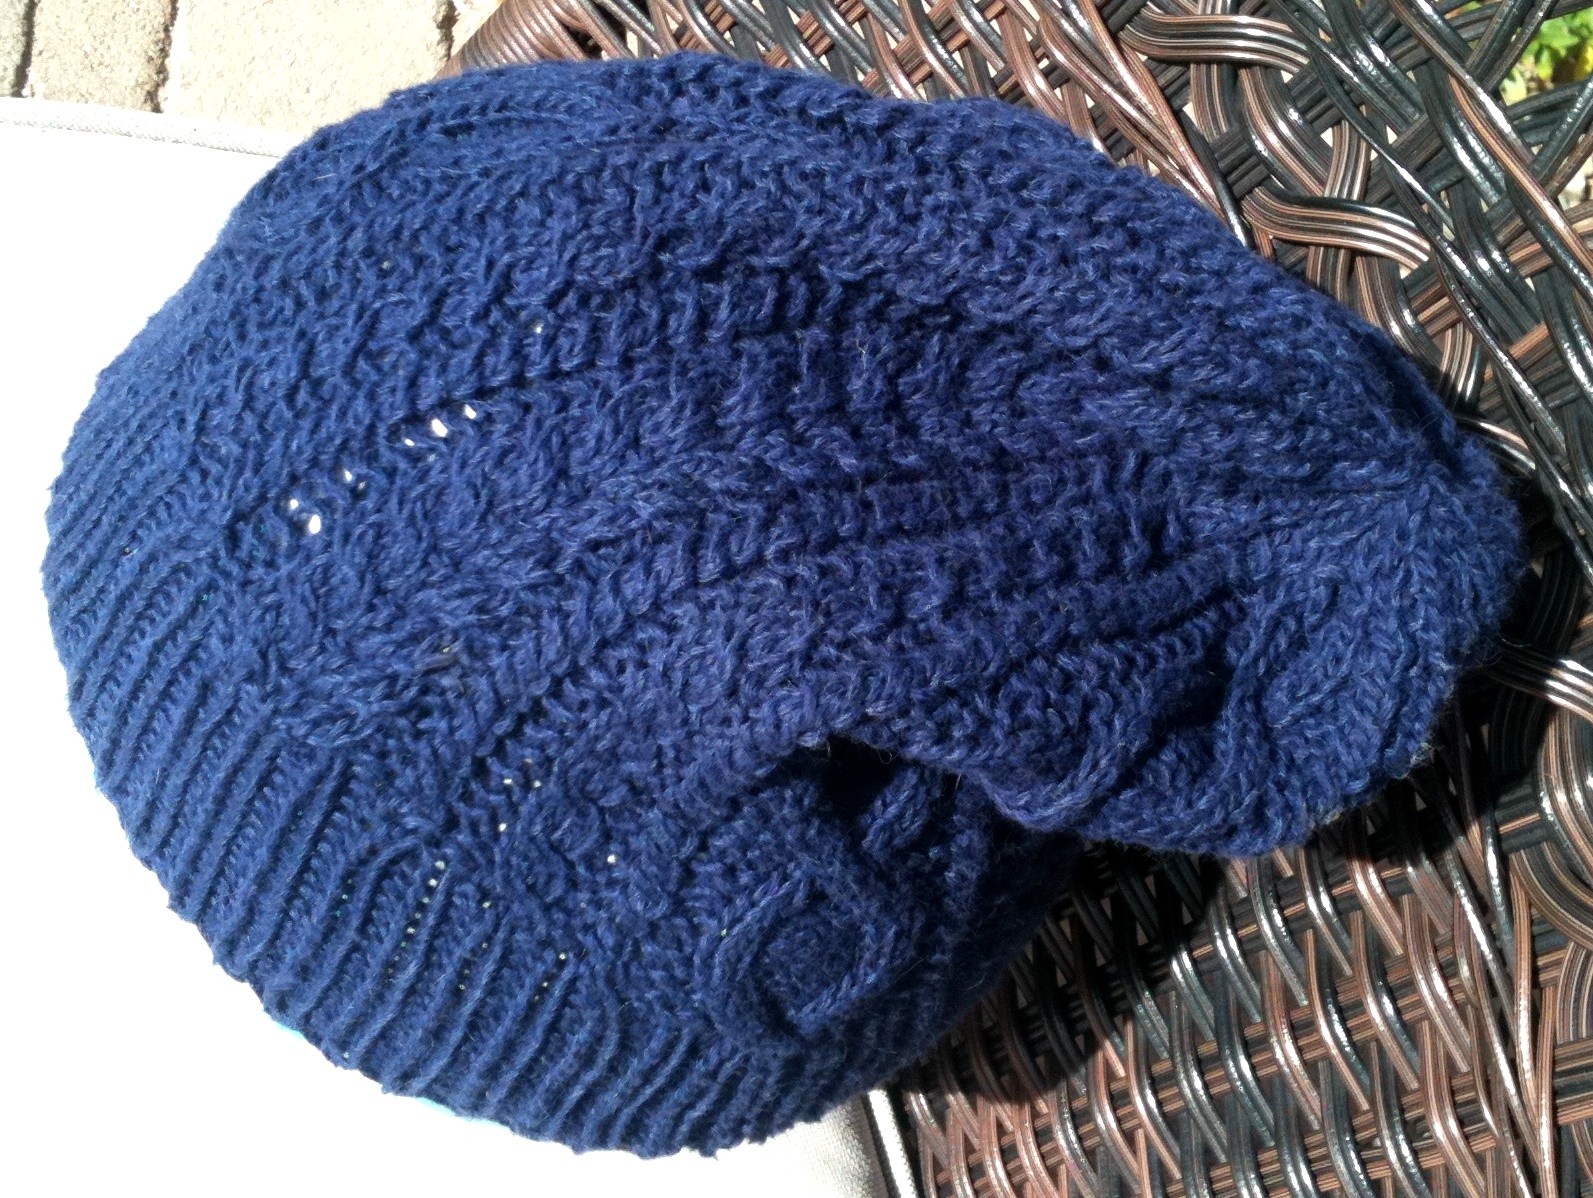
Blue Cabled Hat
Cables in a knitting project add a bit of fun!
It is always fascinating to watch how a few twists of the stitches produce beautiful Aran patterns.
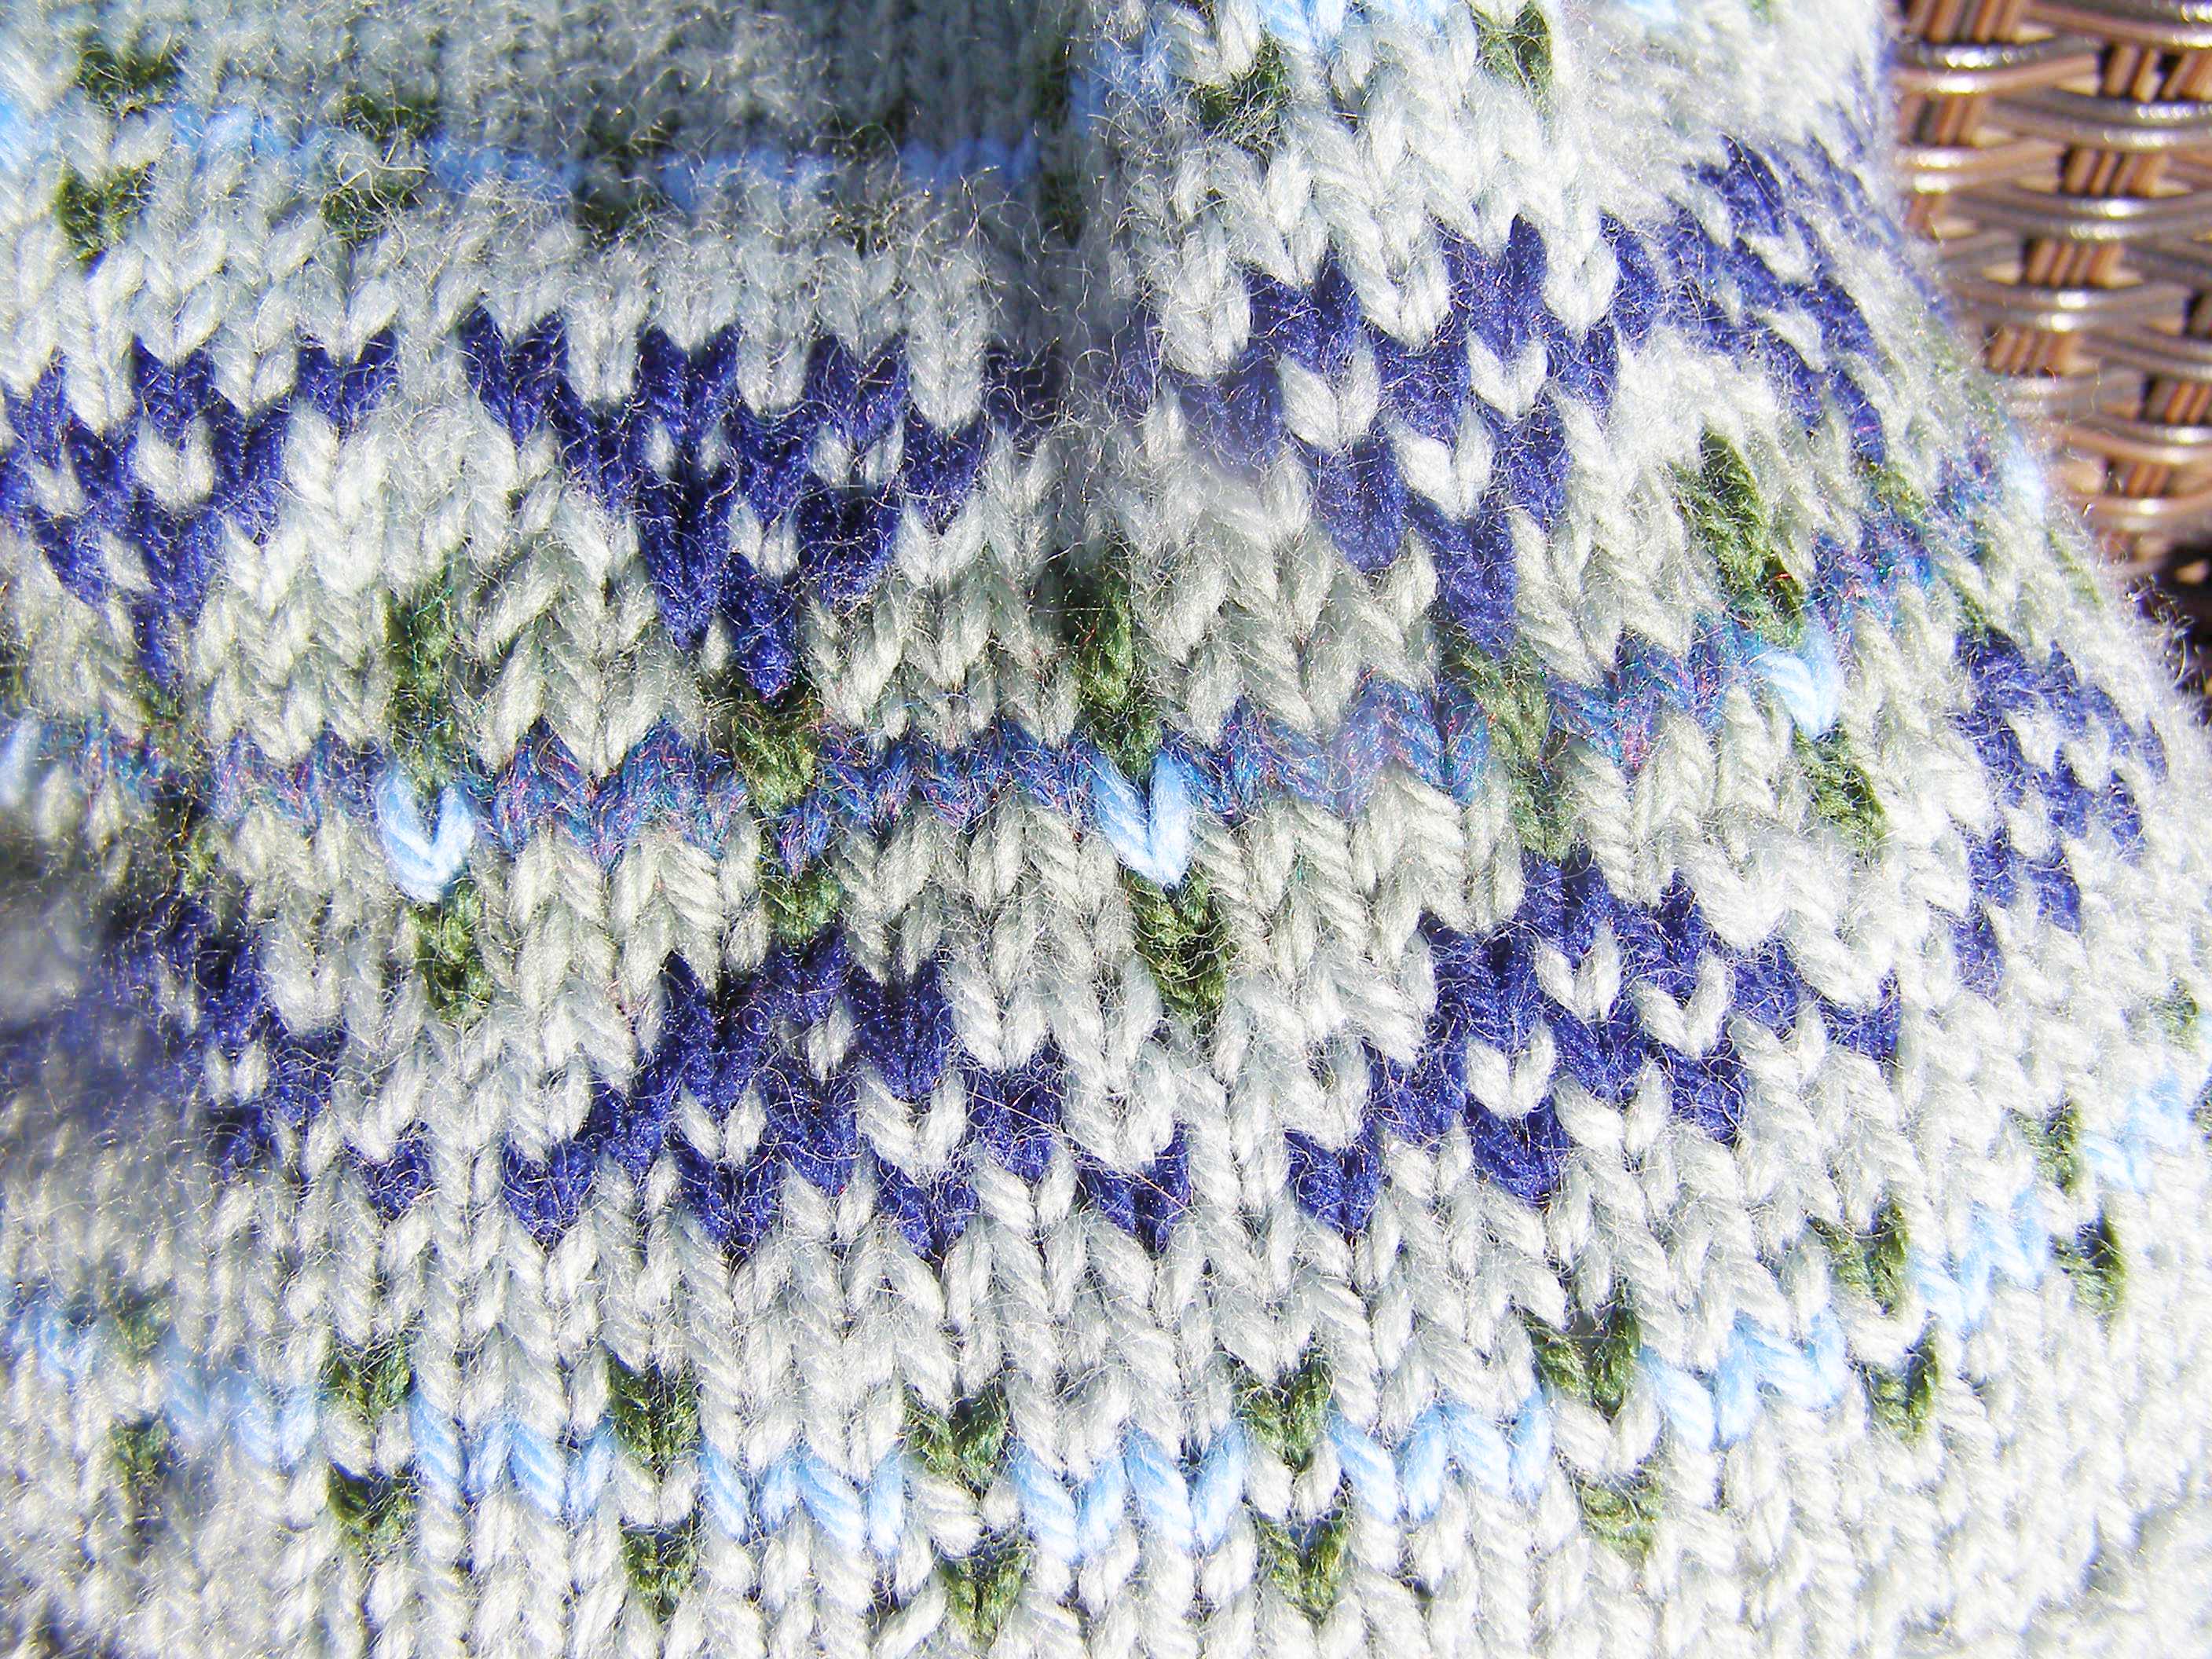
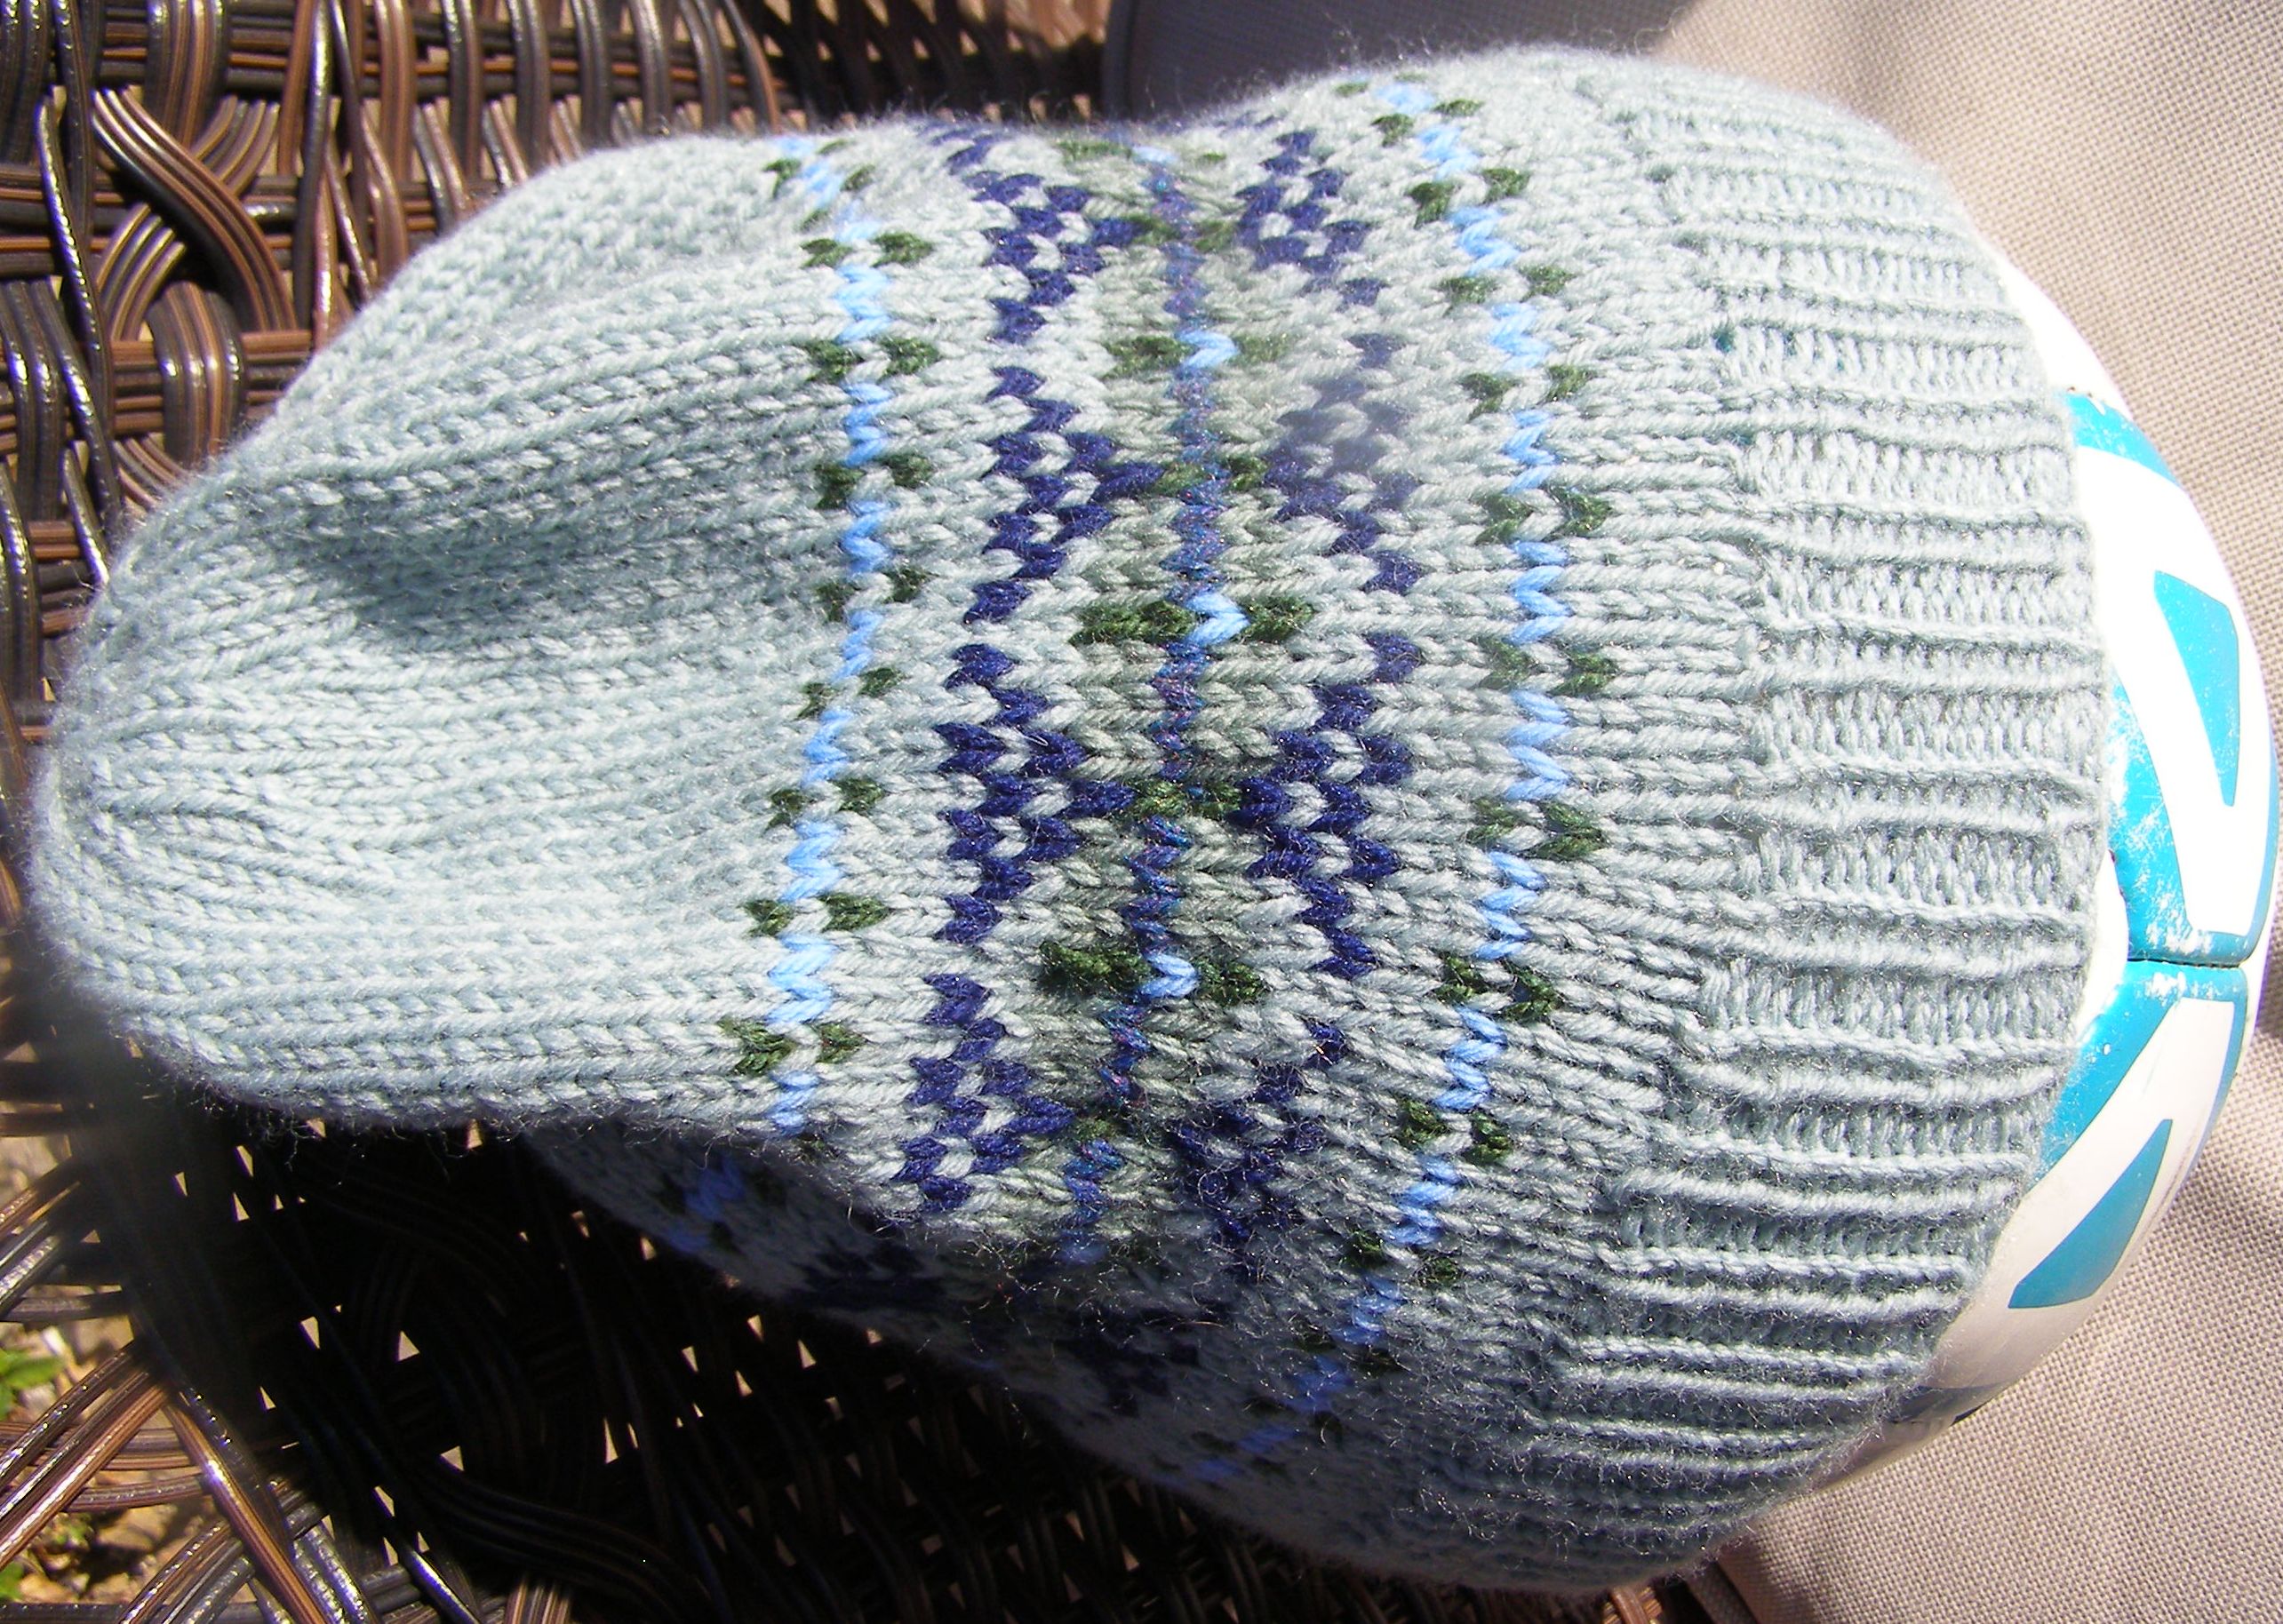
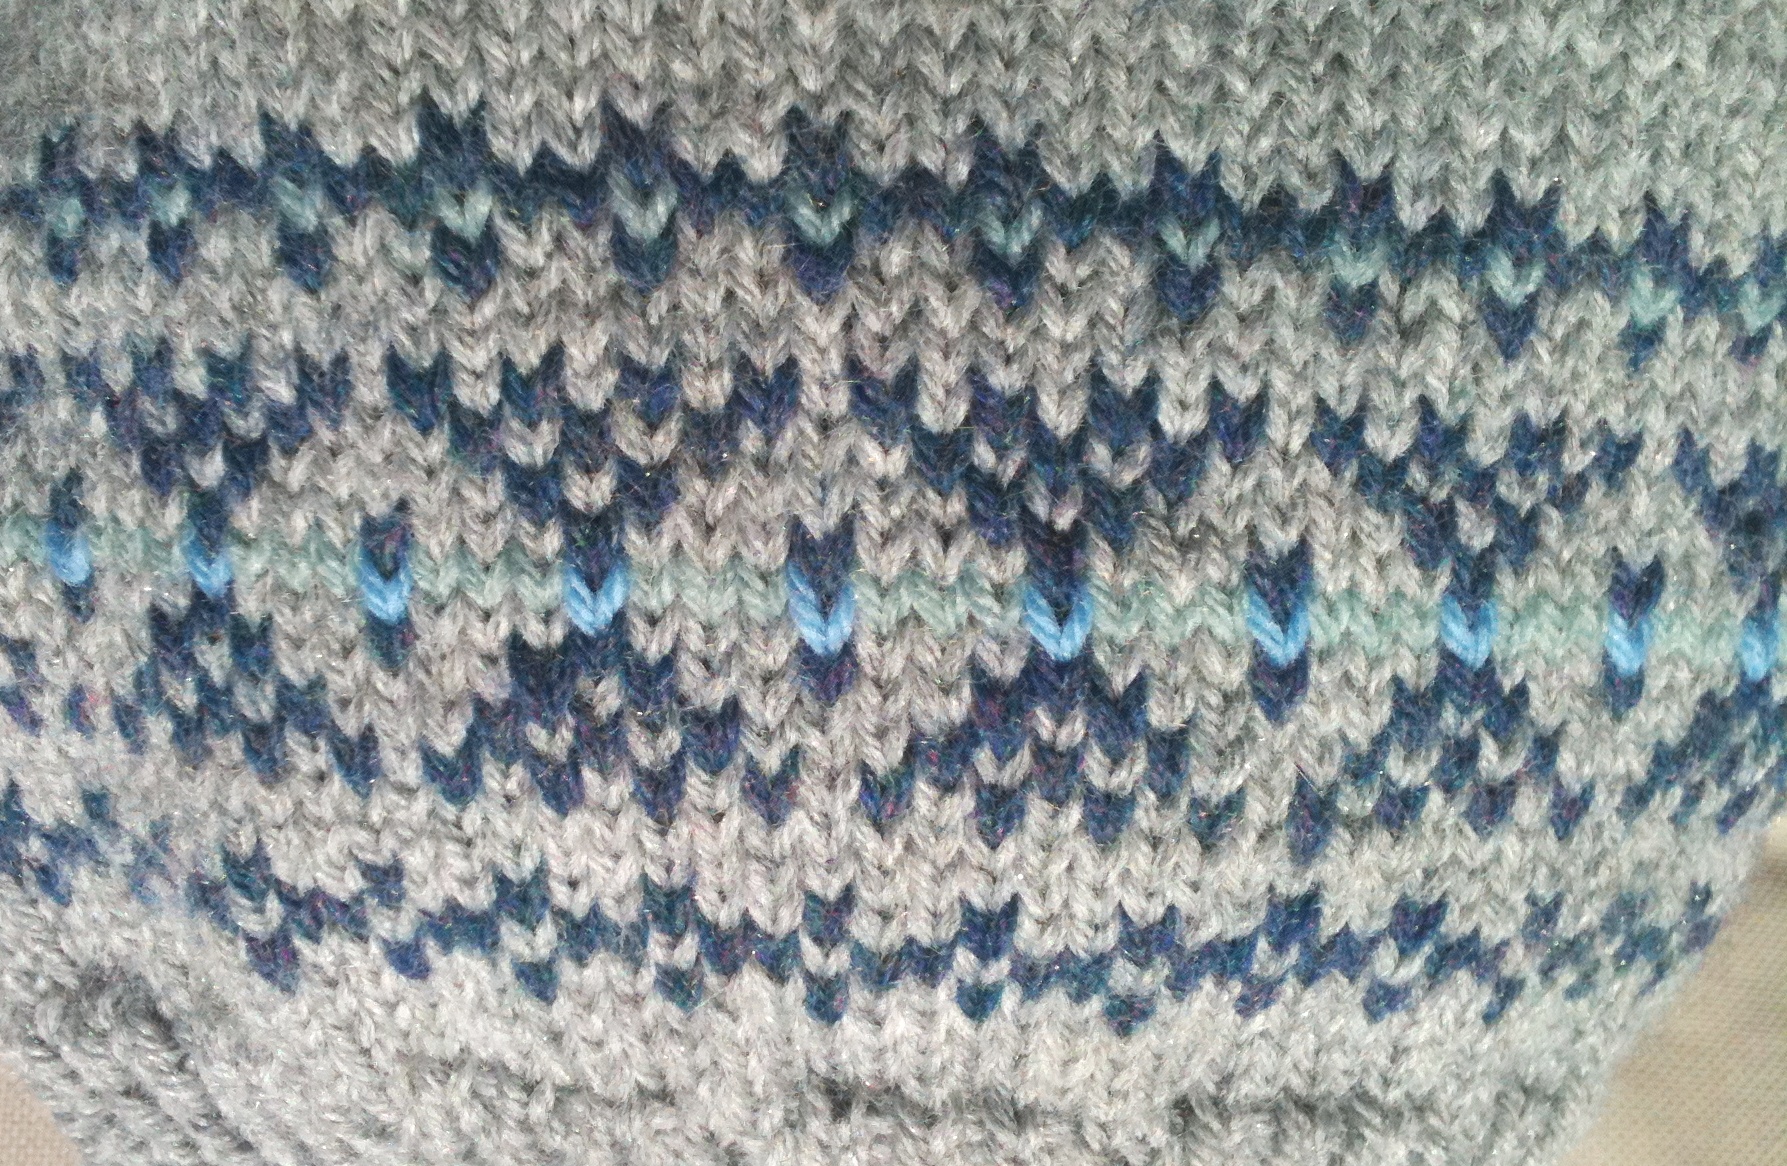
This Stash Couture hat includes four different cables that work in heavy (green) and light (blue) worsted weight yarns. The hat is knit in the round on size 5 (blue) or size 6 (green) 16″ needles.

Decreases
Gauge for the green hat: 24 rows (2 repeats) of Cable Links = 4 inches long and 1.5″ wide.
Gauge for the blue hat: 24 rows (2 repeats) of Cable Links = 3 inches long and 1.5″ wide.
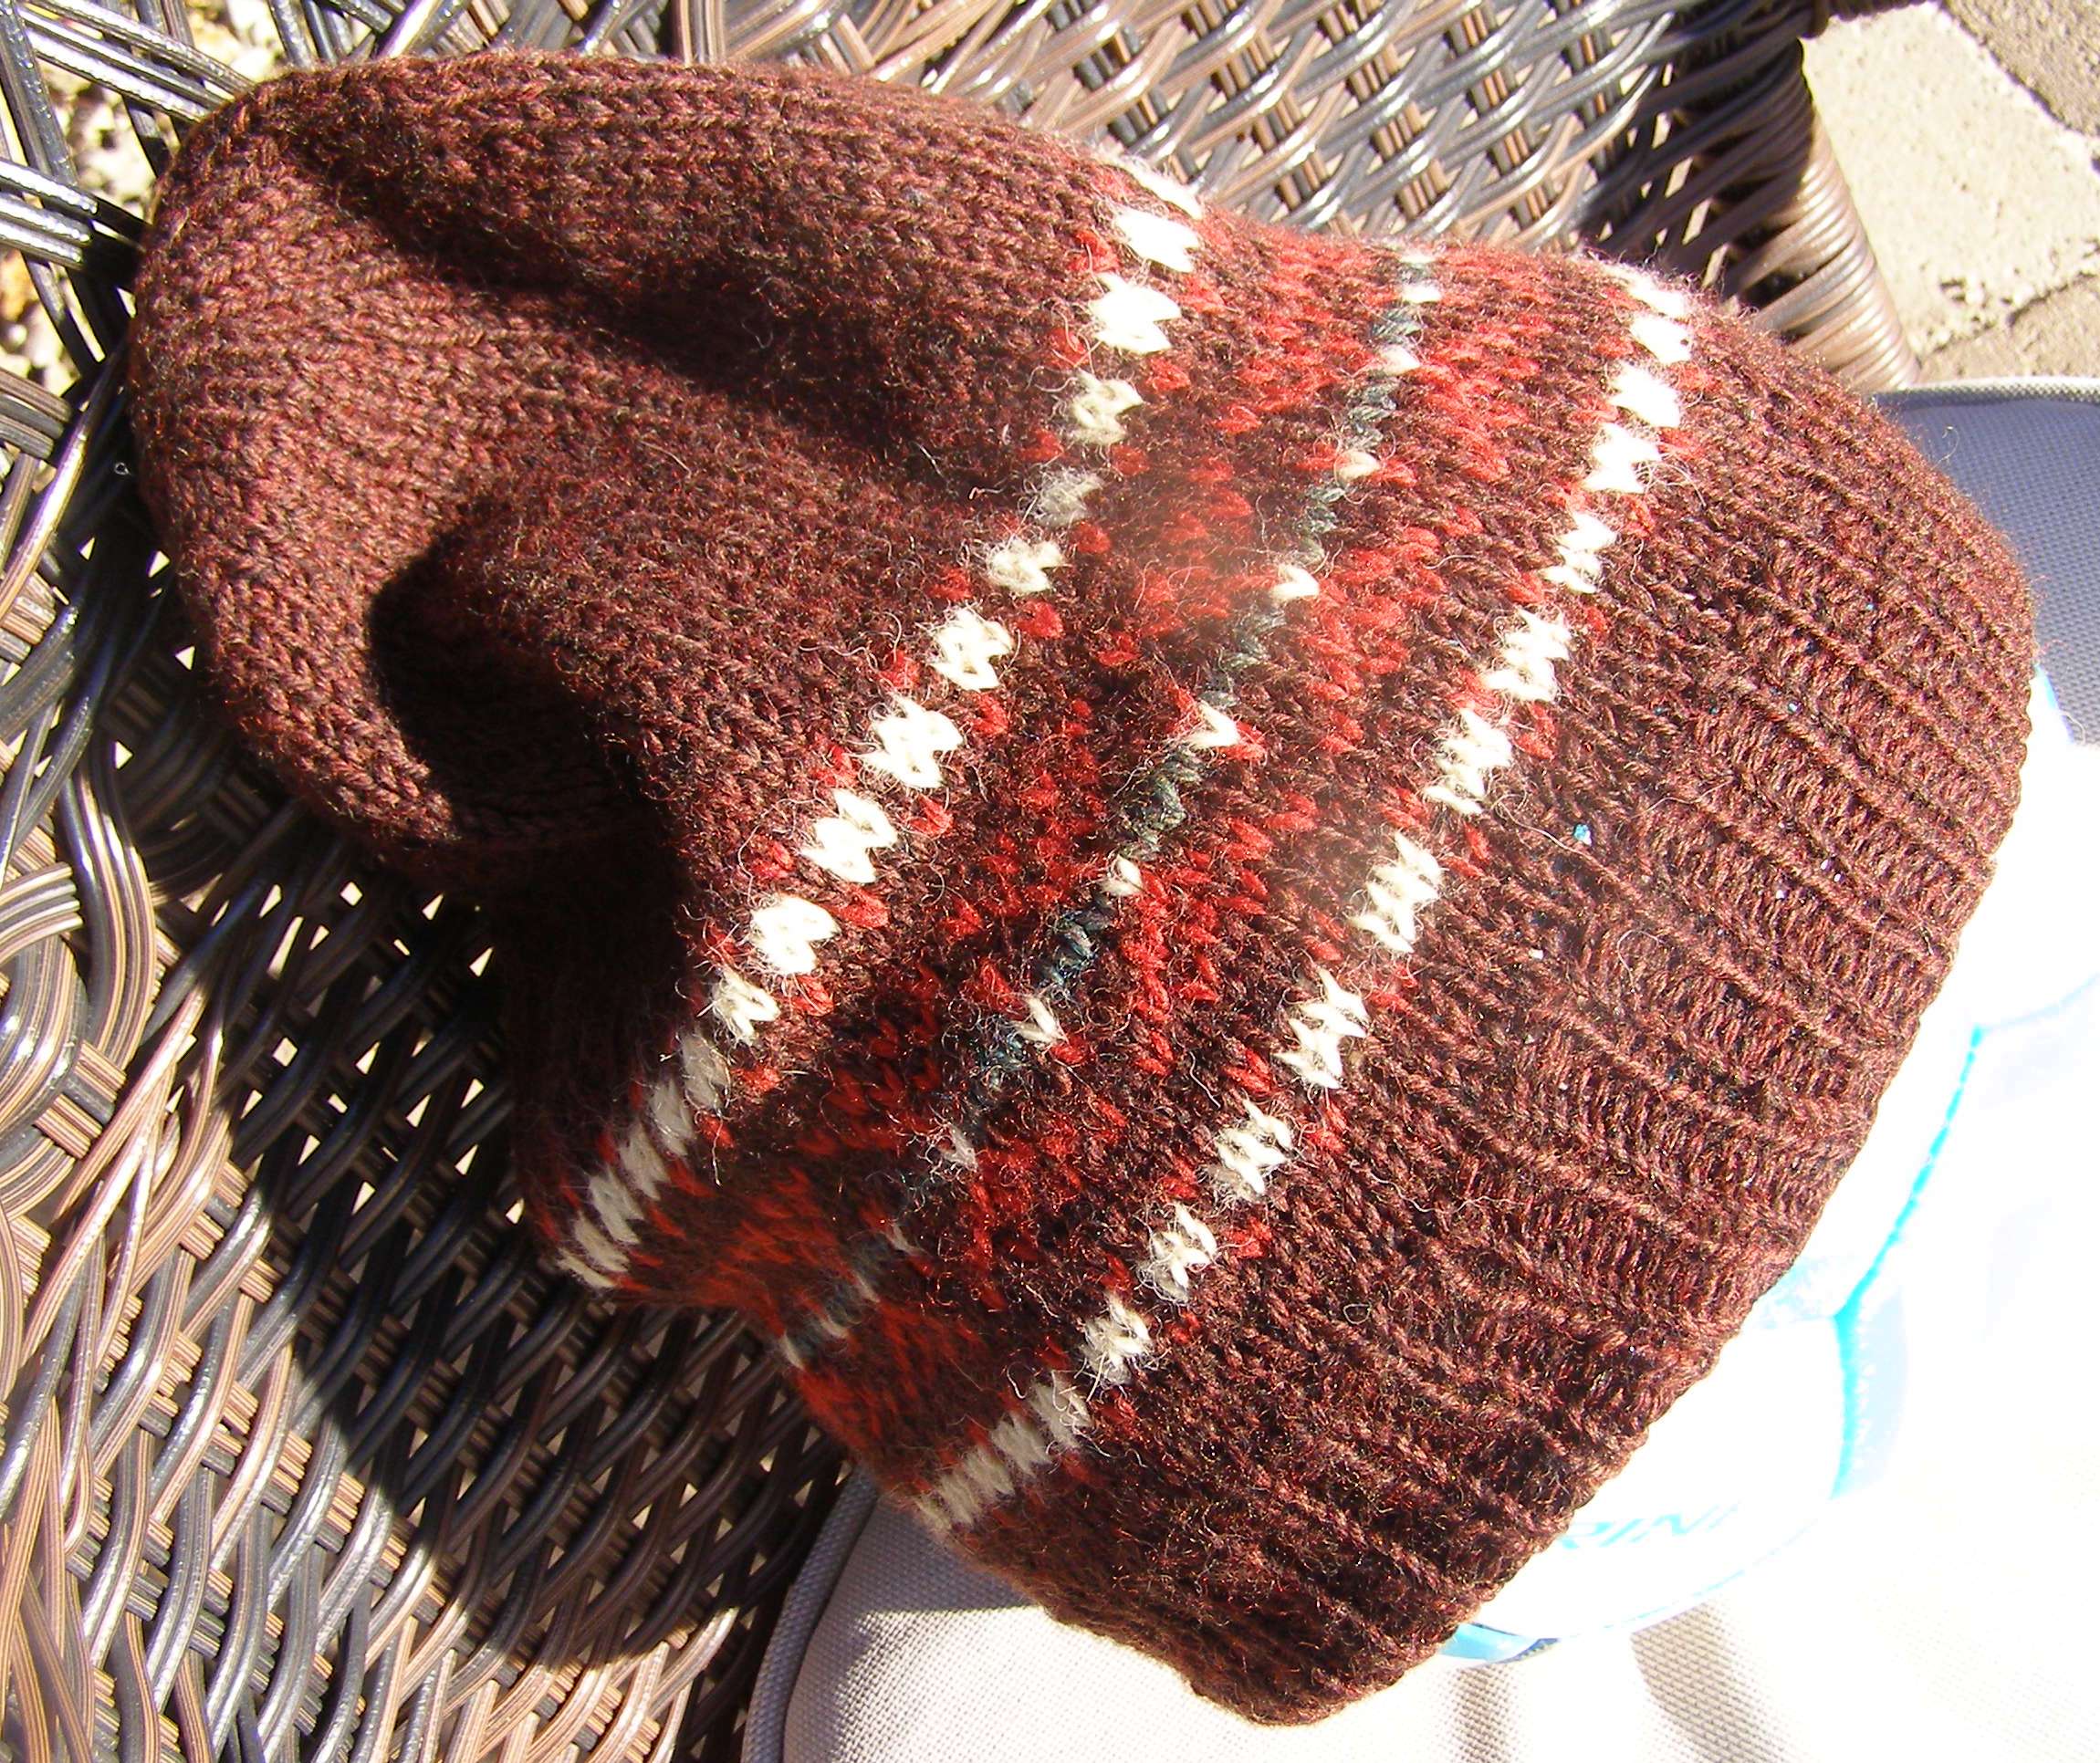
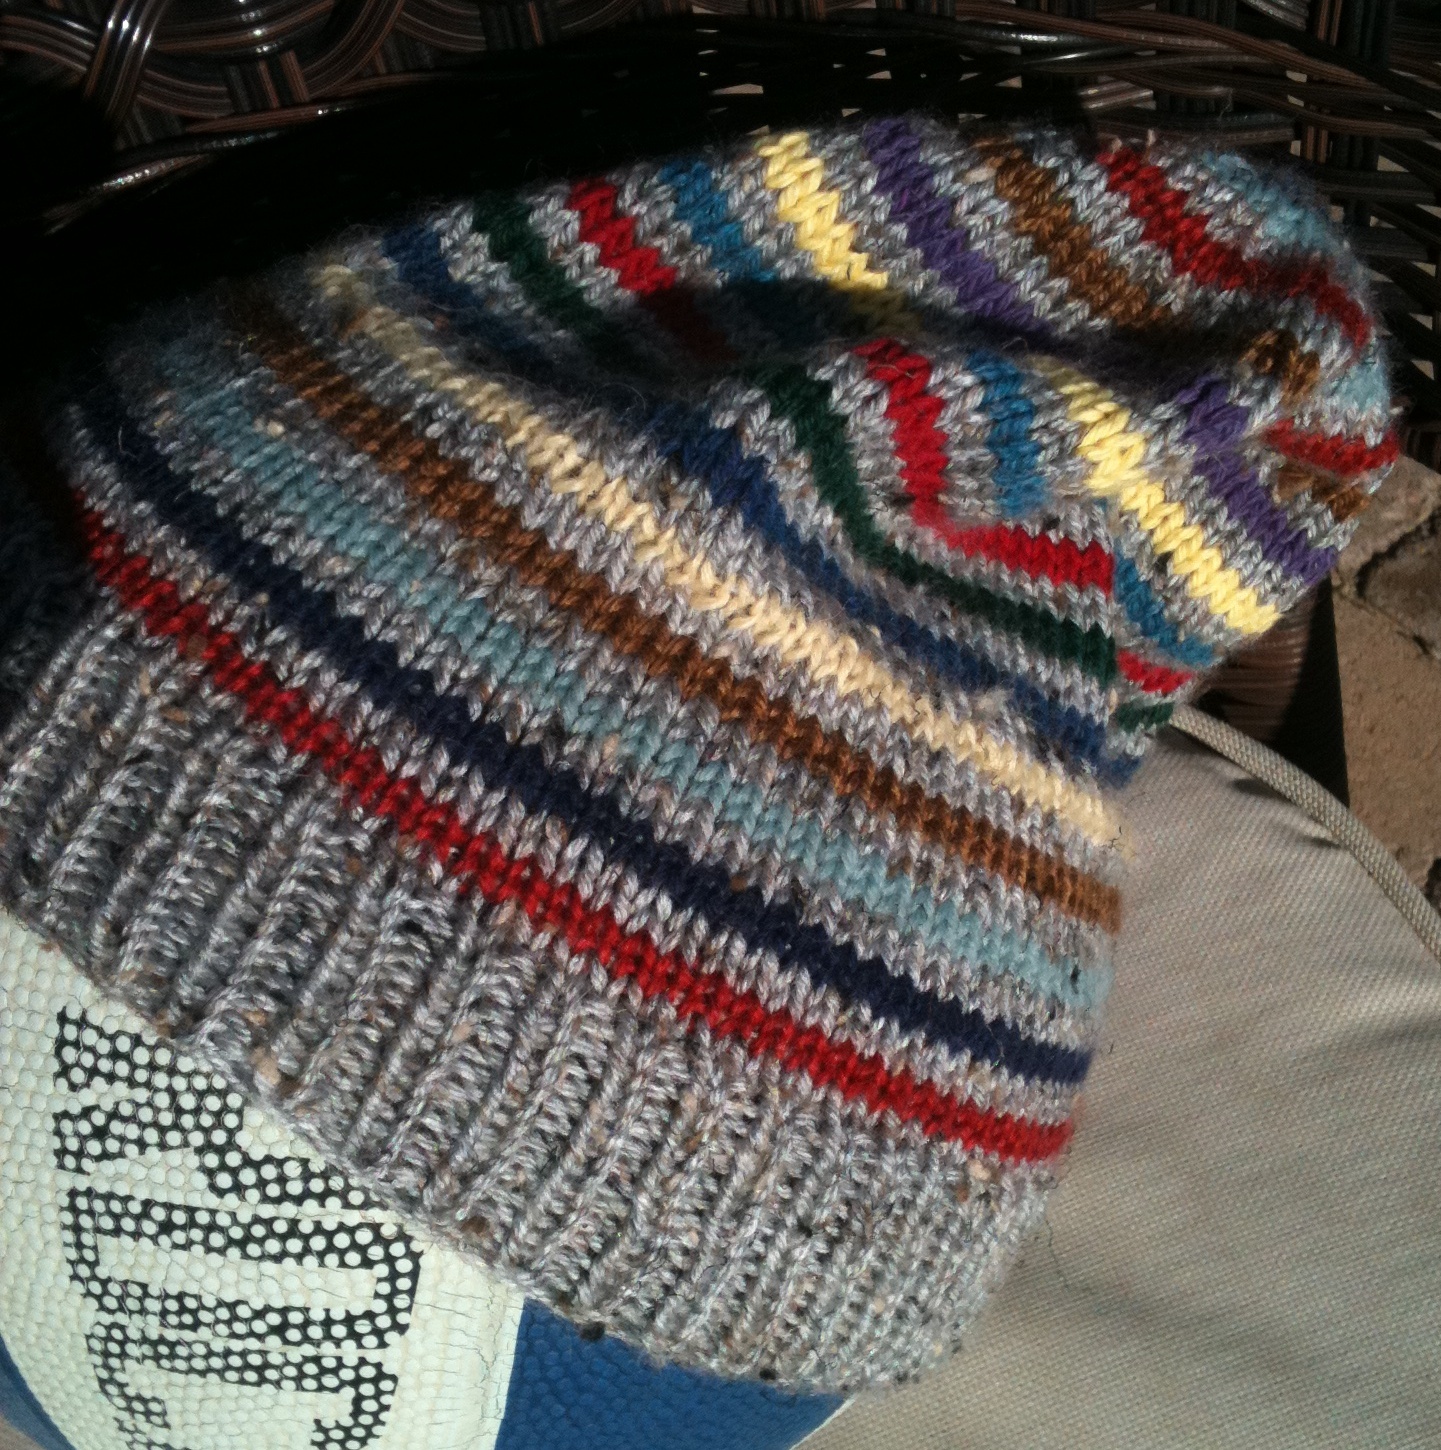
After blocking, both hats were 19″ around. The blue hat was about 11″ long, the green hat about 10″ long.
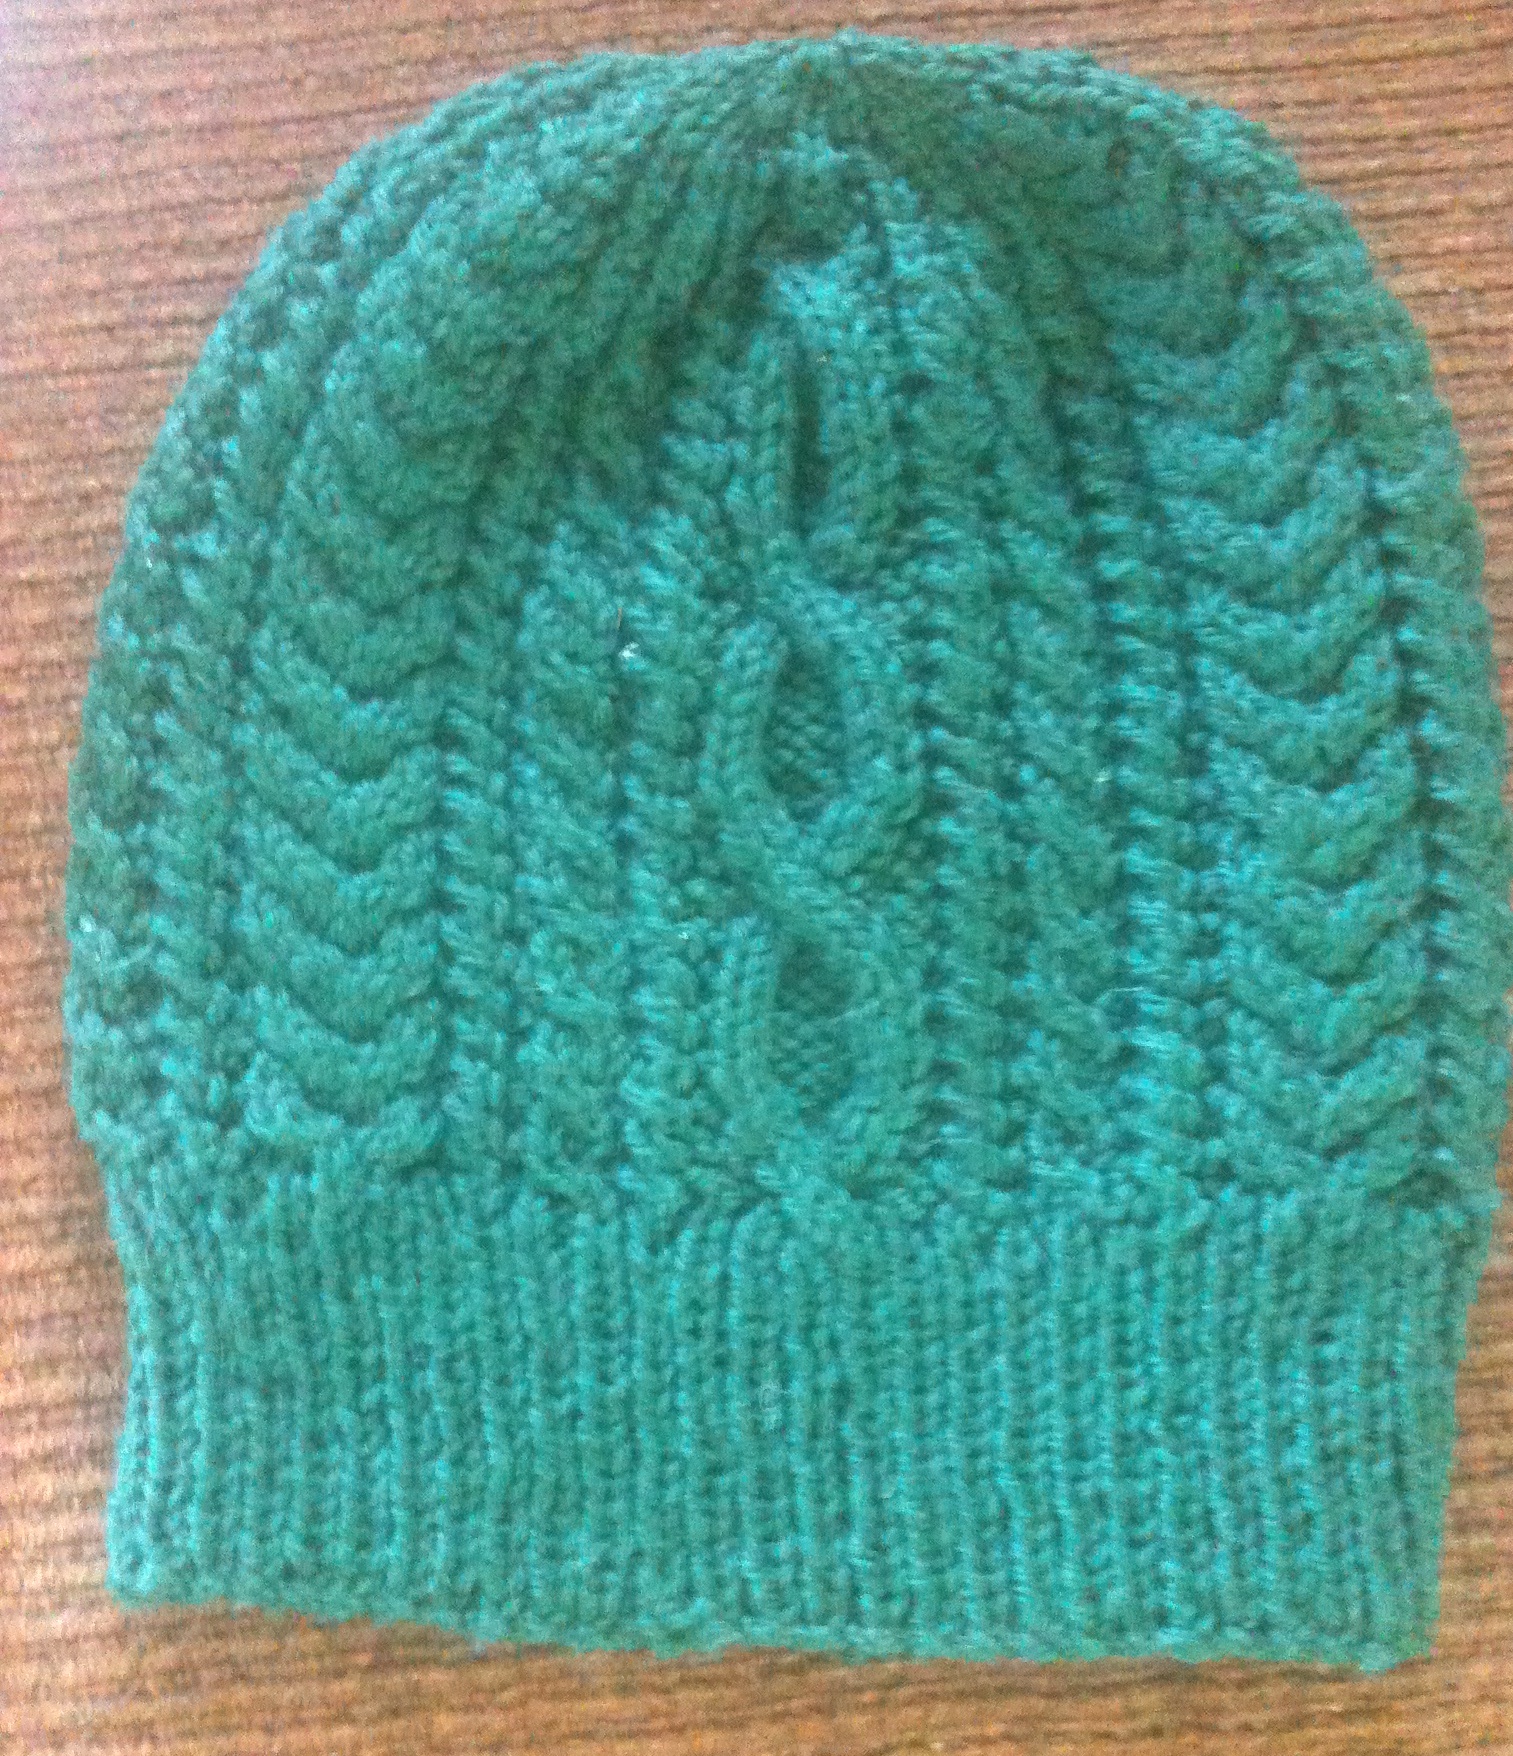
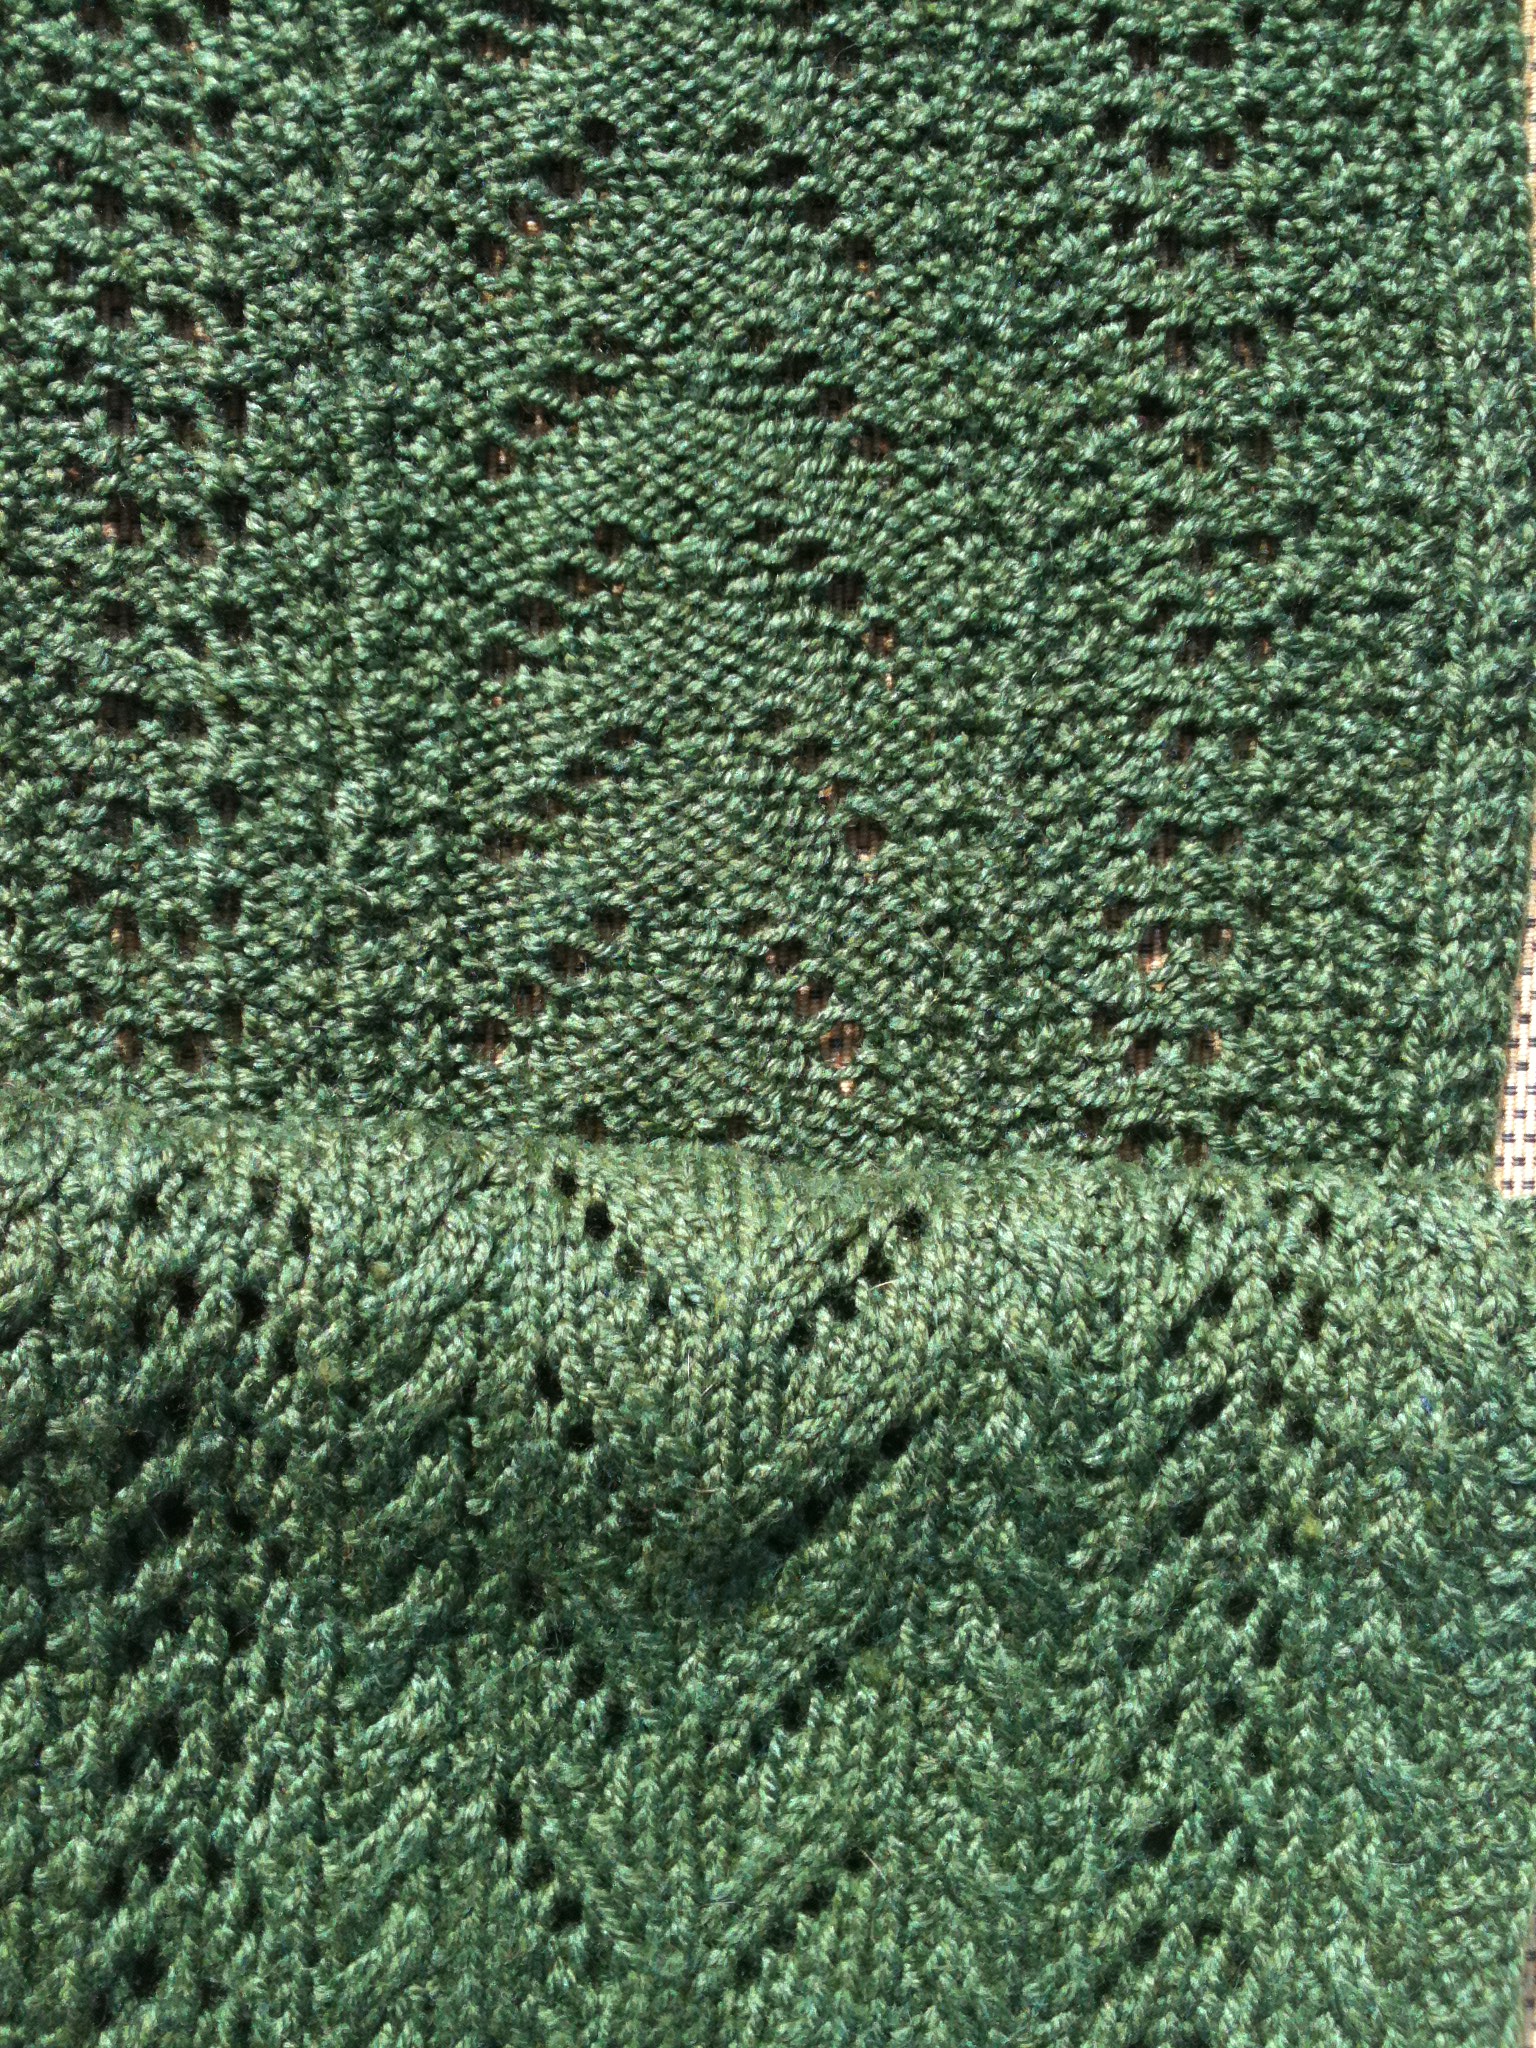
Green Cabled Hat – heavy worsted
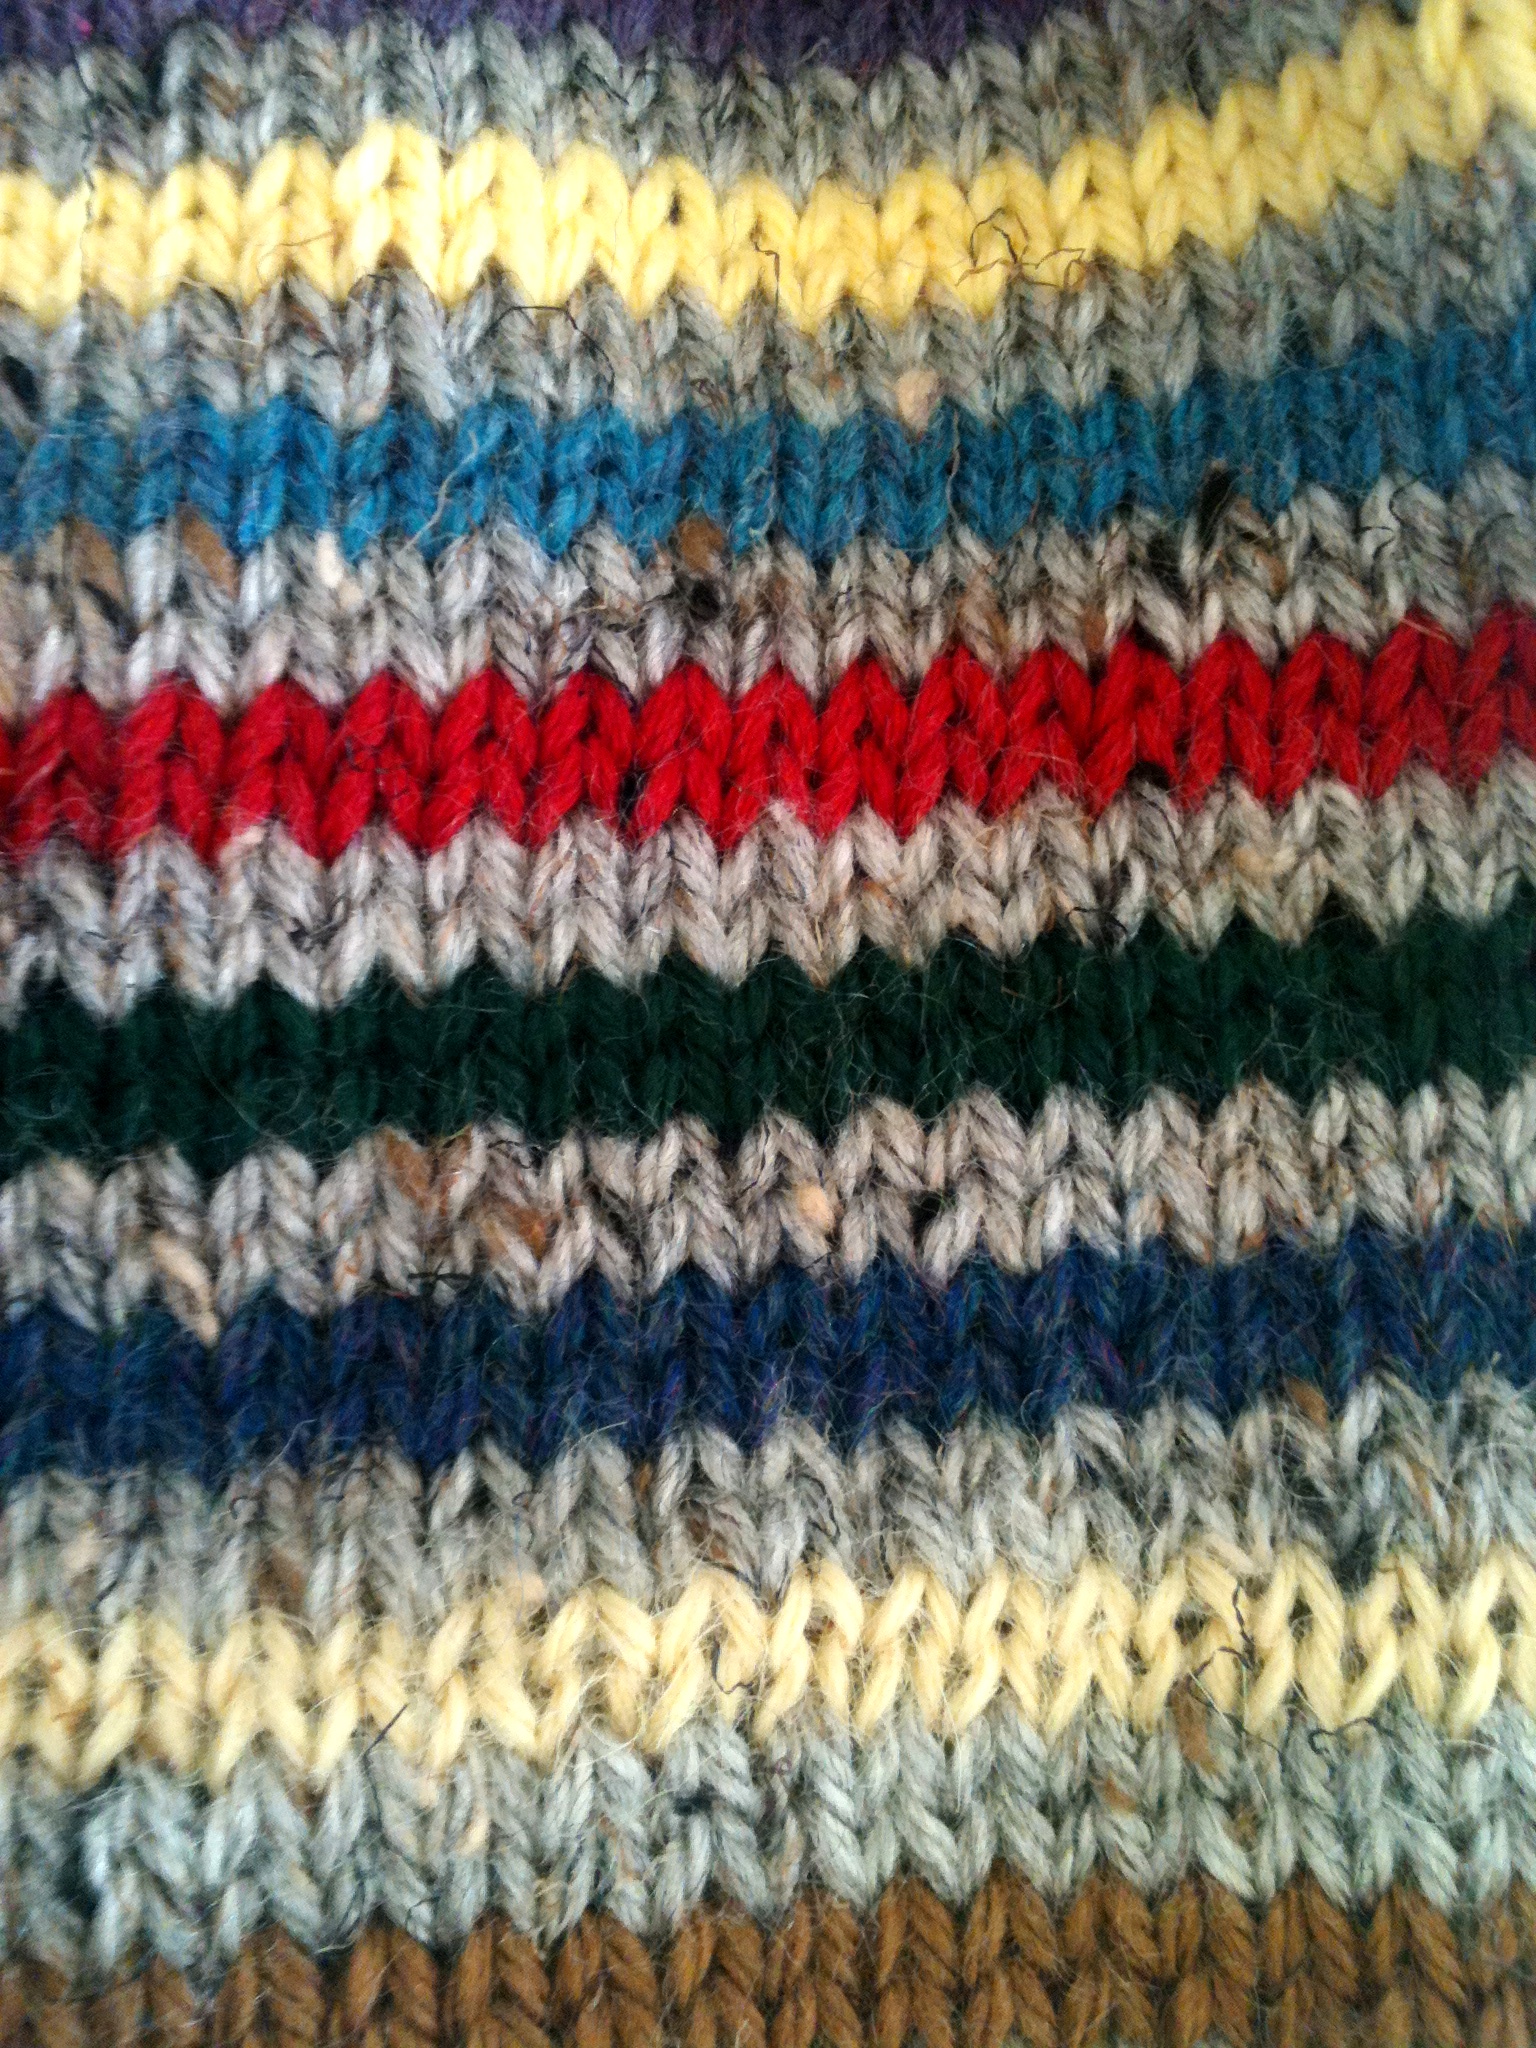
The blue hat was knit for the son that cannot wear wool. It is Cascade Yarns Key Largo – an Alpaca and Cotton blend from The Yarn Stash. The green hat is knit for the other son from 2 skeins of an unknown Stash Cashmere and Wool blend – the hat used all but 18″ of the two skeins!
Cast on 104 stitches on size 4 needles (for either yarn) and knit K1, P1 ribbing for 2.5 inches.
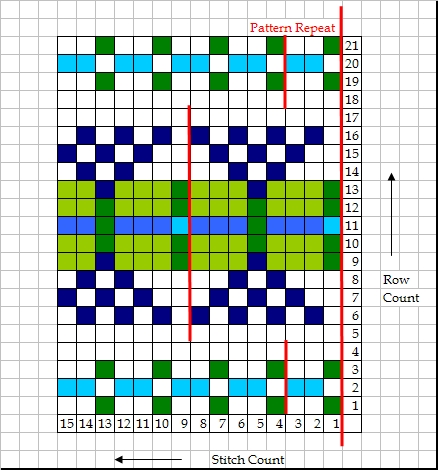
The 39 stitch pattern (graph below) is repeated 3 times around the hat for a total of 117 stitches.
To reach the 117, increasing 13 stitches must occur in the Set Up Rows. Suggested increase locations for 12 of the stitches are shown on the pattern below. One additional increase must also occur.

One Pattern Repeat: Identification of Cables Used
Stitch markers are very helpful insuring correct stitch count during set up rows (and beyond).
Details and graphs for each of the four individual cables are also provided below. I had some fun color coordinated the cables used!!

Key
Double Clicking on any of the pattern graphics should link to a larger version.
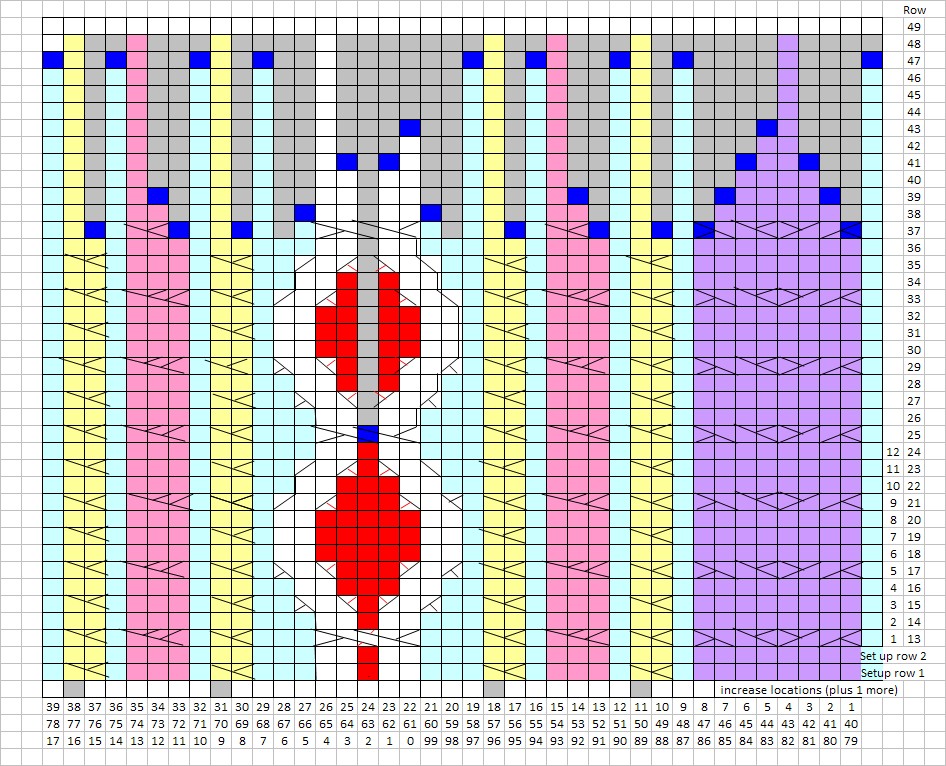
Cable Hat Pattern
Stitch count is across the bottom. Row count is on the right side.
The Stash provided enough yarn for the blue hat to have three vertical repeats of Rows 1 – 12, which creates a Slouch Hat. The 2 green skeins limited the hat to only 2 vertical repeats of rows 1 – 12 which created a tighter fitting hat.
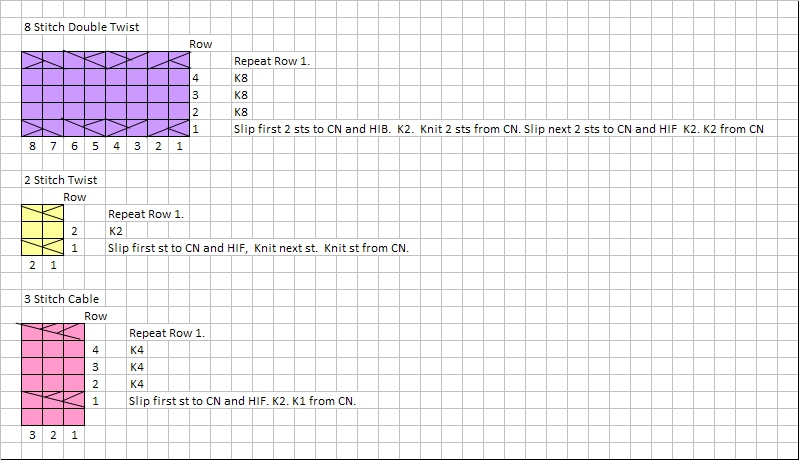
Detail on 3 of the Cables

Cable Links: 12 Row Pattern
The Cabled Links graph may seem complex, but it has three elements:
- The Oval within the cables = knit in reverse stockinette stitch (purl every row when knitting in the round) shown in red.
- The 2 stitch cables = they (shown in white) twist in Row 1 and then “open the oval’ by sliding over one stitch in Rows 3 and 5. Then do not change through Row 8. They “close the oval” by sliding back one stitch in Rows 10 and 12.
- The garter stitch “surround” (shown in aqua) increases a stitch when the center oval closes and decreases a stitch when the oval opens. Knitting in the round, garter stitch is created by knitting each even row and purling each odd row.
After completing the desired number of Cable Links, decreases narrow the cables and the hat.
As creating decreases while maintaining the cables can be challenging, additional detail is provided for the Double Cable Twist and the Cable Links.

Double Twist Cable Decreases
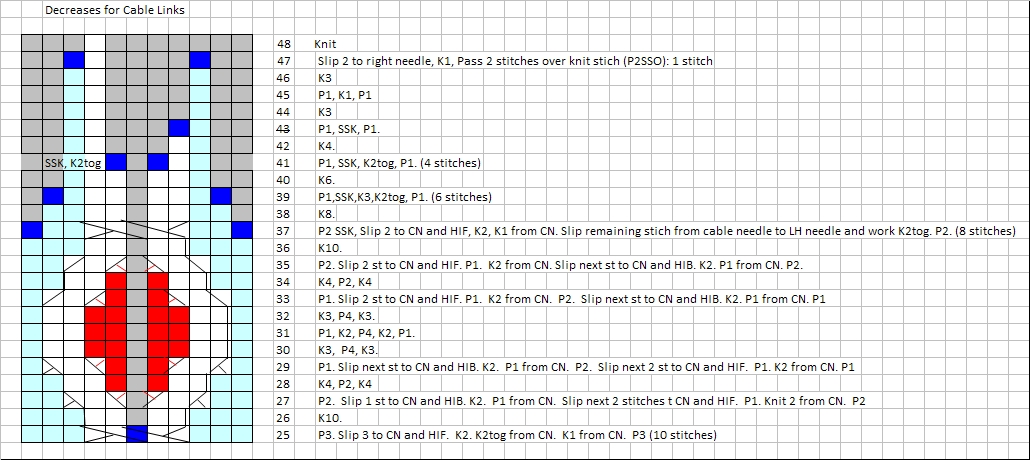
Decreases for Cabled Links
The final patterned decreases in Row 47 involve decreasing 2 stitches at once. The 2 garter stitches on either side of the remaining knit stitch are decreased by: Slipping the right garter stitch and the knit stitch to the right needle knitwise. Then knitting the left garter stitch and passing the two slipped stitches from the right needle over the knit stitch.

Green Cabled Hat: Stash Cashmere and Wool Yarn
The final row in knit by K2tog across all stitches and then cutting the tail approximately 16″ long.
Thread tail into large eyed needle and sew through all remaining stitches.
Pull tightly and secure by weaving and trimming end of tail.
Weave and trim other ends!